
How to Create Branded Packaging That Turns One Order Into Repeat Buyers


Jordan is our labels, packaging and sustainability voice, built from the knowledge of our production team, with over 20 years in printing.
To create branded packaging for a small brand, print four layers: a logo box, printed tape, a sleeve and a card. That is a complete branded unboxing, and a small brand can build one without a warehouse or a five-figure print budget. Here is the order to build it in, what each layer costs, and how to keep the whole kit looking like one brand.
To create branded packaging, lock your logo, colors and typefaces in print-ready form, measure the product to set the internal box size, then brand the layers in order of cost: printed tape on the seam, a sleeve or belly band around the product, an insert card inside, and a custom printed carton once your volume is steady. Build every piece from the same artwork and the same color build so the box, the tape and the card read as one brand from the doorstep to the last layer.
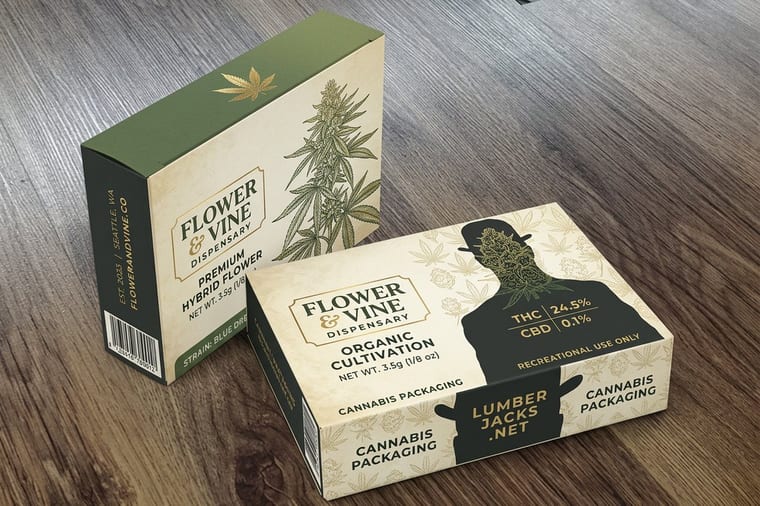
Start here
The whole build in one paragraph
Branded packaging is the set of printed layers that carry your identity from the doorstep to the product. Get your logo, colors and type into print-ready files, measure the product to fix the internal box size, then print outward from the cheapest layer to the most expensive: tape, sleeve, insert card, then the carton itself. Use one dieline and one color build across all of them, proof on the real stock, and order early enough that packaging is waiting when the product is ready to ship.
Watch it printed
See packaging sleeves on the press, in 90 seconds
Why branded packaging decides whether a first order becomes a second

A parcel is the only physical moment most online brands get. The site was a screen, the confirmation was an email, and then a real object lands on a doorstep. If that object is a plain brown carton with a courier label, the buyer remembers the product and forgets who sold it. If it carries your color, your mark and a short note inside, the brand gets attached to the good feeling of opening it.
That is the whole argument for branded packaging, and it is not a luxury spend. A small brand can build a coherent unboxing out of three printed items and one stock carton. Wrap the product in a printed sleeve, seal the seam with printed tape, and drop in a card that thanks the buyer by name.
The rest of this guide walks the build in order: what the system includes, how to size it, what to print first when money is tight, how to prepare files that survive folding, and what the run actually costs. If you sell food or baked goods, the sibling food and cookie packaging guide covers the food-safe variations.
What branded packaging actually includes

People hear branded packaging and picture a printed box. The box is only one layer. A working system has an outer layer that survives shipping and identifies the sender, a middle layer that protects and slows the reveal, and an inner layer that speaks directly to the buyer. Each layer has a cheap version and an expensive version, which is what makes the whole thing scalable.
The outer layer is the carton or mailer plus the tape across its seam. The middle layer is tissue, a belly band, a printed sleeve, or a paper wrap held with a sticker. The inner layer is the card: a thank-you note, a care instruction, a discount code for the next order, or a short story about who made the thing. Together they turn one transaction into a small piece of theater.
Every layer is a print job with its own minimums, so you can stage the build. Start with the layers that cost the least per parcel and add the printed carton when volume justifies it. The packaging printing collection shows the pieces side by side with live pricing, which makes staging easy to plan.
Step 1: lock the brand assets before you touch a dieline

Packaging punishes an unfinished identity. A logo that only exists as a screenshot will look soft on a carton and muddy on kraft. Before anything goes to press, gather a vector logo, a one-color version of that logo for tape and stamps, your exact brand colors as CMYK builds, and one or two typefaces you are licensed to use in print.
Pin the color down early. Screen color and ink on board are different animals, and a saturated teal that glows on a monitor can go flat on uncoated kraft. Pick the stock first, then adjust the build to that surface, and order free paper samples so you are judging the color on the material it will actually print on.
Write down the rules while you are at it: minimum logo size, clear space around it, which color goes on which layer. Those rules are what keep the tape, the sleeve and the card looking like one family instead of three separate jobs. The same discipline carries into everything else you print, from branded notebooks to the swag that rides along in the box.
Step 2: size the box around the product, not the other way around
Measure the product at its widest, tallest and deepest point. Add the protection you plan to use, whether that is tissue, a wrap, or a molded insert. The result is your internal dimension, and it is the number that drives your dieline, your board choice, your shipping weight and your price. Guessing here is the most expensive mistake in packaging.
Undersized boxes crush at the corners and force a reprint. Oversized boxes cost more in board, more in void fill and more in dimensional shipping weight, and they let the product rattle. A snug fit costs less, and it also reads as considered when the lid comes off, because nothing has shifted in transit.
Decide the construction at the same time. A folding carton ships flat and assembles by hand, which suits low volume. A rigid box feels premium but costs more per unit and takes more storage. Corrugated mailers handle courier abuse best. Our custom carton printing, priced from $711.78 per run at custom packaging, is built to your dimensions rather than a fixed catalog size.
Step 3: build the inside layers that create the reveal
The inside is where the loyalty is built, and it is cheaper to brand than the outside. Tissue paper printed with a repeating mark, a belly band around a folded garment, a sleeve that slides off a plain box, a sticker holding a paper wrap closed: each one adds a beat to the opening. Two or three beats is the sweet spot. More than that starts to feel like waste.
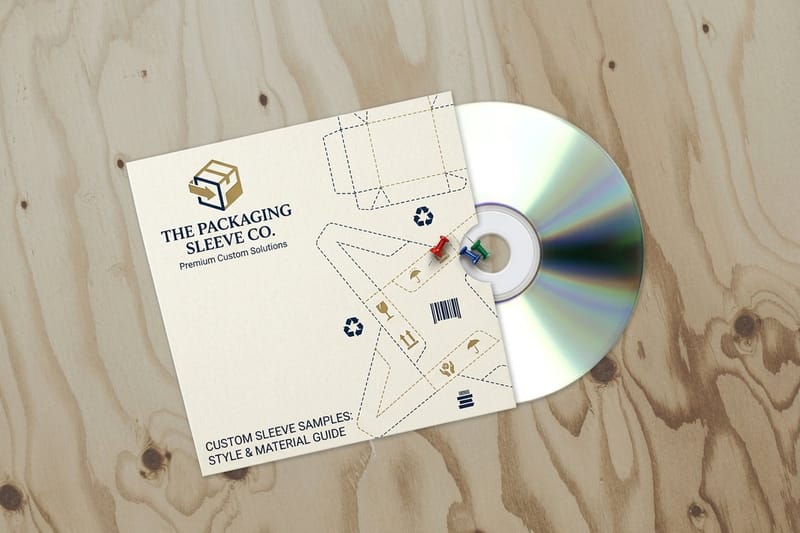
Printed packaging sleeves, from $438.25 per run, are the single most flexible piece in the kit. A sleeve turns a stock white box into a branded one, carries your product name and ingredients or specs, and can be reprinted seasonally without redoing the box. Change the sleeve, change the whole look, keep the same carton.
Finish with a card. A short handwritten-style note, a care instruction, or a code for the next order gives the buyer a reason to keep something with your name on it. If you want the whole ecosystem consistent, the same artwork can carry onto notepads and small paper goods that ship as gifts with purchase.
Step 4: seal it with printed tape, the highest-return upgrade
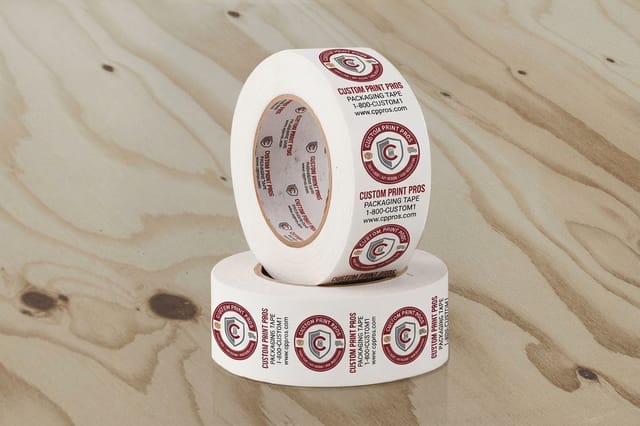
If you only print one thing, print the tape. A plain kraft carton sealed with a branded tape is recognized on a porch, in a mailroom and in every photo a customer takes. It also does something a printed box cannot: it covers the seams of any carton size you happen to be using that week, so one artwork file serves your entire size range.
Design the repeat carefully. Tape prints as a continuous pattern, so the logo should sit comfortably inside the roll width with clear space around it, and any secondary elements should read even when a strip is cut mid-pattern. High contrast beats fine detail. A two-color mark on a solid ground survives the cut better than a delicate line drawing.
Our custom printed packaging tape starts at $347.11 per run, which is the lowest cost of entry to branded shipping in the whole kit. Pair it with a stamped kraft carton and you have a look people mistake for a much larger print budget, as the kraft packaging box breakdown shows.
Step 5: prepare artwork that survives folding, gluing and trimming
Flat artwork and folded artwork are different problems. A carton dieline is a map of panels, creases, glue tabs and dust flaps, and your design has to make sense on every one of them. Build on the supplied dieline, keep cut and crease lines on separate layers, and never flatten them into the art.
Keep critical content off the creases. Logos, legal text, barcodes and ingredient panels should sit at least a quarter inch inside any fold or trim edge, because board shifts slightly as it runs through cutting and gluing. Carry your background color past every trim edge so a small shift never reveals a white sliver at a corner.
Send vector files in CMYK with fonts outlined, and remember that rich blacks and heavy solid coverage behave differently on corrugated than on coated board. If you are starting from nothing, our design templates give you a correctly built starting layout, and reviewing current packaging design trends is a fast way to see which treatments actually reproduce well in print.
What branded packaging costs on small runs, and where to spend first
Packaging pricing is run-based, not piece-based. Setup, plates and die work are fixed costs spread across the quantity, so the first hundred units carry the whole burden and every unit after that gets cheaper. That is why a small brand should order the largest quantity it can genuinely use within a year, and why splitting the kit matters so much.
A practical first order looks like this: printed tape from $347.11, packaging sleeves from $438.25, and stock kraft cartons bought locally. That is a complete branded unboxing without a custom die. When reorders prove the size range is stable, add the printed carton from $711.78 and retire the plain box.
Spend on the layers the customer touches and photographs. A beautifully printed inner card costs almost nothing and gets shared; a full color wrap on the underside of a carton nobody turns over does not. If sustainability is part of your positioning, the eco-friendly packaging ideas roundup shows which swaps cut material without cutting the look.
Choosing stocks and finishes that match how your product feels
Stock is a tone of voice. Uncoated kraft says honest, handmade and recycled, and it takes a stamp or a single-color print beautifully while muting bright colors. Coated white board says clean and precise, holds photographic images, and suits cosmetics, supplements and food. Rigid board says gift, and it costs accordingly.
Finishes should be used as punctuation, not paragraphs. Matte lamination gives a soft, fingerprint-resistant surface and deepens dark colors. Gloss lifts product photography. Soft-touch coating changes the feel in the hand, which is the one sensory cue a screen can never deliver. Spot gloss on a matte field makes a logo catch the light without adding a second ink pass everywhere.
Whatever you choose, choose it once and repeat it. The tape, the sleeve, the card and the box should share a family of surfaces, so the kit feels designed rather than assembled. That repetition is the same principle that makes branded notebooks and other giveaway pieces feel like they belong to your box.
Production timelines and how to plan your first branded run
Two clocks run at once. The first is approval: you upload artwork, we proof it, you review it. That clock is usually the slower one, because it depends on how fast decisions get made on your side. Have your final logo, final copy and final dimensions ready before you start, and approval takes a day or two instead of a week.
The second clock is production. Tape and sleeves move fastest because they are printed and cut. Die-cut cartons take longer, since they are printed, cut, creased, glued and packed flat. Then add transit, and remember that a pallet of cartons ships as freight while tape and sleeves ship as parcels.
The planning rule is simple: order packaging before you order product, and place the first run at least a month ahead of a launch or a holiday push. Check the live specs and pricing below to see quantities, stocks and turnaround for each piece, and browse the full packaging printing collection when you are ready to add the next layer.
Wally explains branded packaging
Brand the layers people touch, in the order they touch them
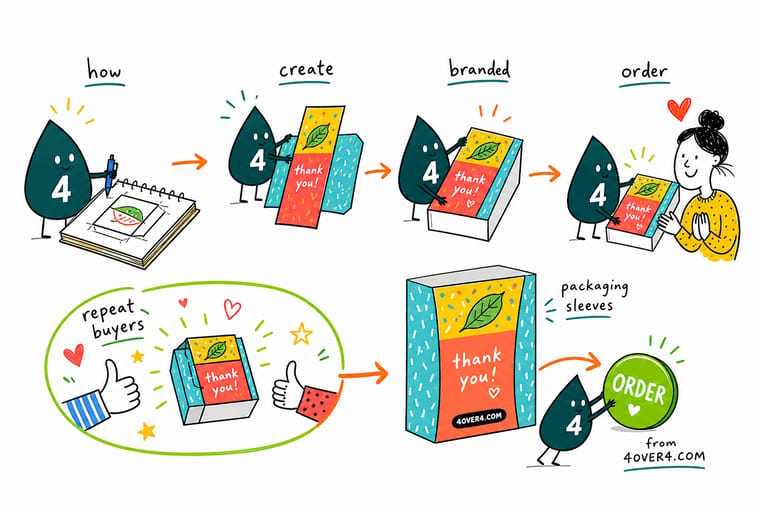
Wally builds every unboxing back to front. He starts with the card the buyer reads last, because that is what they keep, then the sleeve that slows the reveal, then the tape that gets recognized on the porch. The carton comes when reorders prove the size. Same logo, same colors, same stock family on every layer, so four separate print jobs land as one brand.
Build your packaging kit →%22%2F%3E%3Ccircle%20cx%3D%2248%22%20cy%3D%2220%22%20r%3D%2223%22%20fill%3D%22%23334155%22%20opacity%3D%220.15%22%2F%3E%3Ccircle%20cx%3D%2254%22%20cy%3D%2227%22%20r%3D%22-3%22%20fill%3D%22%23334155%22%20opacity%3D%220.1%22%2F%3E%3Crect%20x%3D%2278%22%20y%3D%22-9%22%20width%3D%2233%22%20height%3D%2220%22%20rx%3D%224%22%20fill%3D%22%23334155%22%20opacity%3D%220.08%22%20transform%3D%22rotate(43%2080%2030)%22%2F%3E%3C%2Fsvg%3E)
Infographic
The branded unboxing system at a glance
Seven layers, one identity: the logo box, a box sized to the product, one CMYK brand color build proofed on the real stock, printed tape, seasonal sleeves, a reveal of two or three beats and the insert card. Save this frame and use it as a checklist when you brief your first packaging run.
No layer works alone. The tape is recognized outside, the sleeve slows the opening, and the card is what stays on a desk long after the product is unwrapped.
Specs and pricing
Packaging sleeve specs and live pricing
Sleeves are the fastest way to brand a plain box, so they are the piece most small brands print first. Check the stocks, sizes and quantity breaks below before you commit to a run.

| Quantity | Price Per Unit | Total |
|---|---|---|
| 100 | $4.38 | $438.25 |
| 200 | $2.25 | $450.34 |
| 300 | $1.52 | $455.83 |
| 400 | $1.15 | $461.32 |
| 500 | 93.4¢ | $466.82 |
| 600 | 80.5¢ | $483.29 |
| 700 | 73.0¢ | $510.76 |
| 800 | 65.2¢ | $521.74 |
Print it
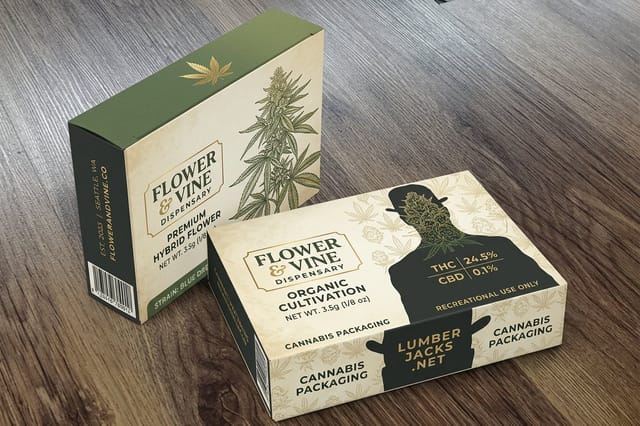
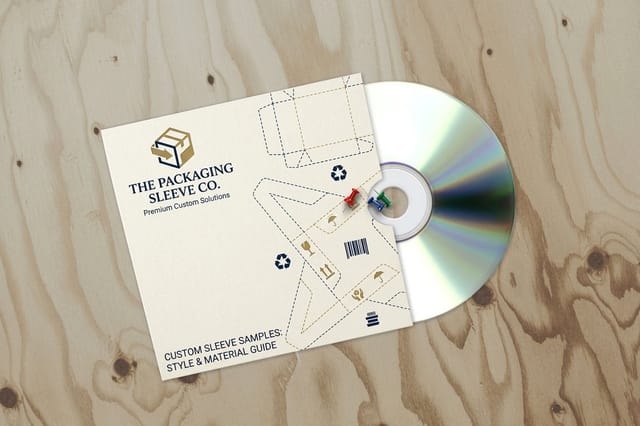
The three pieces that build a branded unboxing

Explore more
Where to go next

By the numbers
The stocks a branded package can print on
Common Questions
Common questions about branded packaging
What is branding and packaging?
Branding is the identity a customer recognizes: the name, the mark, the colors and the tone. Packaging is the physical carrier that identity rides on: the box, the sleeve, the label and the insert. Branded packaging is where the two meet, and the first thing a customer touches.
What is branded packaging?
Branded packaging is any shipping or retail material that carries your identity instead of a blank surface. It covers the printed outer box, the tape sealing the seam, tissue paper, belly bands and sleeves, insert cards, labels and stickers. The point is not decoration. It is recognition: a buyer should know whose parcel arrived before the box is open, and the inside should confirm it layer by layer.
How do I choose the right branded packaging?
Work outward from the product. Weigh it, measure it with protection in place, and decide whether it ships alone or with other items. Fragile or high-value goods justify a printed rigid or folding carton. Apparel and soft goods do better with a mailer plus a sleeve and tissue. If the budget is tight, keep the carton plain, put the brand on the tape and the inside layers, and upgrade the outer box once your reorder volume is steady.
What does branded packaging cost and how are prices set?
Price is driven by four things: quantity, board or stock choice, the number of ink colors, and finishing such as lamination or spot coating. Setup and die work are spread across the run, so unit cost drops sharply as quantity climbs. At 4OVER4, printed packaging tape starts at $347.11, packaging sleeves start at $438.25, and printed cartons start at $711.78 for the run rather than per piece.
What sizes, stocks and finishes are available for branded packaging?
Cartons run on paperboard and corrugated stocks in custom internal dimensions built to your dieline. Sleeves and belly bands print on cover-weight stock cut to wrap a set box or product depth. Tape comes in standard roll widths with a repeating printed pattern. Finishes include matte and gloss lamination, soft-touch coating, spot UV on a logo, and uncoated kraft when you want a recycled look and a surface that takes a stamp.
How long does branded packaging take to print and ship?
Plan for two clocks. Artwork and dieline approval is the first, and it moves at the speed of your proof review, usually one to three days. Production is the second and depends on the item: tape and sleeves turn faster than die-cut cartons, which need cutting, gluing and folding. Add transit time for the freight weight of full cartons, and order your first branded run well before a launch or holiday deadline.
Can I order branded packaging in small quantities?
Yes, and the smart move is to split the kit. Order the low-minimum items first, tape, sleeves, tissue and insert cards, and pair them with a stock carton. That gives you a branded unboxing at a fraction of the outlay of a custom die-cut box, and it lets you test the look on real customers before you commit to a large carton run.
What files do I need to send for custom packaging?
Send print-ready vector artwork built on the supplied dieline, with fold and cut lines on their own layers, CMYK color, fonts outlined, and a bleed carried past every trim edge. Keep small type away from creases and glue tabs. If you only have a logo, our design templates and free paper samples let you test placement and stock before the file goes to press.
Get Started
Ready to put your brand on the box?
Start with the layers that cost the least and travel the furthest. Print your tape, sleeves and cards at 4OVER4.COM, then add the custom carton when your reorders prove the size.
Legal Disclaimer
Gold Standard guarantees apply to all standard orders placed through 4over4.com. Price match requires verifiable proof of a competitor's published price for an equivalent product with matching specifications and turnaround time. Satisfaction guarantee covers manufacturing defects and print quality issues. Contact support with order number and documentation.
