
How to Design Metallic Foil Postcards in Canva and Print Them


Canva has no foil button, but it can produce exactly what a foil press needs. Here is the two page file, the artwork that survives a stamping die, and the export settings that get it printed.
Design page one in Canva as the normal colour postcard, duplicate it, delete everything except the elements you want foiled, fill those shapes 100% black on a white background, and export both pages as one PDF Print with crop marks and bleed. Page one prints as ink, page two is the artwork the stamping die is cut from. A gold gradient drawn in Canva is not foil, it is yellow ink, and no export setting turns one into the other.
Quick answer
Two pages, one PDF, and no grey anywhere
Canva cannot name a spot colour, so the foil instruction has to arrive as a separate page of pure black artwork. Build the colour card, duplicate the page, strip it to the foil shapes, set them to hex 000000 with no effects and no opacity, and send both pages as a single PDF Print. Everything else that goes wrong with a first foil job is downstream of two habits: designing detail too fine for a heated die, and expecting the die to register to the printed layer more precisely than roughly 1/32 inch.
Set the Canva Document Up Before You Draw Anything
Canva starts you in RGB at whatever size you typed, and both of those defaults cause problems later. Fix them first and the rest of the job is just design.
Size the canvas at trim plus a quarter inch. Canva has a crop marks and bleed toggle in the export dialog, but it adds roughly 3mm, slightly under the 0.125 inch a US printer works to. Rather than argue with it, create a custom size of 6.25 by 4.25 inches for a 4 by 6 postcard, treat the outer 0.125 inch on every edge as bleed, and drop guides 0.125 inch inside the trim as your safety line. Backgrounds and photos run off the outer edge. Type, logos and page numbers stay inside the guides.
Check the resolution of anything you upload. A 6 by 4 inch card at 300 ppi needs an 1800 by 1200 pixel image. Canva will scale a 700 pixel photo to fill the frame without complaint and it looks fine on a laptop, which is exactly how soft postcards get ordered. Stock images from the Canva library are generally large enough; phone screenshots and logos pulled from a website are usually not.
Know what your export can do about colour. The PDF Print export offers a CMYK colour profile on Canva Pro. On the free plan the PDF leaves in RGB and gets converted at our end, which is fine for most work but will pull the life out of an electric blue or a fluorescent green. If a specific brand colour matters, print it darker and less saturated than the screen suggests, or ask for a hard copy proof. Our rundown of print design services covers when it is worth handing the file over instead.
Build the Foil as a Second Page, Not a Gold Gradient
This is the part every first foil job gets wrong. Canva can paint a beautiful gold gradient, and a gradient prints as yellow ink. Real foil is a metallic film pressed onto the sheet by a heated die, and the only way to specify it is to hand over artwork showing where that die should press.
The workflow inside Canva is four steps and takes about ten minutes:
- Finish page one as the printed card. Photos, body copy, background colour, everything that will be ink. Where a foil element goes, leave the space empty or hold the position with a shape you will delete.
- Duplicate the page. Right click the page thumbnail and duplicate, so page two starts with identical positions. Never rebuild it by eye.
- Strip page two down to the foil. Delete everything that is not being foiled. Set the background to white. Select each surviving element and set its colour to hex 000000 at 100 percent opacity.
- Remove every effect from those shapes. Shadows, glows, outlines and the transparency slider all render as soft grey, and grey is not a foil instruction. The shape must be solid black with a hard edge.
Export both pages together with File, Download, PDF Print, crop marks and bleed switched on. You upload one file with two pages: page one becomes the ink, page two becomes the die. Name the file so the order is obvious, something like brand-postcard-p1-cmyk-p2-foil.pdf. If you would rather see the same logic laid out for other software, our file setup guide for foil shows the spot channel version, and you can start from a correctly proportioned layout in the blank template library.
What Foil Holds, and What It Quietly Ruins
A die is a metal shape pressed onto paper under heat. That single fact predicts almost every foil problem, and it is worth designing around rather than discovering on the proof.
Weight beats delicacy. Aim for 8 point type and up in a weight that is not hairline, and rules of 0.5 point or heavier. A fine script with thin joins is the classic casualty: parts break away, the thicker curves blob, and the whole word looks unsteady. If you love a delicate face, foil the monogram and print the script flat in a dark ink. That mixed treatment usually looks more expensive than foiling everything.
Foil is opaque, so nothing printed under it survives. Ink beneath the stamped area disappears completely. Placing foil over a photograph does not tint the photo gold, it deletes that part of it. For the same reason you cannot print CMYK on top of foil in the standard sequence, so a foiled shape cannot carry coloured text inside it.
Give registration some room. The foil layer lands within roughly 1/32 inch of the printed layer, which is invisible on a foil monogram sitting on open stock and painfully visible on a thin foil rule that has to sit inside a printed box. Design so the two layers overlap generously or do not touch at all. Trapping a hairline gap between them is asking for a card that looks misprinted even when nothing went wrong.
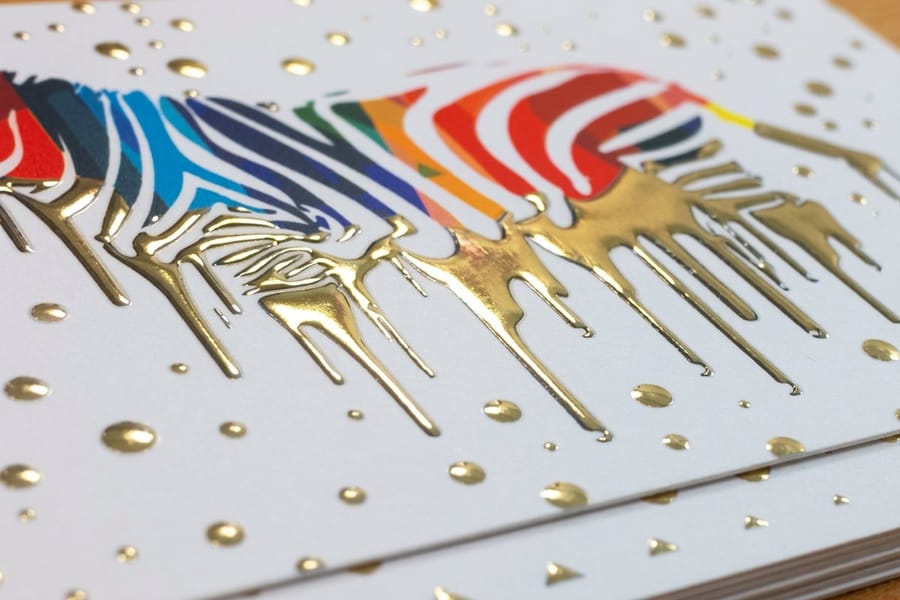
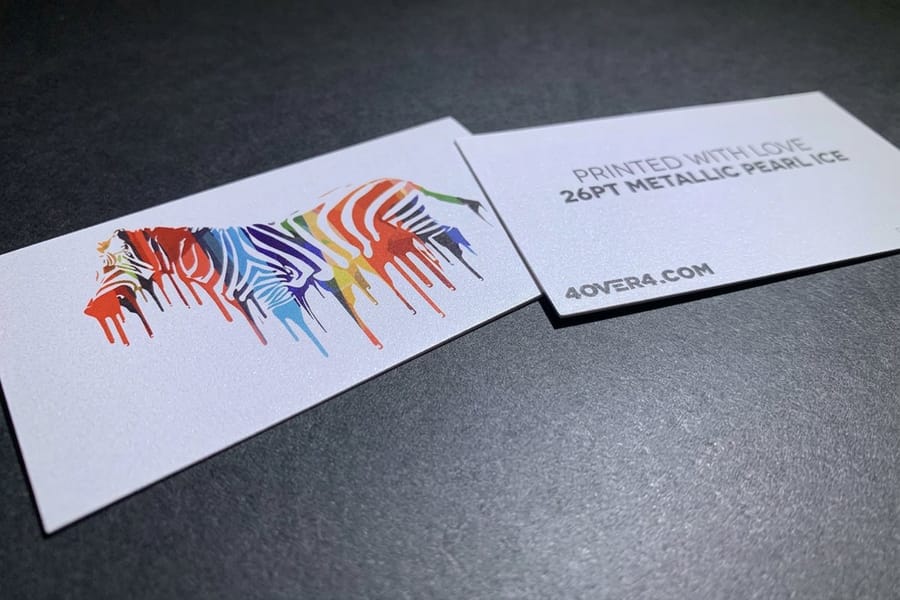
Big solid foil areas are harder than small ones. A large flooded panel shows fingerprints, scuffs and the occasional pinhole where the leaf did not take. It also raises the cost. Foil rewards restraint: a mark, a name, a rule and a border are more effective than a metallic background. If you want the whole card to carry a lift, that is a job for ultra thick metallic pearl postcards, where the shimmer is in the sheet itself and there is no die at all.
Want the foil to sit proud as well as shine? Raised foil postcards add a resin build under the metal, so the design catches light and catches a fingertip. Same two page artwork, same rules about weight and detail, more presence in the hand.
Colour Pairings and Which Foil Product to Order
Foil shines by reflecting, so its impact depends almost entirely on what sits behind it. The single best decision you can make in Canva is the background colour of page one.
Gold on deep navy, near black, forest green or burgundy is the pairing that never fails, because the dark field gives the metal something to flash against. Silver wants charcoal, slate or a cool deep blue; on pale grey it turns into an outline you have to hunt for. Rose gold sits happily on cream, blush and warm sand, though the contrast is gentle by nature, so keep the foil shapes larger than you would with gold. Gold on plain white is elegant and the most requested pairing we see, but it lives or dies on angle: under flat overhead light it can read as pale beige, which is why a small foil element on white often disappoints while a bold one does not. The colour combinations that hold up in print piece goes further into the pairings, and the logo mistakes worth catching before you print covers the artwork problems foil magnifies.
Once the design is settled, the product choice comes down to how much of the card should shine and whether you want texture with it.
| Product | Where the shine sits | Needs a foil page | Starting price |
|---|---|---|---|
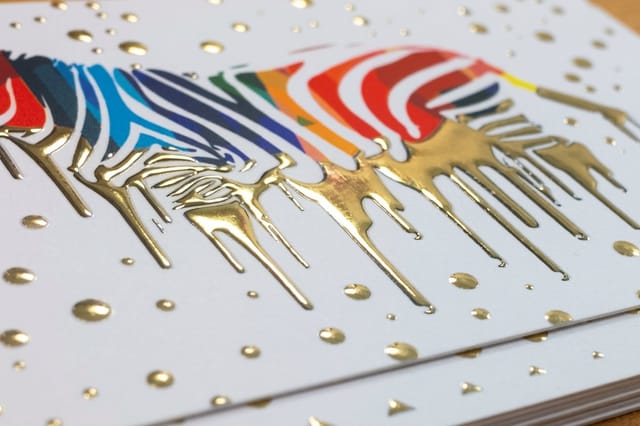
| Metallic foil postcards | Only on the shapes you specify, flat and mirror bright. | Yes, page two in 100% black. | $421.91 |
| Raised foil postcards | On your shapes, built up so you feel it as well as see it. | Yes, same two page file. | $299.00 |
| Ultra thick metallic pearl postcards | Across the whole sheet, a soft shimmer under the ink. | No, one page of CMYK. | $30.76 |
| Metallic foil business cards | Only on the specified shapes, on the piece people keep. | Yes, page two in 100% black. | $222.13 |
Read the third column before the fourth. If your Canva file has no separable foil elements, and plenty of designs genuinely do not, pearl stock gives you a metallic feel with no extra artwork step. If a specific mark has to be the hero, foil is the only process that isolates it. Those starting prices reflect different run sizes, so configure the same quantity on each product page before you decide. The full metallic foil printing collection lists everything that carries a stamped layer, the foil printing collection spans the wider range, and foil stamping products covers the pieces where the die does the whole job. For the same technique on a smaller canvas, metallic foil hangtags follow identical artwork rules.
Wally explains the foil page
Page one is ink. Page two is the die.
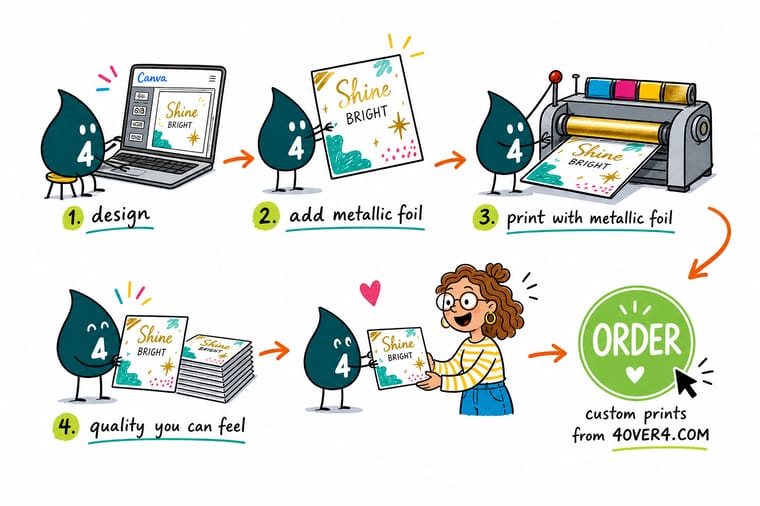
Wally designs the postcard in Canva, then copies the page and rubs out everything that is not getting foiled. What is left he paints solid black on white, no shadows, no soft edges, no opacity slider halfway across. That black page is the map his stamping die follows. He keeps the type chunky, because a heated die fills in tiny letters, and he leaves a little room around the foil so a hair of movement never shows. Then he sends both pages as one PDF and lets the press do the shiny part.
Order metallic foil postcards →Specs and pricing
Foil options, sizes, and starting prices
Compare the foil products side by side, with live configuration choices and starting prices straight from the 4OVER4.COM configurator.

Print it
Send the file and get the shine
Explore more
Where to go next


By the numbers
The press that runs your foil postcards, in numbers
Common Questions
Your Canva foil questions, answered
What are common foil art mistakes?
Drawing a gold gradient and expecting it to print as metal, which comes out as yellow ink. Leaving gray, opacity or a drop shadow on the foil page, which the die cannot read. Setting type under 8 point or rules under half a point, which fill in or break. Putting foil over a photo, which deletes that part of the image. And butting a thin foil rule against a printed keyline, which shows every fraction of the 1/32 inch the die can drift.
How do I foil print a design at home?
Home foil uses heat and toner rather than a die. Print the foil page from a laser printer, lay a sheet of toner-reactive foil over it and run both through a laminator or under a heat press, and the foil sticks only where the toner is. A Cricut with a foil transfer tool presses foil by pressure instead. Both suit a handful of cards, and both blur below the 8 point rule, so a run of postcards is still a job for a stamped die.
Can Canva print metallic foil directly?
No. Canva has no foil option, no spot channel and no way to tag an element as anything other than ink. What it can do is produce the two files a foil printer needs: a colour page and a separate black and white page showing exactly where the foil goes. You design both in Canva, export them together as one PDF Print, and upload that when you configure metallic foil postcards. The press lays the CMYK, then a heated die stamps the metal leaf using your second page as the artwork for the die.
How do I make the foil layer in Canva without spot colours?
Duplicate your finished page, then on the duplicate delete every element that is not being foiled. Set the page background to plain white. Select each remaining element and set its colour to black, using the hex value 000000, with opacity at 100. Remove any shadow, glow or outline effect from those elements, because the effects rasterize into soft grey edges and grey has no meaning to a die. Keep every shape in the exact position it holds on page one. Do not move anything to make it look better on its own.
What size and bleed should a Canva postcard file be?
Set the custom size to your trim dimensions plus 0.25 inch in each direction, so a 4 by 6 inch postcard becomes a 6.25 by 4.25 inch canvas. Treat the outer 0.125 inch on all four sides as bleed, push backgrounds and photos right off that outer edge, and keep type and logos at least 0.125 inch inside the trim. Uploaded photos need enough pixels to hold 300 ppi at final size, which is 1800 by 1200 pixels for a 6 by 4 inch card. Canva will happily scale a small image up and it will look soft on paper.
Will my gold gradient from Canva print as real gold?
It prints as ink that looks like a picture of gold. On a white sheet under office light it reads as mustard yellow, because there is nothing reflective in CMYK. If the brief is a gold gradient, print it flat and spend nothing extra. If the brief is metal that flashes when the card is tilted, you need a foil layer, and the two are not interchangeable. This is also the difference explained in our comparison of gold foil against metallic gold ink.
What is the smallest text and thinnest line you can foil?
Plan on roughly 8 point type in a weight that is not hairline, and rules of about 0.5 point or heavier. Below that the die starts to fill the counters of letters like a, e and g, and a thin script with delicate joins can break in places and blob in others. Reversed detail behaves the same way in the other direction: a hairline white gap inside a solid foil block tends to close up. Test by printing your foil page at 100 percent on a home printer and looking at it at arm length.
Should I pick foil or metallic pearl stock?
Foil puts real metal on the specific shapes you choose and leaves the rest of the card matte, which is why a foiled monogram reads as expensive. Pearl stock puts a shimmer across the entire sheet and needs no die, so a Canva file goes straight to print with no second page at all. The catch with pearl is that the shimmer sits under the ink, so anything you leave white shows the pearl and dark solids largely cover it. Ultra thick metallic pearl postcards start at $30.76 and metallic foil postcards start at $421.91, but the two are quoted at different run sizes, so set the same quantity on both configurators before you compare them.
Get Started
Ready to see your Canva file in real metal?
Upload the two page PDF, pick your stock and quantity, and we stamp the foil exactly where your black page says it goes.
Legal Disclaimer
Gold Standard guarantees apply to all standard orders placed through 4over4.com. Price match requires verifiable proof of a competitor's published price for an equivalent product with matching specifications and turnaround time. Satisfaction guarantee covers manufacturing defects and print quality issues. Contact support with order number and documentation. On-time delivery rate based on tracked orders 1999 to 2026. Individual results may vary based on shipping carrier performance.
