
Custom Boxes With Inserts That Hold the Product Still


Jordan is our labels, packaging and sustainability voice, built from the knowledge of our production team, with over 20 years in printing.
Inserts are tooled separately from the box, so the order you spec them in decides whether the lid closes. The sizing stack comes first, then the four insert types, then the die-line details that make or break the fit. We print the outer carton; the insert comes from a packaging supplier, sized to the carton's interior.
A custom box with an insert is two separately tooled parts: the printed carton, and a die-cut tray, pad, foam block or molded pulp shell that holds the contents in one position. Size the insert first and the box second, because two insert walls plus two clearance gaps can widen the box by a quarter of an inch. Allow about a sixteenth of an inch of clearance per side on board, cut foam cavities a thirty-second under so they grip, and cut a finger notch into every cavity so the product can be lifted out instead of shaken out.
Quick answer
The insert sets the box size, never the other way round
Build the dimension from the product outward. Product width, plus one insert wall on each side, plus the clearance the packer needs to drop it in without forcing it, equals the inside width of the box. Board thickness is real, and two walls plus two gaps add up fast. Get that number wrong and the tray sits proud of the wall, the lid will not close flat, and the box die is already cut.
The Four Inserts That Cover Almost Every Product

Insert is a loose word in packaging quotes, and it covers four different parts: a die-cut tray, a flat pad, a foam block and a molded pulp shell. Each one fits to its own tolerance, set out in the sizing section below. Ask a supplier which one they mean before you compare quotes.
| Insert | What it is | Best for | The catch |
|---|---|---|---|
| Die-cut tray | Corrugated or heavy board, folded into walls with a cavity cut through the top face. | Sets, kits, anything with two or more pieces that must not touch. | Every cavity is tooled into one die, so a product change means a new die. |
| Flat pad or platform | A single scored sheet that lifts the product off the floor of the box or fills the headroom. | Flat goods, printed matter, apparel, anything that only needs to stop sliding. | Positions nothing. It stops movement in one axis and that is all. |
| Foam | Cut polyethylene or polyurethane, either a slab with a cavity or a two-piece clamshell. | Weight, glass, optics, instruments, anything that has to survive a drop. | Bulky to store, not curbside recyclable in most places, and buyers notice it. |
| Molded pulp | A shell pressed from recycled fiber into the shape of the product. | Rounded products, cosmetics, bottles, and brands that want the fiber look. | Needs a real tool and real volume before the tooling cost divides down. |
Read the last column first. A tray looks impressive in a render, but the die is the expensive part, and a product that changes next season needs a new one. For flat goods, a pad in a correctly sized custom mailer box stops the sliding and can be reordered without touching tooling. If you are still choosing the outer box, our guide to choosing the best box style for your product covers the structures an insert has to live inside.
Sizing the Insert and the Box So Nothing Rattles
Order the box first and the insert second, and the board has nowhere to go: its thickness comes out of the room meant for the product.
Work the stack from the inside out. Measure the product at its widest point, wrapped exactly as it will ship, tissue and shrink film included. Add the thickness of the insert wall on each side. E flute is roughly a sixteenth of an inch, B flute is roughly an eighth, 24pt board is closer to a fortieth, and cut foam starts at a quarter inch and goes up from there. Then add the clearance the packer needs: about a sixteenth per side for a board cavity, and a negative thirty-second for foam, which should grip.
Two E flute walls and two sixteenth-inch gaps widen a box by a quarter of an inch, the difference between a nine-inch mailer and a nine and a quarter inch one. Depth matters just as much: a tray that sits proud of the box wall stops the lid closing flat and every carton in the run will bulge.
Height needs the same care. If the product is shorter than the box interior it will bounce, and a tray that positions it side to side does nothing about vertical travel. Either bring the box depth down or add a pad above the product. Our guide to measuring a box and calculating cubic inches covers the inside versus outside dimension trap that starts most of these problems.
Drawing the Die Line, Finger Notch Included
An insert die line is a simple drawing with three or four details that decide whether the finished part works at the packing bench.
- The finger notch. Cut a half-inch to three-quarter-inch relief into the edge of every cavity. Without it the only way to get the product out is to turn the box over and shake, which is exactly what the insert existed to prevent. It costs nothing at the die stage and cannot be added later.
- Grain and flute direction. Board folds cleanly along the grain and cracks across it. Run the flutes parallel to the main folds of the tray, and the walls stand up square instead of bowing.
- Corner relief. A cavity cut as a perfect rectangle tears at the corners under repeated use. A small radius or a relief cut at each corner keeps the cavity intact through a full production run.
- Glued or drop-in. A glued insert cannot shift in transit but adds a gluing operation and makes the box impossible to flat-pack with the tray installed. A drop-in tray ships flat and folds at the bench, which is the right default until volume justifies otherwise.
Supply the die line as vector artwork at full size with the cut, crease and bleed on separate layers, exactly as you would for the box itself. Our guide to preparing files for packaging products covers the layer setup, and checking a packaging proof before approval is worth reading before you sign anything, because a structural proof is the only place a fit problem shows up cheaply.
What It Costs, and When to Skip the Insert Entirely
An insert is a second product. It has its own board, its own die, its own run, and its own step at pack-out where someone picks it up and puts it in. Quote it that way.
Start with the box, because that is the fixed part. Retail boxes share the mailer's ladder, and sales presentation boxes cost $1,207.12 for 250 and $1,866.15 for 1,000. Those are run prices, not unit prices: the per-unit cost falls as the quantity climbs, and the same holds for a die-cut tray.
There are three cases where an insert is the wrong spend. If the product rattles only because the box is oversized, a smaller box is cheaper and lighter than a tray, and a lighter box costs less to ship on every order. If the product is soft goods, a pad and a printed tissue wrap look better than a cavity that never fits a folded garment the same way twice. And if the design is still moving, tooling a cavity around a shape that changes next quarter buys a die you will scrap.
Where an insert clearly pays: multi-piece kits where the pieces must not scratch each other, anything fragile enough that a claim costs more than the tray, and unboxing sequences where the order of reveal is part of the product. A subscription box is the clearest example of the last one, and the custom printing collection is where to start pricing the outer box that carries it.
Wally sizes the insert
Product, plus two walls, plus two gaps
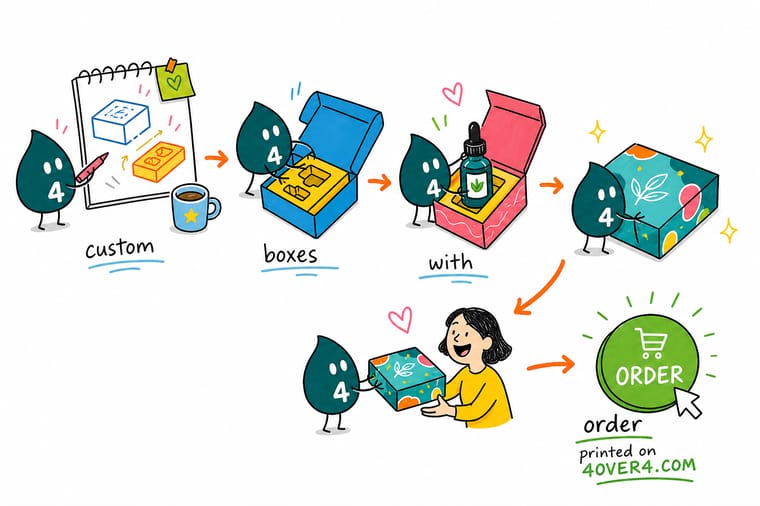
Wally measures the product first, wrapped the way it will ship. Then he adds one insert wall on each side and a sixteenth of an inch of clearance so the tray drops in instead of being forced. Only then does he write down the inside size of the box. He also cuts a finger notch into the cavity, because a box you have to turn upside down to empty is a box that undoes the whole point of the tray.
Order custom mailer boxes →
Specs and pricing
Box structures, sizes, and starting prices
Start with the carton. Mailer and retail boxes come in 5 x 7 x 1.7 or 5.5 x 5.5 x 2.625 inches, from 250 in 7 business days. The sales presentation box is 11.75 x 10 inches and 1 inch deep, the size for a flat pad holding a letter-size kit, from 250 in 9 business days. All three print full color on the outside, on 14pt uncoated or 18pt cover with gloss on one side.

Print it
Order the box and what goes in with the product
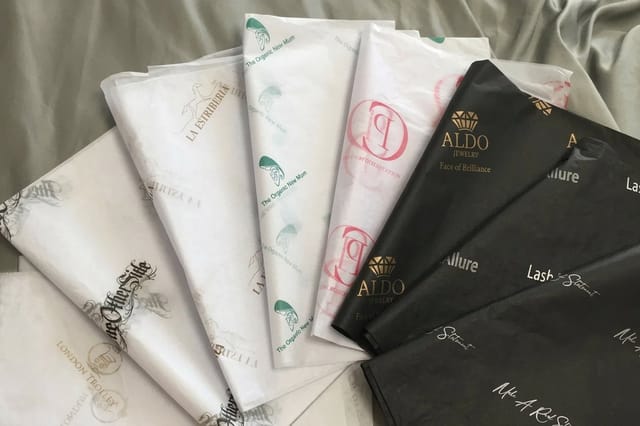
Size the insert against the box interiors above, then add what sits on top of it: printed tissue in 10 x 15, 15 x 20 or 20 x 30 inches, and a thank you card in 4.25 x 5.5, 5 x 7 or 6 x 6 inches.


Explore more
Where to go next
Go to the packaging inserts guide for what the printed insert card should say, the cardstock versus corrugated guide before you pick the board, the box measuring guide before you quote an interior, and the mailer versus shipping box guide to see which carton suits a tray.


By the numbers
The printer behind the box
Common Questions
Your box insert questions, answered
What is a box insert?
An insert is a separate die-cut or molded part that sits inside a box and holds the contents in a fixed position. It can be a folded corrugated tray with a cavity cut into it, a flat paperboard pad, a foam block, or a molded pulp shell. It goes in by hand at pack-out, either dropped in loose or glued to the box floor.
How much clearance should I leave between the product and the insert?
About a sixteenth of an inch per side in board, because board thickness varies slightly between runs and a cavity cut to the exact product size will not take it. Foam is the opposite case and is cut under size so it grips.
Do inserts have to be printed?
Most are not, and unprinted kraft is the normal choice. Printing an insert only pays when the customer actually sees the printed face. A message revealed under a lifted product, or a tray with the brand mark on the top surface, does something. Ink on the underside of a tray that goes straight into the recycling does not. If the budget is fixed, a printed thank you card laid on top of the product does the talking for less.
Corrugated insert or foam insert?
Corrugated for anything under a few pounds that is not fragile, foam for weight and impact. Corrugated ships flat, folds at the bench, costs less, and keeps the whole package in one recycling stream. Foam absorbs shock that board cannot and holds an irregular shape without a complicated die line, which is why glass, electronics and anything with a lens usually ride in foam.
Can I add an insert to a mailer box I already ordered?
Yes, as long as you know the true inside dimension of that box, which is not the size printed on the listing unless the listing states inside dimensions. Measure a real box across the inside walls at the middle, not at the corners, and subtract nothing. Then build the insert to that number with the clearance included, and test one against a physical box before the full run.
What does a box with an insert cost?
Price the printed box first, then add the insert from your packaging supplier as a second line. Our printed boxes start at 250: 250 custom mailer boxes cost $711.78, about $2.85 each, and 1,000 cost $797.02, under 80 cents each, so the carton share of the total drops fast with quantity.
Get Started
250 custom mailer boxes, printed full color outside
Settle the insert stack, check it fits the 5 x 7 x 1.7 or 5.5 inch square interior, then build your art on the box dieline.
Legal Disclaimer
Gold Standard guarantees apply to all standard orders placed through 4over4.com. Price match requires verifiable proof of a competitor's published price for an equivalent product with matching specifications and turnaround time. Satisfaction guarantee covers manufacturing defects and print quality issues. Contact support with order number and documentation.
