
How to Design a Greeting Card in InDesign From Setup to Press Ready PDF


Build the document at trim size, add 0.125 inch of bleed, stay in CMYK, place your images at 300 PPI, then package and export. That is the full InDesign workflow for a greeting card that prints exactly the way you drew it.
To design a greeting card in InDesign, create a Print document at the folded trim size with 0.125 inch bleed and a 0.25 inch margin, turn facing pages on for a folded card and off for a flat one, work in CMYK, place images at 300 effective PPI, set up master pages and paragraph styles, mark the fold in the slug, then Package the file and export a PDF/X-1a or PDF/X-4 with crop marks and document bleed switched on.
Quick tips
The InDesign settings a greeting card actually needs
Set Intent to Print and build the page at the folded trim size, four pages for a folded card with facing pages on, two pages for a flat card with facing pages off. Add 0.125 inch bleed, a 0.25 inch slug for your job notes, and a 0.25 inch margin that holds every piece of text. Stay in CMYK, place images so the Links panel reads 300 effective PPI, mark the fold, then Package and export PDF/X-1a or PDF/X-4 with crop marks and document bleed on. Get those right and 4OVER4.COM prints the card exactly as drawn.
Why InDesign Is Still the Right Tool for a Printable Greeting Card
A greeting card looks like the simplest thing a designer can make. One image, a few words, a fold. Then the file goes to press and the fold lands a sixteenth of an inch off, the background stops short of the edge, and the deep navy you picked on screen arrives on paper looking like slate. None of that is a printing problem. It is a document setup problem, and InDesign is built to prevent every one of them.
InDesign is a page layout application, which means it thinks in trim, bleed, margins, spreads, and separations rather than in canvases and layers. It tracks every placed image and its effective resolution, it holds paragraph styles that keep a run of cards consistent, and it exports to the PDF/X standards that commercial presses actually want. Photoshop can produce a beautiful card face, and Illustrator can draw a beautiful ornament, but neither one manages a four panel folded piece the way InDesign does.
This guide walks the whole build, from the New Document dialog to the packaged export. It is the software tutorial. If you are still choosing dimensions, start with our greeting card size guide, and if you want a file that already has the guides drawn in, grab a free greeting card template before you set anything up by hand.
Set Up the New Document at Trim Size, With the Right Spread
Open File then New then Document and set Intent to Print. That single choice switches the units to inches or picas, sets the color mode to CMYK, and puts the transparency blend space where a printer expects it. Everything downstream gets easier because of it.
Now the size, and this is where most first attempts go wrong. Enter the finished folded size, not the flat sheet. A 5 by 7 inch folded card is a 5 by 7 inch page. A 4.25 by 5.5 inch A2 card is a 4.25 by 5.5 inch page. InDesign builds the flat spread for you.
- Flat card, printed both sides: two pages, facing pages off. Page 1 is the front, page 2 is the back. There is no spread to compose across, so a single page view keeps things honest.
- Folded card: four pages, facing pages on. Pages 2 and 3 sit together as the inside spread, which is exactly how the reader will see them.
Set orientation to portrait or landscape to match the fold. A top-fold card and a side-fold card are the same rectangle turned ninety degrees, and choosing wrong means your artwork ends up sideways on the press sheet. If you are undecided, our breakdown of flat versus folded greeting cards covers which format suits which occasion.
Bleed, Slug, Margins, and the Safe Zone
Click the arrow beside Bleed and Slug in the New Document dialog. If the document already exists, the same fields live under File then Document Setup.
Bleed: 0.125 inch on all four sides. This is the industry standard and the number 4OVER4.COM asks for. Anything that touches an edge, a photograph, a color wash, a foil panel, a paper texture, has to keep going 0.125 inch past the trim line. Cards are cut hundreds at a time and the blade can wander by a fraction of a millimeter. Bleed is the tolerance that absorbs that drift. Our full explanation of bleed and trim shows what happens when it is missing.
Slug: 0.25 inch, and yes, use it. The slug is a strip outside the bleed that prints on the proof and gets trimmed away. Put your job name, the card size, the paper stock, and a note like Fold at center here. It costs nothing and it prevents the wrong file getting uploaded at midnight.
Margins: 0.25 inch minimum. The margin defines your safe zone, the live area where text and logos belong. Type sitting a sixteenth of an inch from the trim looks confident on screen and looks like a mistake on paper. Keep headlines, greetings, sign-off lines, and any barcode or logo inside the margin, and let only background elements travel out to the bleed. The crop marks and bleed guide shows the three zones side by side.
Work in CMYK From the First Click, Not at Export Time
Your monitor makes color with light and mixes red, green, and blue. A press makes color with ink on paper and mixes cyan, magenta, yellow, and black. RGB can produce colors that CMYK inks simply cannot reach, and the ones it loses first are exactly the ones designers reach for on a celebration card: electric blues, neon greens, hot oranges, and vivid purples.
Setting Intent to Print in the New Document dialog already put your document in CMYK. Two more steps make it reliable. First, open Edit then Color Settings and assign a working CMYK profile so InDesign previews ink behavior rather than screen behavior. Second, turn on View then Proof Colors while you design, which simulates the printed result on your monitor and shows you the shift before it becomes a surprise.
Build your swatches as CMYK from the start. If a brand color arrives as a hex value, convert it deliberately and look at the result rather than accepting whatever the automatic conversion produces. Our guides on CMYK versus RGB and converting RGB to CMYK walk through the safe way to do it.
One more detail that matters on a card with a dark interior. Do not set large black areas to 100 percent K alone, because flat black ink over a wide panel prints thin and gray next to a photograph. Use a rich black recipe instead, explained in our guide to rich black and the CMYK recipe.
Place Images at 300 PPI and Live in the Links Panel
Use File then Place, never copy and paste. Place creates a live link to the original file, so InDesign always knows where the real pixels are. Pasting can drop in a screen preview of the art, which looks acceptable at 100 percent on your monitor and prints as mush.
Open Window then Links and dock the panel where you can see it. Expand a selected link and read the Effective PPI value. That number, not the original PPI, is what actually prints, because it accounts for how far you scaled the image inside the frame. A 300 PPI photo enlarged to 200 percent has an effective resolution of 150 PPI, and it will look soft on a coated card stock where every detail shows.
- Target 300 effective PPI for photographs and any raster texture.
- Keep logos and ornaments as vector so they stay crisp at any size and never pixelate along a curve.
- Watch the Links panel for warnings. A yellow triangle means the source file changed and needs updating, a red question mark means the link is broken and the image will not print.
If you are unsure whether a photo has enough pixels for the size you want, our printing image resolution guide gives the arithmetic in plain terms.
Master Pages, Paragraph Styles, and Character Styles
A single card does not feel like it needs a system. A set of twelve holiday cards, or one card that gets revised four times before approval, absolutely does.
Master pages hold the elements that repeat on every panel: the margin guides, a fold guide, a logo in the back panel corner, a website line at the foot. Open Window then Pages, double-click the A-Master, build those elements once, and every page based on it inherits them. Change the master and every card in the document updates at once.
Paragraph styles control whole blocks of text. Build one for the cover greeting, one for the inside message, one for the sign-off, and one for the small back-panel credit line. Each style carries its typeface, size, leading, alignment, and color. When the client asks to make the inside message two points larger across all four cards, that is one edit rather than sixteen.
Character styles handle the exceptions inside a paragraph: a name in italic, a date in small caps, a single word in the accent color. Apply them on top of a paragraph style rather than overriding the text by hand, so the underlying structure stays intact.
Typeface choice carries a card more than any other decision. Script faces read as personal and warm, a clean serif reads as formal, a geometric sans reads as modern and corporate. Our guide to serif versus sans serif is a useful sanity check before you commit a whole set to one family.
Build a Four Panel Folded Card in the Pages Panel

Here is the panel order that trips up almost everyone the first time. A standard folded card is four panels, and they do not run in visual order around the fold.
- Page 1, front cover. The face of the card. Artwork, greeting, the piece someone sees first.
- Page 2, inside left. Often left blank or given a light pattern, an illustration, or a photograph.
- Page 3, inside right. The message. This is where the actual writing goes.
- Page 4, back cover. Your logo, a website, a small credit line, a recycling mark.
With facing pages on, InDesign automatically pairs 2 and 3 as a spread, which is what you want, because a photograph or a color band that crosses the fold has to line up across both panels. Design that crossover on the spread view, not panel by panel.
The outside of the card is a spread too, made of page 4 on the left and page 1 on the right. It is worth previewing that pairing in the Pages panel before export so the back panel logo does not collide with a cover element that wraps around the edge.
One practical rule for a side-fold card: keep meaningful content at least 0.25 inch away from the fold on both sides. Paper compresses and stretches slightly where it is scored, so a line of type that sits right on the crease can look bowed after folding.
Fold Marks, Score Marks, and Spot Color Versus Process
InDesign draws crop marks automatically at export, but it does not know where your card folds. Add that information yourself.
Fold marks. Create a layer named Marks, draw short hairlines in the slug area lined up with the fold position, and label them Fold. Some printers prefer a note in the slug instead of a drawn mark. Either way, be explicit. A card that folds at the top instead of the side is a full reprint, and it is entirely avoidable with one label.
Score marks. Anything on heavy cover stock should be scored before it is folded, which means pressing a channel into the fiber so the sheet bends cleanly instead of cracking the coating. On a thick or digitally printed card, scoring is what separates a crisp fold from a broken one. It is a production instruction rather than something you draw, so put it in the slug and in the order notes.
Spot color versus process. Process color builds every shade out of cyan, magenta, yellow, and black. A spot color is a single premixed ink laid down on its own plate, which is how you get an exact brand color or a metallic that CMYK cannot reproduce. In InDesign, create the swatch as a Spot color type and give it the correct name so it appears as its own separation. Check the result under Window then Output then Separations Preview before you export.
Spot treatments are also what make a card feel expensive. Raised foil, spot gloss, and metallic inks are separate passes that need their own artwork layer, usually solid 100 percent black shapes on a dedicated layer. Read our overview of spot color printing and the Pantone PMS spot color service before you build one.
Package the File, Then Export PDF/X-1a or PDF/X-4

Two steps stand between a finished layout and a file the press can trust.
Preflight first. The Preflight panel sits at the bottom of the InDesign window and flags missing links, missing fonts, and overset text before they become expensive. Clear every error, not just the ones that look serious.
Package second. Go to File then Package. InDesign builds a folder holding the INDD file, every linked image, every font used, and a printing instructions report. Even when you only send a PDF, packaging is the archive that lets you reopen this card in two years and find everything intact.
Then export. Choose File then Export, pick Adobe PDF (Print), and select a preset:
- PDF/X-1a flattens transparency and forces everything to CMYK. It is the most predictable option and the safest default for a straightforward card.
- PDF/X-4 keeps live transparency and supports color management, which is the better choice when your design uses soft shadows, blend modes, or feathered edges you do not want flattened.
In the Marks and Bleeds panel of the export dialog, tick Crop Marks and tick Use Document Bleed Settings. Skip that second checkbox and your carefully built 0.125 inch bleed never makes it into the PDF. Open the exported file and confirm you can see the marks and the bleed area before you upload. Our step-by-step on exporting a print-ready PDF from Illustrator or InDesign covers each field in the dialog.
The Mistakes That Send a Card File Back, and the Shortcut Around Them
Almost every greeting card file that comes back for correction fails on one of five things. None of them are difficult, and all of them are easier to catch before upload than after.
RGB images left in the document. Check the Links panel, convert the photographs deliberately, and look at the shift on your own screen rather than letting an automatic conversion decide for you. Missing bleed. Background art that stops exactly at the trim line produces a white hairline on one edge after cutting. Extend it the full 0.125 inch. Low-resolution placed art. Read Effective PPI in the Links panel, not the original resolution, because scaling a frame changes what actually prints.
Live fonts on outlined artwork. Text inside a PDF/X export is embedded and safe, but any logo or ornament you built from type on a specialty layer should be converted to outlines so it cannot reflow. Text in the trim zone. Anything closer than 0.25 inch to the edge is at risk. Keep the greeting, the message, and the sign-off inside the margin.
If none of this sounds like a good use of your afternoon, there are two shortcuts. Download a free blank template for the exact card size and the trim, bleed, and safe zone come already drawn, so you only have to fill the space. Or skip design software entirely and build the card in the 4OVER4.COM online designer, which outputs a correctly sized, print-ready file with no setup at all. Either path ends at the same place: custom greeting card printing on premium stock, with a stack of design templates to start from and free paper samples if you want to feel the stock first.
Wally explains InDesign card setup
Set the document right and the press does the rest
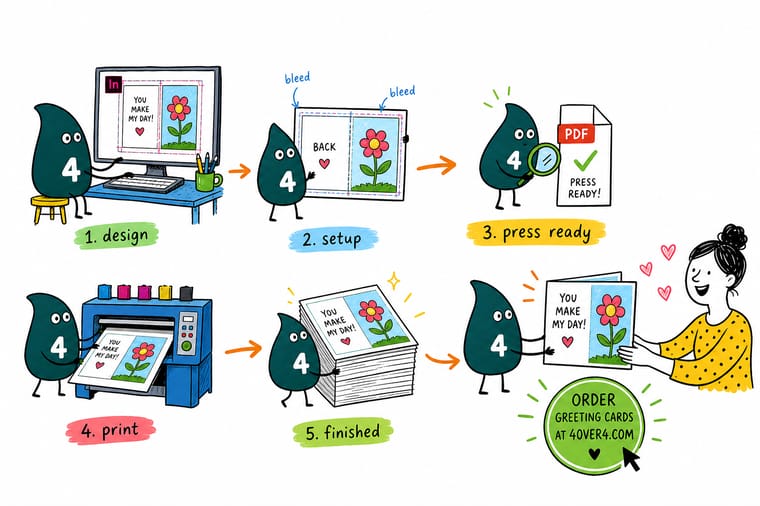
Wally never starts a card by drawing. He starts by setting the page to the folded trim size, dropping in 0.125 inch of bleed, and turning facing pages on so the inside spread reads as one surface. Then he places images instead of pasting them, keeps every word inside the margin, marks the fold in the slug, and packages the whole job before exporting. A file built that way needs no rescue, and 4OVER4 prints it on premium stock exactly as drawn.
Print your greeting cards →Specs and pricing
Greeting card stocks, sizes, and starting prices
Your InDesign file needs a real trim size and a real paper stock behind it. Compare three greeting card lines side by side with live configuration options and starting prices straight from the 4OVER4.COM configurator.


Print it
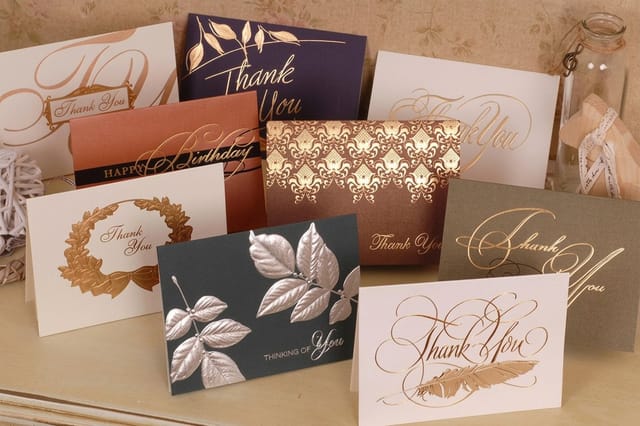
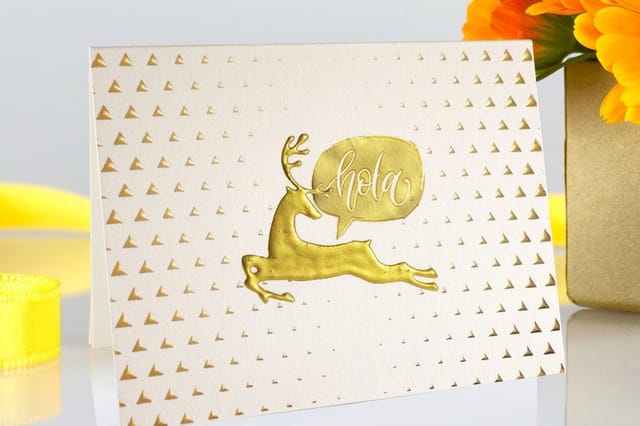
Greeting cards worth building a file for


See it in use
Greeting cards off our own press







Explore more
Where to go next


By the numbers
What happens to your packaged PDF
Common Questions
InDesign greeting card questions, answered
What document size should I use for a greeting card in InDesign?
Use the finished folded size as your page size, not the flat sheet. A 5 by 7 inch folded card is a 5 by 7 inch page, and the document runs four pages: front cover, inside left, inside right, and back. A 4.25 by 5.5 inch A2 card works the same way. InDesign assembles the flat 10 by 7 inch spread for you when the pages sit side by side, so you never have to do the arithmetic yourself.
Should facing pages be on or off for a greeting card?
Turn facing pages off for a flat card, since a flat card is a single sheet printed front and back with no spread to compose across. Turn facing pages on for a folded card, because the inside left and inside right panels read as one continuous surface and you want to see them together while you design. If a photo or a color band crosses the fold, facing pages is the only way to align it correctly.
How much bleed does a greeting card need?
The standard is 0.125 inch on every outside edge, set in the New Document dialog or later under File then Document Setup. Extend any background color, texture, or photograph that touches an edge all the way into that bleed area. Cards are cut in stacks and the blade can drift by a hair, so without bleed you risk a thin unprinted line along one edge of the finished card.
Do greeting card images have to be CMYK, or can InDesign convert RGB?
InDesign can convert RGB images during export, but you should not leave it to chance on a card where color is the whole point. Set the document color mode to CMYK, assign a print profile under Edit then Color Settings, and convert your photographs in Photoshop so you can see and correct the shift yourself. Saturated RGB blues, greens, and oranges lose energy in CMYK, and it is far better to adjust that on your screen than to discover it on paper.
Should I export a greeting card as PDF/X-1a or PDF/X-4?
PDF/X-1a flattens transparency and converts everything to CMYK, which makes it the safest, most predictable choice for a straightforward card. PDF/X-4 keeps live transparency and supports color management, so it is the better pick when your card uses soft drop shadows, blend modes, or feathered edges that you do not want flattened. Either way, export with crop marks on and use the document bleed settings so the trim is unambiguous.
Can I design a printable greeting card without InDesign?
Yes. Download a free blank template for the exact card size and build your artwork in whatever application you own, since the template already carries the trim, bleed, and safe zone. If you would rather not open design software at all, the 4OVER4.COM online designer lets you lay out a card in the browser and sends a correctly sized, print-ready file straight to production.
Get Started
50 greeting cards cost $56.02, or $1.12 each
Upload your packaged PDF with bleed and crop marks, pick your stock and finish, and we print flat or folded greeting cards that match your file exactly.
Legal Disclaimer
Gold Standard guarantees apply to all standard orders placed through 4over4.com. Price match requires verifiable proof of a competitor's published price for an equivalent product with matching specifications and turnaround time. Satisfaction guarantee covers manufacturing defects and print quality issues. Contact support with order number and documentation. On-time delivery rate based on tracked orders 1999 to 2026. Individual results may vary based on shipping carrier performance.
