
How to Place Grommets on Banners for a Secure Outdoor Hang


Grommets are the metal rings that let a banner hang without tearing. Spacing every two to three feet is what spreads the load across the hem.
Place a grommet in all four corners, then every 24 to 36 inches along the top and bottom edges. Set each ring on a folded, welded 1 inch hem, about half an inch in from the edge. Tighten spacing toward 24 inches and choose mesh or wind slits for windy outdoor sites so the grommets are not fighting the full load.

Start here
A hem, a ring, and a spread load
Corners first, then every 24 to 36 inches. Put a grommet in each of the four corners, then space the rest evenly along the top and bottom edges. Set every ring on a reinforced, welded hem so it will not tear out, and tighten the spacing or switch to mesh when wind is a factor. The diagram below shows the pattern for a standard vinyl banner.
What grommets do and why banners need them

A grommet is a metal ring, usually brass, pressed through the edge of a banner to create a reinforced hole you can hang from. Without one, running rope or a zip tie through bare vinyl would slowly tear the material at the stress point. The grommet spreads that force across a metal-backed ring, so the banner takes the load instead of ripping.
Because they carry the whole weight of the piece, grommets are the single most important finishing detail on a hanging banner. Get their placement right and a vinyl banner hangs flat, square, and secure for the life of the print. Get it wrong and the banner sags, flaps, or fails at the first strong gust. If you would rather skip the hardware entirely, our online design tool lets you set grommet spacing before you order, and every banner ships with grommets installed.
This guide covers the two things that matter most: where to place each grommet, and how to reinforce the edge so it holds. We will also cover the wind question, since outdoor banners live or die on how they handle a breeze.
Grommets for posters: when and how

Grommets and posters are a common pairing and a common mistake. A plain paper poster will not hold a grommet. Punch a ring through uncoated or lightly coated paper, hang it, and the paper tears at the hole the first time the sheet takes weight or catches a draft. Paper has no fiber strength to spare at a single point, which is exactly what a grommet asks of it.
There are three ways to make a poster grommet-ready. Mount it to a rigid board such as foam board, so the board carries the load and the ring sits in the board rather than the paper. Laminate it, which adds a plastic layer on both faces and gives the ring something tough to bite into. Our foam core posters come mounted on 3/16 inch white or black board from 16 by 20 up to 40 by 60 inches. Or reprint the artwork on vinyl, which turns the piece into a banner and takes grommets exactly as one does.
Once the poster is laminated, mounted, or printed on vinyl, the placement rules are the same as a banner: a grommet in all four corners first, then along the top edge at an even interval, which is usually all a poster-sized piece needs. Keep every ring half an inch to one inch in from the edge, and reinforce that edge if the piece will hang outdoors. If you are still choosing the format, our guide on banner vs poster and when to use each one sets the two side by side.
If the poster has to stay paper, do not force the hardware. Poster rails clamp the top and bottom edge and spread the load across the full width, magnetic hangers do the same on a steel surface, and adhesive hanging strips hold a light poster flat to a wall with no holes at all. Those are the right answers for paper. A grommet is the right answer once the piece is laminated, mounted, or vinyl.
Standard grommet options on a printed banner
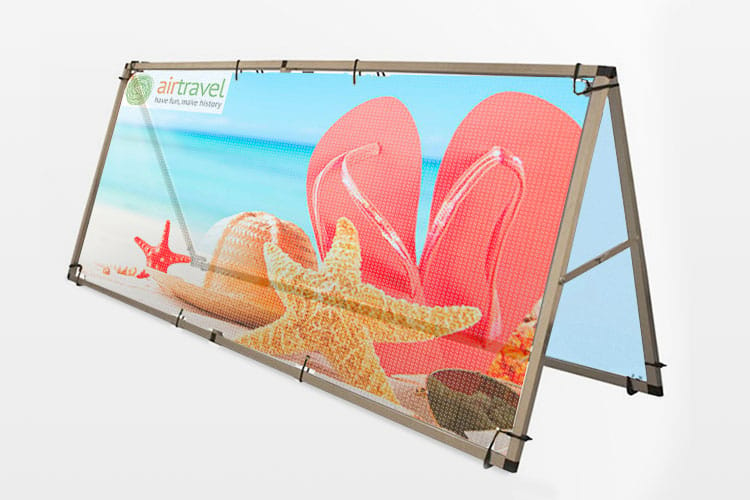
A grommet on a poster or a banner is the metal ring set through a reinforced edge so a rope, zip tie or hook can carry the piece. When you order a printed banner you choose where the rings go, and each product offers a fixed set of positions:
| Product | Grommet options | Edge and hanging options |
|---|---|---|
| Vinyl banners | None, corners only, or every 2 feet | Hems top and bottom or on all 4 sides, 2 or 4 inch pole pockets |
| Mesh banners | None, corners only, or every 2 feet | Hems top and bottom or on all 4 sides, pole pockets from 1.5 to 4 inches |
| Pole banners | 4 corners only | 2 inch pole pockets top and bottom, up to 10 wind slits |
| Foam core posters | No grommet option, the board carries the load | 3/16 inch white or black foam core, optional gloss lamination |
Every 2 feet is the 24 inch end of the spacing rule below, and each ring should sit on the 1 inch welded hem, half an inch to one inch in from the edge, so pick hems on the same edges as your grommets.
Where to place each grommet: corners, then a steady rhythm

Placement follows one simple pattern. Start with a grommet in all four corners, because the corners bear the most stress when the banner is under tension. Then work along the top and bottom edges, adding grommets at an even interval so no single point carries too much of the load.
The working interval is every 24 to 36 inches. On a small indoor banner you can lean toward 36 inches. On a large banner, or any banner that will hang outdoors, tighten toward 24 inches so the vinyl stays flat and the pull is shared. Keep the top and bottom grommets vertically aligned so the banner hangs square rather than skewed. The spacing chart below shows the pattern at a glance. On a 4OVER4 vinyl banner, that means choosing grommets every 2 feet with hems on all 4 sides, on 13oz outdoor or 15oz BlackOut vinyl, in sizes from 2 by 4 up to 8 by 20 feet.
Set each grommet about half an inch to one inch in from the outer edge, which places the ring on the doubled material of the hem instead of a single raw layer. That inset is the difference between a grommet that holds for years and one that pulls loose. For where to actually mount the finished banner, our guide on how to hang banners walks through rope, ties, and frame methods.
Grommet spacing by banner size
Apply the 24 to 36 inch interval to real banner sizes and you get the counts below. Corner grommets are counted in the top and bottom numbers, and the per-side figure is the grommets between the corners on each vertical edge.
| Banner size | Grommets top and bottom | Grommets per side | Total |
|---|---|---|---|
| 2 x 4 ft | 3 each | 2 each | 10 |
| 3 x 6 ft | 4 each | 2 each | 12 |
| 4 x 8 ft | 5 each | 3 each | 16 |
| 4 x 10 ft | 6 each | 3 each | 18 |
| 5 x 15 ft | 8 each | 3 each | 22 |
Treat these as the working default rather than a limit. Indoors, or on a wall where the banner is not fighting weather, you can move toward the 36 inch end of the interval and use fewer rings. Outdoors, on an exposed fence or strung between two posts, add grommets rather than remove them, because every extra ring takes load off the ones beside it.
Reinforce the hem so grommets never tear out
A grommet is only as strong as the material around it. Punch one into a single layer of vinyl and it can rip free under load. The fix is a hem: the banner edge is folded over about an inch and heat-welded, doubling the material exactly where the grommets go.
Every banner we finish gets a welded hem on all four sides before the grommets are set, so the metal always bites into reinforced material. If you are preparing your own artwork, leave room for that hem in your layout and keep important text and logos inside the safe margin so nothing lands under a fold or a grommet. Our guide on bleed and trim shows how to set those margins correctly.
If you are adding grommets through the order rather than by hand, the configurator treats hems and grommets as two separate choices: set hems to all 4 sides, then grommets to corners only or every 2 feet, and upload artwork with a 0.125 inch bleed and your text inside the safe margin. Vinyl banners run 3 business days standard, with faster production on the product page.
The order of operations matters: reinforce first, then punch, then set. Skip the hem and even perfect spacing will not save a banner that is fighting the wind on raw vinyl.
Outdoor wind: spacing, mesh, and wind slits

Wind is the main enemy of an outdoor banner, and grommets alone cannot beat a stiff breeze. A solid vinyl banner acts like a sail, and every gust loads all the grommets and hems at once. Three moves keep it under control.
First, tighten the spacing toward 24 inches so the load is shared across more points. Second, choose a mesh banner for exposed sites: the perforated material lets a percentage of air pass through, cutting the wind load dramatically while still reading clearly from a distance. Third, add wind slits, small cuts that give air a path so the banner does not balloon. For a full breakdown of when each material fits, see our guide on banner material types.
Pair the right material with corner-first spacing and a reinforced hem, and your outdoor banner will stay put through weather that would tear a poorly finished one loose. For placement strategy on high-traffic outdoor spots, our guide on vinyl banner placement goes deeper.
Wally spaces the grommets so nothing tears
Corners first, then a steady 24 to 36 inch rhythm
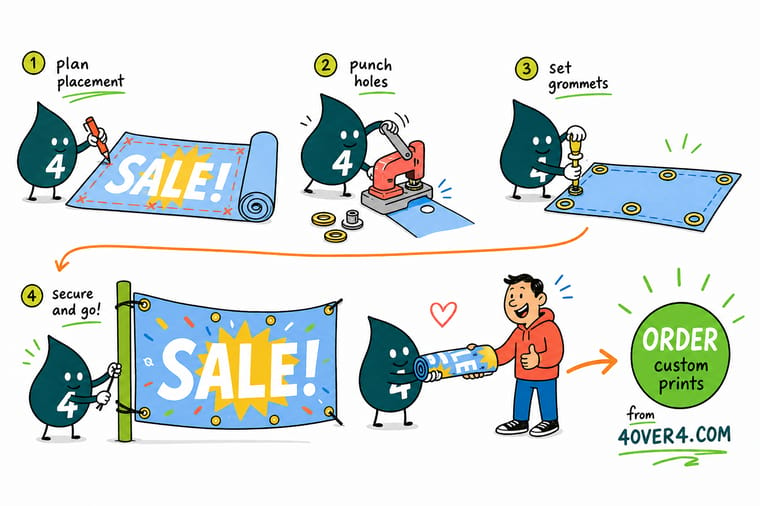
Wally treats a banner like a bridge: load every corner, then share the rest of the weight across evenly spaced grommets set into a reinforced hem. Tighten the spacing when the wind picks up, or reach for mesh so air slips through. Order it with grommets already installed and the banner shows up ready to hang, no punching required.
Order vinyl banners with grommets →Quick reference
The banner grommet setup, at a glance
Match these numbers, a grommet in each corner, then one every 24 to 36 inches, each set half an inch to one inch in on a 1 inch welded hem, and your banner hangs flat, square, and secure, indoors or out.
| Setting | Get it to | Why it matters |
|---|---|---|
| Grommet size | #2 brass (about 0.4 in hole) | The standard eyelet for banner vinyl, wide enough for rope, zip ties, or bungee cord. |
| Corner grommets | All four corners | Corners carry the most stress, so every banner starts with a grommet in each one. |
| Edge spacing | Every 24 to 36 in | Even spacing on the top and bottom edges spreads the load and keeps the banner flat. |
| Hem | Folded, welded 1 in | A reinforced hem gives the grommet material to grip so it does not tear out. |
| Inset from edge | About 0.5 to 1 in | Placing the ring just inside the hem keeps the metal on doubled material, not a raw edge. |
| Windy sites | Mesh or wind slits | Letting air pass through takes strain off the grommets on exposed outdoor installs. |
Step by step
Set and space your grommets in 7 steps
- Measure and mark your grommet points Lay the banner flat. Mark all four corners first, then divide each long edge so the remaining grommets land every 24 to 36 inches. Keep top and bottom marks lined up so the banner hangs square.
- Confirm the hem is reinforced Every grommet should sit on a folded, welded hem, roughly 1 inch deep. If your file did not include a hem, add one before ordering so the metal has doubled material to grip.
- Inset each mark from the edge Move every mark about half an inch to one inch in from the outer edge so the grommet bites into the hem, never a single raw layer of vinyl.
- Punch a clean hole Use a hole cutter sized to your grommet so the ring seats flush. A ragged or undersized hole is where tears start.
- Set the grommet Place the eyelet through the hole, add the washer on the back, and press or hammer with a grommet die until the ring locks tight and spins freely without lifting.
- Hang with the right hardware Run rope, zip ties, or bungees through the grommets and anchor to each corner first, then the middle points, so tension is even across the whole banner.
- Let us finish the grommets for you Order the banner with grommets already installed and you skip every step above. Set the spacing in the configurator and your banner arrives ready to hang.
Specs and pricing
Vinyl banner specs and live pricing
Grommets are included as standard finishing. Pick your size, material, and grommet spacing and watch the price update live, straight from the configurator. Vinyl banners run 2 by 4 up to 8 by 20 feet on 13oz outdoor or 15oz BlackOut vinyl from $79, with grommets at the corners or every 2 feet.

| Quantity | Price Per Unit | Total |
|---|---|---|
| 1 | $79.00 | $79.00 |
Print it
Banners built to hang, from 4OVER4
Vinyl banners from $79 with grommets every 2 feet, mesh banners from $75 for windy fences, and pole banners from $97.76 with corner grommets and 2 inch pole pockets.
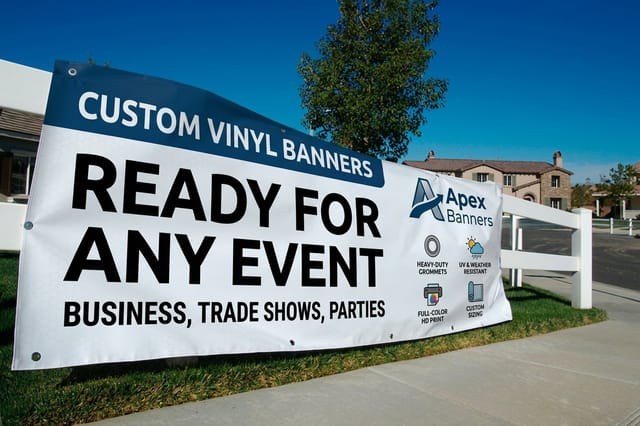


See it in use
Hems and rings we set on customer banners
These are vinyl banner orders our customers sent to press, so you can see ring spacing and hem edges on finished pieces before you set yours.








Explore more
Where to go next






By the numbers
Vinyl, mesh, fabric and pole banners
Common Questions
Common questions about banner grommets
What are grommets on a banner?
Grommets are the small metal rings pressed into the edge of a vinyl banner to create reinforced hanging points. Instead of running rope or zip ties through bare vinyl, which would tear, you thread them through the grommets so the load pulls on metal-reinforced holes. They are the standard way to hang outdoor and indoor banners on fences, poles, walls, and frames. A typical banner uses a number 2 brass grommet, wide enough for rope, bungee cord, or a zip tie, set into a folded and welded hem.
How much wind does this banner have to take?
Start with a grommet in all four corners, since corners take the most stress, then add grommets evenly along the top and bottom edges every 24 to 36 inches. Use the tighter 24 inch spacing for larger banners, banners on windy outdoor sites, or any install where the vinyl needs to stay flat. Smaller indoor banners can lean toward 36 inches. If the banner will face steady wind, pair the spacing with a mesh material or wind slits so air passes through instead of loading every grommet at once.
What does a banner with grommets cost and how are prices set?
Grommets are included at no extra charge on our vinyl banners, so you are really paying for the banner itself. Price scales with size in square feet, the material you choose, quantity, and any add-ons like pole pockets or wind slits. You set each option in the configurator and the price updates live as you adjust it, so you can see exactly what a larger size or a heavier stock does to the number before you order. A standard vinyl banner starts low and the per-unit price drops as the size and quantity settle.
What sizes, stocks, and finishes are available for grommeted banners?
Banners print to custom width and height, from small 2 by 4 foot signs up to large multi-foot spans, on 13 ounce scrim vinyl for everyday use, heavier 18 ounce blockout for double-sided jobs, or mesh for high-wind outdoor sites. Finishing options include grommets at your chosen spacing, hemmed edges, pole pockets, and wind slits. The live specs panel below shows the exact sizes, materials, and finishing choices with pricing straight from the configurator.
How long does a grommeted banner take to print and ship?
Vinyl banners print fast, and grommets are added as part of standard finishing rather than a separate production step, so they do not slow the turnaround. Production time depends on the size, material, and quantity you pick, with same-day and next-day options available on many banner jobs. The configurator shows the live turnaround for your exact specs, and shipping time is added on top based on your delivery method.
Can I hang a banner without grommets?
Yes, but grommets are the sturdiest option for most installs. Alternatives include pole pockets, where a sewn sleeve slides over a pole, and hem-and-rope setups. Adhesive or clips work for light indoor use. For any outdoor banner or anywhere the piece will bear weight or wind, grommets set into a reinforced hem give you the most secure and tear-resistant hanging points, which is why they are the default finish on our banners.
Get Started
Order fabric banners, printed in 4 business days
Order your vinyl banner with grommets already installed at the spacing your site needs. Set the size, material, and finishing and watch your price update live.
Legal Disclaimer
Gold Standard guarantees apply to all standard orders placed through 4over4.com. Price match requires verifiable proof of a competitor's published price for an equivalent product with matching specifications and turnaround time. Satisfaction guarantee covers manufacturing defects and print quality issues. Contact support with order number and documentation. On-time delivery rate based on tracked orders 1999 to 2026. Individual results may vary based on shipping carrier performance.
