Vendor Table Display Design Ideas That Drive Sales in 2026
Vendor Table Display Design Ideas That Actually Get People to Stop and Buy
Your vendor table is a storefront, a brand ambassador, and a silent salesperson - all packed into a few square feet. A smart display doesn't just hold your products. It pulls people in from across the room, tells your story in seconds, and turns casual browsers into paying customers. That's the real power behind strong vendor table display design ideas.
4OVER4 has helped 150,000+ businesses create print materials that make vendor displays pop - from branded table covers to bold signage and counter cards. With 25+ years in the printing industry and 1,000+ products available, we know what works at markets, trade shows, craft fairs, and conventions. This guide breaks down actionable display strategies you can use at your next event.
"I switched from a plain folding table to a fully branded setup with a custom tablecloth and tiered risers. My sales at craft fairs literally doubled. People walked up just because the table looked professional."
- Rachel K., Handmade Jewelry Vendor
The difference between a table people walk past and one they walk up to? Design with intention. Let's break down the strategies that make it happen.
Why Your Vendor Table Layout Matters More Than Your Product
Vendor table display design ideas aren't about decoration. They're about conversion. Research from the Event Marketing Institute shows that 74% of attendees say they're more likely to buy from exhibitors with visually engaging displays. Your layout is doing the selling before you even open your mouth.
Think about it this way. At a busy farmers market or trade show, attendees pass dozens - sometimes hundreds - of tables. You have roughly three seconds to grab their attention. A flat table covered in random products won't do it. A thoughtfully designed display with height variation, branded elements, and clear product hierarchy will.
If you're looking for branded table covers that anchor your entire setup, check out custom table covers on 4over4.com. A fitted, printed tablecloth is the single fastest upgrade you can make to any vendor display. It hides the ugly folding table legs, adds color, and screams "this person takes their business seriously."
Tiered Display Systems - Build Height, Build Interest
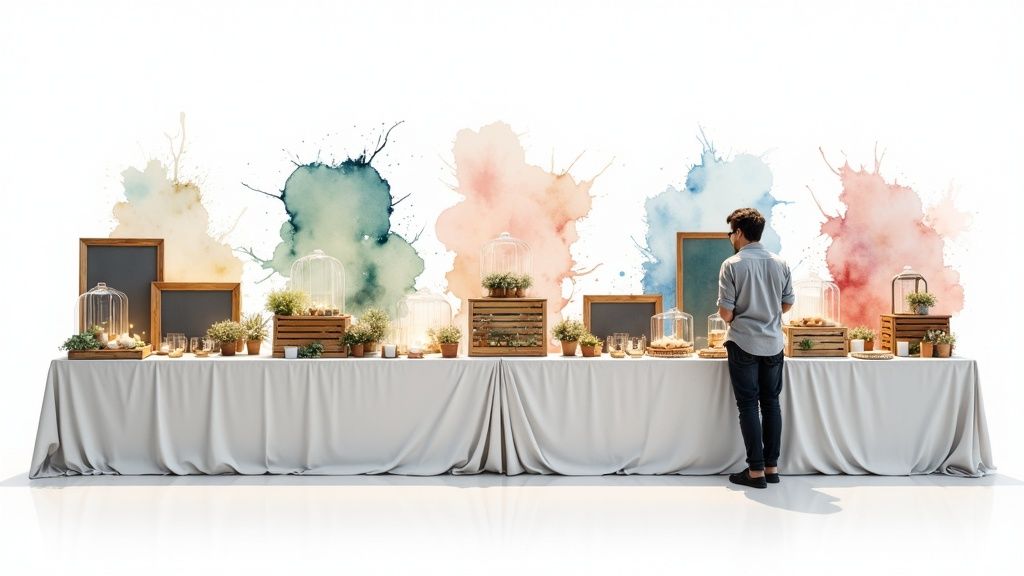
A tiered display system is one of the most effective vendor table display design ideas for adding depth and professionalism to your setup. Instead of laying products flat, you use risers, shelves, and platforms at varying heights. This guides the customer's eye upward and creates a active visual experience that feels more like a boutique than a booth.
This approach maximizes vertical space. It prevents clutter. And it gives every product its own moment in the spotlight. When you break up that horizontal plane, you create visual interest that draws shoppers in from 20 feet away.
Why Tiered Displays Convert Better
A tiered system transforms a flat, one-dimensional table into a curated, three-dimensional shopping experience. It creates hierarchy and importance. Your best-sellers sit at eye level. Smaller items don't get buried behind larger ones.
- Maximizes visibility - every product stays visible, even small items that would otherwise disappear on a flat surface
- Improves approachability - organized displays feel less overwhelming and more inviting to browse
- Creates natural product hierarchy - place high-margin items at eye level where they'll get the most attention
How to Set Up a Tiered Display
Getting started is simple. Wooden crates, acrylic stands, stacked books, or custom-built platforms all work. The key is matching your materials to your brand aesthetic. A rustic candle maker might use reclaimed wood crates. A skincare brand might use clean acrylic risers.
Use the "rule of threes" - arranging items in odd numbers looks more active and natural than even groupings. Test your setup for stability before the event. A wobbly display kills credibility fast. Museum wax or double-sided tape can secure lightweight items without leaving residue.
Place your most eye-catching products on the middle tier at natural eye level. Use lower tiers for larger, heavier items and the top tier for smaller, delicate pieces. For more ideas on creating standout printed materials for your display, browse our Printing Articles for inspiration.
Color-Coordinated Theme Displays That Stop Traffic
A color-coordinated theme is one of the most powerful vendor table display design ideas for instant brand recognition. This approach uses a select color palette across everything - products, props, tablecloth, signage, even your packaging. The result is a cohesive setup that communicates professionalism and captures attention from across any venue.
Color psychology plays a real role here. Warm tones like red and orange create urgency and energy. Cool blues and greens signal trust and calm. Your palette should match both your brand identity and the emotional response you want from customers.
Building a Cohesive Color Story
Start with your brand's primary colors. Then select two to three complementary accent colors. Apply these consistently across your tablecloth, product packaging, price tags, business cards, and any signage. The goal is that someone could photograph your table and immediately know it belongs to your brand.
If you're designing branded stickers for product packaging or giveaways, check out these Logo Sticker Design Ideas for creative approaches. Branded stickers on packaging reinforce your color scheme and give customers something tactile to remember you by.
"I color-matched my table cover, product labels, and business cards through 4OVER4. The consistency made my booth look like a real brand instead of a hobby. Multiple customers told me my table was the most professional at the market."
- David L., Artisan Hot Sauce Maker
- Limit your palette to 3-4 colors - too many colors create visual chaos instead of cohesion
- Use neutrals as a base - white, black, or natural wood tones let your brand colors pop without competing
- Coordinate packaging - bags, tissue paper, and wrapping in your brand colors extend the experience beyond the table
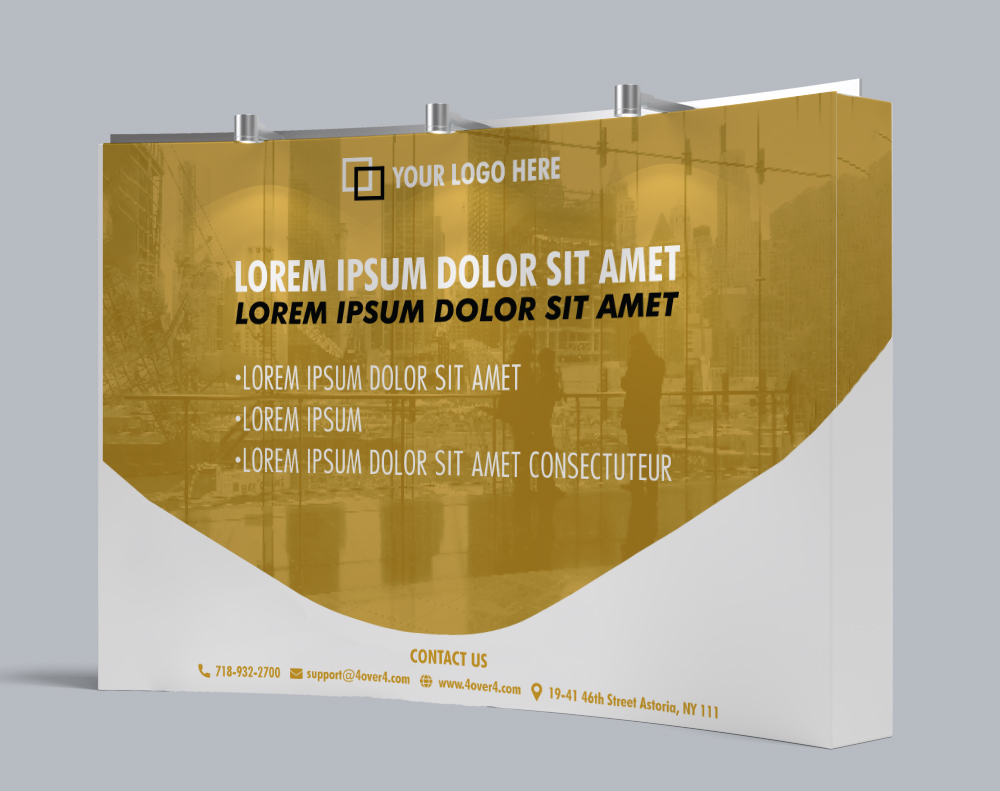
Signage and Banner Placement That Commands Attention
Your signage is doing the talking when you're busy with another customer. Strong vendor table display design ideas always include strategic sign placement - a backdrop banner, tabletop signs with product descriptions, and clear pricing. These elements work together to communicate your value proposition even when you can't.
A large backdrop banner or retractable banner stand is the single most visible element of your display. It's what people see from across the room. Keep the design clean - your logo, a tagline, and maybe one hero image. Don't cram it with text nobody will read from 30 feet away.
For backdrop options that travel well and set up in minutes, look at Fabric Tube Displays and Curve Tube Displays. Both create a professional backdrop that frames your entire table setup and gives you instant brand presence.
Tabletop Signage That Sells
Beyond the big backdrop, smaller tabletop signs do the heavy lifting for individual products. Price cards, product descriptions, and "best seller" tags guide customers through your offerings without requiring your constant attention.
Keep tabletop signs short. Product name, one key benefit, and the price. That's it. Nobody reads paragraphs at a vendor table. Use consistent fonts and colors that match your overall display theme. For countertop display options, explore point-of-sale displays on 4over4.com for professionally printed solutions.
Interactive Elements That Create Engagement
Static displays are fine. Interactive displays are better. Adding touchpoints where customers can engage with your products - samples, testers, demos, or even a simple spin wheel - increases dwell time at your table. And more time at your table means more sales.
Consider what makes sense for your product. A soap maker might offer scent testers. A jewelry designer could set up a mirror station. A food vendor might offer small samples. The interaction creates a personal connection that flat displays simply can't match.
Low-Cost Interactive Ideas
You don't need expensive tech to create interaction. A QR code linking to your Instagram or a "scan for a discount" offer works beautifully. A fishbowl for business card drops (enter to win a free product) builds your email list while creating engagement.
Printed materials play a big role here. Business cards with QR codes, small flyers with your story, or branded postcards as freebies all give people something to take home. For inspiration on business card design that makes an impression, check out Classy Business Card Design Inspiration.
Product Grouping Strategies for Maximum Sales
How you group your products on the table directly impacts what people buy - and how much they spend. Random placement forces customers to work too hard. Strategic grouping tells a story and creates natural upsell opportunities.
Group products by use case, not just by type. A skincare vendor might create a "morning routine" cluster and an "evening routine" cluster instead of just lining up all the moisturizers together. A candle maker might group by scent family or room. This approach helps customers visualize how products fit into their life.
Bundle Displays That Boost Average Order Value
Create pre-made bundles and display them together with a clear "bundle price" sign. Bundles increase your average transaction value because customers perceive them as a deal, even when the savings are modest. Display the individual prices alongside the bundle price so the value is immediately obvious.
Leave a small open area on your table for "impulse buy" items - small, low-priced products near where customers stand to pay. These are your $5-and-under items that people grab without thinking. Position them at the front edge of your table where they're easy to reach.
Lighting and Ambiance - The Details Most Vendors Skip
Lighting is the most overlooked element in vendor table display design ideas. Indoor venues often have harsh overhead fluorescent lighting that washes out colors and creates unflattering shadows. A few small LED lights can transform your display from flat to inviting.
Battery-powered LED strip lights along the back edge of your table create a subtle glow that highlights products. Small clip-on spotlights can draw attention to featured items. Fairy lights add warmth for artisan and handmade product displays. The key is that lighting should feel intentional, not accidental.
Creating Atmosphere Without Electricity
Most vendor events don't provide electrical outlets. Battery-powered and rechargeable lights are your best friends. Invest in lights with adjustable brightness so you can adapt to different venue conditions. For outdoor events, lighting matters less during the day but becomes critical as the sun goes down.
Beyond lighting, consider other sensory elements. A small essential oil diffuser (if permitted) can create an inviting scent. Textured fabrics on your table add tactile interest. Even the sound of your greeting matters - a warm "hey, take a look" beats silence every time.
Branded Print Materials That Tie Everything Together
Your physical print materials are the glue that holds your vendor table display together. Business cards, product tags, postcards, banners, and table covers all need to look like they belong to the same brand. When every printed element shares the same fonts, colors, and design language, your table looks polished and professional.
4OVER4 makes this easy with consistent color matching across all print products. Order your table cover, business cards, and signage together, and they'll all match perfectly. That kind of consistency is what separates vendors who look like they're running a real business from those who look like they threw things together last night.
For creative ideas on printed materials you might not have considered, explore these Graphic Design Portfolio Examples for layout and presentation inspiration. And if you're looking for unique greeting card ideas to include as freebies or thank-you notes, browse these Diy Greeting Card Design Ideas.
The Print Checklist for Vendor Events
Before every event, run through this checklist of printed materials. Missing even one element can make your display feel incomplete.
- Table cover - fitted and branded, hiding the folding table completely
- Backdrop banner - large format, visible from across the venue
- Business cards - thick stock, memorable finish, with your website and social handles
- Price tags and product signs - consistent design, easy to read from arm's length
- Postcards or flyers - a take-home piece with your brand story or upcoming event schedule
- Stickers - branded stickers for bags, packaging, or as freebies
If you have questions about which print products work best for your specific vendor setup, the 4OVER4 Help Center has answers on sizing, materials, and turnaround times.
Setup Day Logistics - Getting It Right When It Counts
The best vendor table display design ideas in the world won't help if your setup takes too long or falls apart mid-event. Practice your setup at home. Time yourself. The goal is to go from car trunk to fully assembled display in 30 minutes or less.
Pack everything in labeled bins or bags. Have a setup order written down - tablecloth first, then risers, then products, then signage. Bring extra supplies: tape, scissors, zip ties, a small toolkit, extra price tags, and a portable steamer for wrinkled fabric.
The Tear-Down Plan
Tear-down matters too. At the end of a long event, you'll be tired. Having a clear system for packing up prevents damage to your display materials and products. Pack fragile items first. Roll banners carefully. Store your table cover in a garment bag to keep it wrinkle-free for next time.
Take photos of your completed setup from multiple angles before the event starts. These photos serve double duty - they're your reference for next time, and they're content for your social media. A great vendor display photo can drive traffic to your next event.
"I photograph my table setup at every event and post it on Instagram the night before. It builds anticipation and drives foot traffic. People come looking specifically for my booth because they saw the display online."
- Megan T., Handmade Ceramics Artist
Here are some ready-to-use templates that can help you design your vendor table display materials quickly and professionally.
Need a starting point for your custom designs? These blank templates give you full creative control.
Blank Templates


Don't just take our word for it. Here's what real vendors are saying about their display materials.
"Ordered vendor table display design ideas from 4OVER4 and the quality blew me away. Sharp colors, premium feel, arrived 2 days early."
"Been using 4OVER4 for vendor table display design ideas for a year. Consistent quality every time. The online designer made it easy."
"Switched to 4OVER4 and saved 40% on vendor table display design ideas. Better quality than my old printer. 60+ paper options."
"4OVER4's vendor table display design ideas helped us look more professional. Clients notice the difference."
What to Remember About Building a Standout Vendor Display
Vendor table display design ideas come down to a few core principles. Height variation through tiered systems keeps products visible and creates visual interest. Color coordination across all elements - from your table cover to your business cards - builds instant brand recognition. Strategic signage placement sells for you when you're busy with other customers.
Interactive elements increase dwell time, and more time at your table means more sales. Product grouping by use case (not just product type) helps customers see how items fit into their life. Don't skip lighting - it's the most overlooked detail that separates amateur setups from professional ones.
4OVER4 offers 1,000+ products that help vendors build cohesive, branded displays, from custom table covers and banners to business cards and stickers. Practice your setup at home, photograph it for social media, and always pack a repair kit. For more creative marketing ideas, check out these Funny Print Ad Examples to spark fresh thinking for your booth signage and promotional materials.
| Display Type | Implementation Complexity 🔄 | Resource Requirements ⚡ | Expected Outcomes 📊 | Ideal Use Cases 💡 | Key Advantages ⭐ |
|---|---|---|---|---|---|
| Tiered Display System | Medium - needs risers and setup | Moderate - display materials and time | Increased visibility; professional look | Small spaces needing vertical organization | Maximizes vertical space and product visibility |
| Color-Coordinated Theme Display | Medium - color/material coordination | Moderate - coordinated props/materials | Strong brand recognition; cohesive look | Brand-focused vendors; social media appeal | Enhances brand identity and memorability |
| Interactive Demonstration Station | High - requires live demos and space | High - materials, vendor presence | Builds trust; memorable engagement | Product demos, experiential marketing | Drives sales through interaction and experience |
| Storytelling Display with Brand Narrative | Medium - visual and signage prep | Moderate - photos, signage | Emotional connection; brand loyalty | Story-driven brands; artisan products | Creates emotional ties and differentiates |
| Minimalist Clean Line Display | Medium - curated selection, lighting | Moderate - quality materials | Premium perception; reduced decision fatigue | Luxury/high-margin products | Highlights product quality elegantly |
| Seasonal/Holiday Themed Display | Medium - seasonal updates required | Moderate to high - decorations | Urgency; repeat customer interest | Holiday events and seasonal sales | Taps into seasonal shopping and trends |
| Lighting-Enhanced Display | Medium - electrical setup | Moderate - lights and equipment | Improved visibility; inviting atmosphere | Poorly lit venues; night markets | Enhances product appeal and photography |
| Multi-Functional Display Furniture | Medium to High - furniture design | High - furniture pieces | Efficient space use; practical vendor benefits | Small booths; long events needing storage | Maximizes space and vendor convenience |
- Maximizes Visibility: Every product is visible, preventing smaller items from getting lost behind larger ones.
- Improves Traffic Flow: An organized, visually appealing display is more approachable and encourages customers to stop and browse.
- Creates Visual Hierarchy: It allows you to strategically place best-sellers or high-margin items at eye level, where they are most likely to be noticed.
- Choose Your Risers: Wooden crates, acrylic stands, stacked books, or custom-made wooden platforms all work well. For a cohesive look, stick to materials and colors that align with your brand aesthetic.
- Apply the "Rule of Threes": Arranging items or display levels in odd numbers (like three or five) is often more visually appealing and dynamic than even-numbered groupings.
- Ensure Stability: Test your setup for sturdiness before the event begins. A wobbly display is unprofessional and dangerous. Use museum wax or double-sided tape to secure lightweight items if needed.
- Strategic Placement: Place your most popular or eye-catching products on the middle tier, which is typically at eye level for most customers. Use the lower tier for larger, heavier items and the top tier for smaller, delicate products.
- Reinforces Brand Identity: Consistent use of brand colors creates a strong, memorable identity that shoppers will recall long after the event.
- Creates Emotional Connection: Colors evoke specific emotions. Using color psychology can help you connect with your target audience on a subconscious level.
- Boosts "Instagrammability": A beautifully themed booth is highly shareable on social media, providing organic marketing and extending your reach beyond the event itself.
- Select a Core Palette: Choose two to three primary colors that represent your brand. Complement them with a neutral shade like white, grey, or beige to create balance and prevent the display from becoming overwhelming.
- Incorporate Your Theme Everywhere: Your color scheme should extend to your display props, packaging, business cards, and even your attire. A custom-printed table cover is an excellent foundation for your theme. You can explore a variety of options for custom table covers on 4over4.com to anchor your look.
- Use Texture and Materials: Enhance your color theme with textures that align with your brand. A rustic food vendor could use burlap and wood, while a modern jewelry maker might opt for sleek acrylic and rose gold metal.
- Consider Seasonal Updates: Keep your display fresh by subtly updating your theme with seasonal colors or props. This encourages repeat customers to see what's new at your booth.
- Boosts Engagement: It stops traffic by providing an activity, encouraging shoppers to linger longer at your booth.
- Educates Customers: A live demonstration is often the clearest and most persuasive way to explain how a product works or what makes it special.
- Drives Sales: Allowing customers to try a product creates a sense of ownership and makes them more likely to make a purchase on the spot.
- Schedule Demonstrations: Plan your demos for peak traffic times to maximize viewership. Announce the schedule on a small sign to build anticipation.
- Keep It Tidy: A clean, organized demonstration area is crucial. Have cleaning supplies on hand and reset the station between each demonstration to maintain a professional appearance.
- Prepare Your Pitch: Develop a concise 30 to 60-second "elevator pitch" to deliver during the demonstration, highlighting the key benefits and features of your product.
- Delegate Roles: If possible, have an assistant handle sales and answer questions from the crowd while you focus on the demonstration. This ensures no potential customer is ignored.
- Gather Feedback: This is a great opportunity to collect customer feedback. You can use custom notepads to jot down comments or capture email addresses for follow-ups. You can discover more about customized notepads on 4over4.com.
- Creates an Emotional Connection: Stories resonate with people on a deeper level, making your brand more memorable than competitors.
- Justifies Premium Pricing: When customers see the craftsmanship, high-quality materials, or ethical practices involved, they better understand the value of your products.
- Builds Brand Authenticity: Sharing your unique journey differentiates you from mass-produced alternatives and fosters a sense of trust.
- Keep It Concise and Visual: Use high-quality photos, infographics, or even a short video loop on a tablet. For example, a farm-to-table vendor could display large, vibrant photos of their farm and growing process.
- Use Professional Signage: A well-designed sign or banner can succinctly tell your origin story or mission. For a more polished look, you can explore professional printing for custom vinyl banners to showcase your brand narrative.
- Show, Don't Just Tell: Let your materials and props do the talking. A crafter could show a "before and after" of their raw materials turning into a finished product, while a family-run bakery might feature vintage photos and handwritten recipe cards.
- Focus on the Customer: Frame your story around the benefits to the shopper. Instead of saying, "I started this business in my garage," try, "Handcrafted from my home studio to bring unique, artisanal quality directly to you."
- Elevates Perceived Value: The clean, uncluttered presentation makes products feel more luxurious and high-quality.
- Reduces Decision Fatigue: By showcasing fewer items, you help customers focus and avoid feeling overwhelmed, which can lead to easier purchasing decisions.
- Highlights Craftsmanship: It puts the spotlight directly on the intricate details, materials, and design of your products.
- Curate Ruthlessly: Do not try to show your entire inventory. Select only your best-sellers, highest-margin items, or a cohesive collection. For example, an artisan soap maker might feature just three signature scents on individual white pedestals.
- Invest in Quality Materials: Use sleek, high-quality display props. Think matte acrylic blocks, polished metal stands, or fine-grain wood in a neutral finish. Avoid cheap plastic or cluttered-looking materials.
- Embrace Negative Space: Don't be afraid of empty space on your table. This "white space" is a design element itself, giving your products room to breathe and drawing the eye toward them.
- Use Strategic Lighting: A single, well-placed spotlight can transform a simple product into a work of art. Use small, battery-powered LED spotlights to create focused highlights and dramatic shadows.
- Creates Urgency and Relevance: A seasonal theme connects your products to a specific time of year, encouraging immediate purchases.
- Boosts Emotional Connection: Tapping into the festive or cozy feelings associated with a season helps build a stronger bond with customers.
- Keeps Your Display Fresh: Regularly changing your theme prevents your booth from looking stale and gives repeat customers something new to see each time.
- Plan Ahead: Begin sourcing decorations and planning your layout 4-6 weeks before the season or holiday. This prevents last-minute scrambling and ensures you have a cohesive look.
- Invest in Versatile Decor: Choose items that can be adapted for multiple seasons. For example, a set of string lights can be used for a cozy winter market, a summer night fair, or a festive holiday event. Neutral-colored crates can be filled with pumpkins in the fall and faux snow in the winter.
- Integrate, Don't Overwhelm: Weave seasonal elements into your display rather than letting them take it over. A few well-placed pumpkins, some pine garland, or a color palette of reds and pinks for Valentine's Day is often more effective than a complete decorative overhaul. Ensure your branding and products remain the main focus.
- Tailor to the Event: Consider the specific event and its audience. A local fall festival might call for rustic, harvest-themed decor, while a chic urban holiday market may require a more modern and minimalist festive approach.
- Creates Ambiance: Warm lighting can make a space feel cozy and inviting, encouraging shoppers to linger longer.
- Enhances Product Appeal: Good lighting makes products pop. For example, it can make jewelry sparkle, bring out the rich colors in artwork, and highlight the fine craftsmanship of handmade goods.
- Draws Attention: A bright, well-lit table is a magnet for eyes in a crowded hall, pulling customers to your display from across the room.
- Choose the Right Lights: For most products, warm white LEDs (around 3000K) create a welcoming glow. Jewelry vendors can use cool white LEDs to maximize sparkle. Battery-powered puck lights, flexible LED strips, and clip-on spotlights are all excellent, portable options.
- Position for Impact: Place lights to eliminate shadows and illuminate key product features. Run LED strips along the inside edges of shelves or crates. Use small spotlights to highlight your hero products. For a technical guide on integrating linear lighting, learning about professional under cabinet lighting installation can provide transferable skills.
- Come Prepared: Always bring backup batteries, power banks, and extension cords. Test your complete lighting setup at home to ensure everything works and you know how to assemble it quickly on-site.
- Consider Light Boxes: For a truly professional look, integrating branded light boxes can elevate your signage and product displays, ensuring they are seen even in the busiest environments. You can learn more about creating custom light boxes at 4over4.com.
- Maximizes Space Efficiency: It allows you to get the most out of every square inch, combining display, storage, and utility into a single footprint.
- Enhances Professionalism: A clean, uncluttered booth free of visible storage boxes and personal bags presents a more polished and inviting brand image.
- Improves Vendor Experience: Having integrated storage and a place to sit reduces physical strain, allowing you to stay energized and focused on customers.
- Choose Your Pieces: Look for storage ottomans that can act as display platforms and seating, foldable display cases with hidden storage compartments, or nesting tables that can be stacked or spread out as needed. A simple bench can display products and hold backstock underneath.
- Prioritize Mobility: If you frequent different venues, select furniture with wheels or pieces that are lightweight and collapsible. This makes setup, breakdown, and repositioning much easier.
- Maintain Brand Cohesion: Ensure the furniture’s style, material, and color align with your brand aesthetic. A rustic wooden chest works for a handmade brand, while sleek metal and glass pieces suit a modern one.
- Test Functionality: Before a big event, do a trial run with your setup. Make sure drawers open easily, lids are simple to lift, and the pieces are stable enough to hold your products securely. For related point-of-sale setups that complement this approach, you can explore various options for a cohesive look. Learn more about point-of-sale displays on 4over4.com.
Start with a Strong Foundation: Begin with a Tiered Display System as your structural base. This immediately breaks the flat, boring plane of the table, creating height and drawing the eye upward. Pair this with a striking, high-quality printed table cover that establishes your Color-Coordinated Theme. This combination alone sets a professional and visually organized stage.
Layer in Your Brand's Personality: Next, decide on your primary engagement strategy. Are you product-focused or story-focused? If your products are best understood through use, integrate an Interactive Demonstration Station as your centerpiece. If your brand's origin or mission is your key differentiator, weave in elements of a Storytelling Display using custom-printed signage, brand timelines, or QR codes linking to your story.
Refine with Professional Accents: The final layer is about polish and atmosphere. This is where a Lighting-Enhanced Display can dramatically elevate the mood and spotlight your hero products. Even simple, battery-powered puck lights or clip-on spotlights can make a world of difference. Complement this with Multi-Functional Display Furniture, like a vintage suitcase or wooden crates, to add texture and reinforce your brand’s aesthetic, whether it's rustic, modern, or whimsical.
Free Vendor Table Display Templates

Common Questions About Designing Your Vendor Table Display
What are the best practices for vendor table display design ideas?
Start with a branded table cover that hides the folding table completely. Build height with tiered risers so every product stays visible. Keep your color palette to 3-4 colors max. Place your best-selling items at eye level and add clear pricing signs. Use Custom Counter Cards for product descriptions that sell when you're busy with other customers.
How do I choose the right vendor table display design ideas for my products?
Match your display style to your brand personality and product type. Handmade goods look great with rustic wood risers and warm lighting. Tech accessories need clean, modern acrylic displays. Food products benefit from sample stations and bold signage. Consider your typical venue size and setup time when planning. The Help Center can guide you on sizing for printed display materials.
What makes vendor table display design ideas effective for marketing?
Effective displays combine visual appeal with strategic product placement. A cohesive brand look builds trust instantly - customers associate professional displays with quality products. Interactive elements like QR codes and sample stations increase engagement time. Printed Event Badges for yourself and any team members add another layer of professionalism that builds customer confidence.
How much should I budget for vendor table display design ideas?
A solid starter display runs $150-$300 for a custom table cover, retractable banner, business cards, and basic risers. Mid-range setups with professional signage, lighting, and branded packaging materials land between $400-$700. Invest in durable, reusable elements first - a quality table cover and banner will last dozens of events, making the per-event cost minimal.