Quick Bookmark-Making Takeaways
Learning how to make bookmarks starts with picking the right paper stock, sizing your design to standard dimensions (2"x6" or 2"x7"), and choosing a finish that holds up to daily use. 4OVER4.COM offers 1,000+ products and has printed over 10 billion cards and print materials since 1999. Whether you're crafting bookmarks for a bookstore, school fundraiser, or personal branding, the process is simpler than you think.
Bookmarks
Starting from $16.48
Free Design Templates:
Your Starting Point for Custom Bookmarks
Bookmarks are one of those print products people actually keep. They sit inside a favorite novel for months, sometimes years. That makes them a surprisingly powerful branding tool, a memorable gift, or a creative outlet.
This guide walks you through how to make bookmarks from scratch - from design concepts and file setup to paper selection and professional printing. You'll learn what separates a flimsy DIY bookmark from one that feels like it belongs in a boutique bookshop. Need inspiration? Browse the Showcase to see real customer designs in action.
And if you're the type who loves hands-on projects, you might also enjoy our guide on Custom Magnets Faq for another creative print project.
Here's a look at the bookmark products 4OVER4.COM offers to get your wheels turning:
| Quantity | Price Per Unit |
|---|---|
| 500 | $1.97 |
| 1,000 | $1.10 |
| 3,000 | $0.66 |
| 10,000 | $0.41 |
Ink Color
Effect
Number of Flips
Effect Direction
Hole Drilling
Tassels
Rounded Corners
Proof Options
Ink Color
Finish
Rounded Corners
Variable Data (Codes, Names, Etc.)
Hole Drilling
Total Sets
Proof Options
A Step-by-Step Walkthrough for Making Bookmarks
Step 1: Define Your Bookmark's Purpose
Before you open any design software, ask yourself one question. What's this bookmark for? The answer shapes everything - size, paper, finish, even the artwork style.
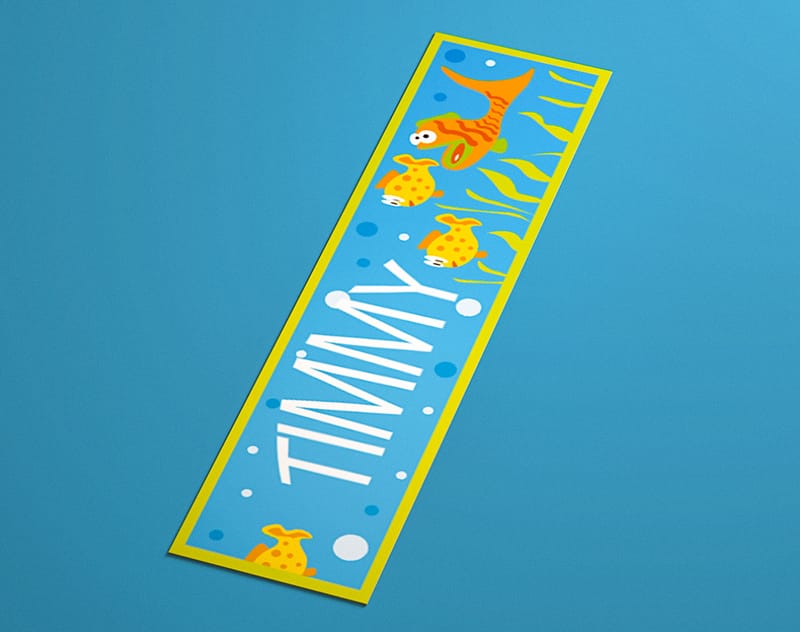
Promotional bookmarks for a business need your logo, contact info, and maybe a QR code linking to your website. Literary bookmarks for a bookshop might feature quotes, illustrations, or reading lists. Fundraiser bookmarks for a school could showcase student artwork. Event bookmarks double as keepsakes from weddings, conferences, or book signings.
Knowing the purpose first saves you from redesigning halfway through. It also helps you pick the right quantity. A wedding favor run might be 150 pieces. A trade show giveaway could be 2,500+.
Step 2: Choose Your Bookmark Size
Standard bookmark sizes fall into a few common ranges. The most popular is 2" x 6", which fits comfortably in most paperback and hardcover books. A slightly taller 2" x 7" gives you more design real estate. Some people go wider at 2.5" x 7" for a chunkier feel.
If you're designing for children's books, a shorter 2" x 5" works well. For oversized art books or coffee table editions, consider going up to 2.5" x 8.5". The key is matching the bookmark to the book it'll live in.
Custom die-cut shapes are another option. Rounded corners, tapered ends, or completely custom silhouettes add a tactile surprise. Just keep in mind that unusual shapes cost a bit more and need careful file setup. Check the Faq Hub for detailed file preparation tips across all print products.
Step 3: Pick Your Paper Stock and Finish
Paper choice makes or breaks a bookmark. Too thin, and it bends and curls within a week. Too thick, and it won't slide between pages without cracking the spine.
Here's what works best:
- 14pt cardstock - a solid everyday option. Sturdy enough to last, thin enough to sit flat between pages. Think credit card thickness.
- 16pt cardstock - a step up in rigidity. Great for bookmarks that need to feel premium without being bulky.
- 32pt ultra-thick stock - makes a statement. These bookmarks feel hefty, almost like mini art prints. Best for luxury branding or collector editions.
For finishes, you've got options that change both the look and the durability:
- Gloss lamination - adds a shiny, protective coating. Colors pop. Resists fingerprints and moisture. Perfect for photo-heavy designs.
- Matte lamination - smooth, velvety feel. Subdued elegance. Works beautifully with minimalist typography and muted color palettes.
- Soft-touch lamination - that silky, almost suede-like texture people can't stop rubbing. Seriously, it's addictive. Ideal for high-end bookmarks.
- Spot UV - selective glossy coating on specific design elements. Your logo shines while the background stays matte. Eye-catching contrast.
- Uncoated - a natural, papery feel. Great for bookmarks with a handmade or eco-friendly aesthetic.
If you've worked with print finishes before - say, when learning How To Fold A Brochure - you'll recognize these options. The same finish logic applies to bookmarks.
Step 4: Design Your Bookmark
Now the fun part. You can design bookmarks using professional tools like Adobe Illustrator or InDesign, or go the simpler route with Canva or 4OVER4.COM's own design templates.
Design tips that actually matter:
- Set your document to the correct dimensions plus 0.125" bleed on all sides. Bleed prevents white edges after trimming.
- Keep text and important elements at least 0.125" inside the trim line (the safety zone).
- Use CMYK color mode, not RGB. Print uses CMYK. What looks bright on screen might look dull in RGB-to-CMYK conversion.
- Export as a high-resolution PDF at 300 DPI minimum. Anything lower looks fuzzy when printed.
- Embed all fonts or convert text to outlines so nothing shifts during production.
If you're designing double-sided bookmarks, treat each side as its own composition. Front side: the attention-grabber. Back side: the information or secondary design. Don't cram everything onto one face.
For design inspiration across different print formats, the Showcase gallery features real customer work across dozens of product types.
Step 5: Add Special Features
Plain bookmarks are fine. But special features turn a good bookmark into something people actually talk about.
3D lenticular printing creates that flip-image or animation effect when you tilt the bookmark. It's attention-grabbing at trade shows and unforgettable as a gift. Kids especially love them.
Free Design Templates:
Foil stamping adds metallic gold, silver, or copper accents. A foil-stamped title or border catches light and screams premium.
Rounded corners soften the look and prevent dog-earing. They also feel better in your hand.
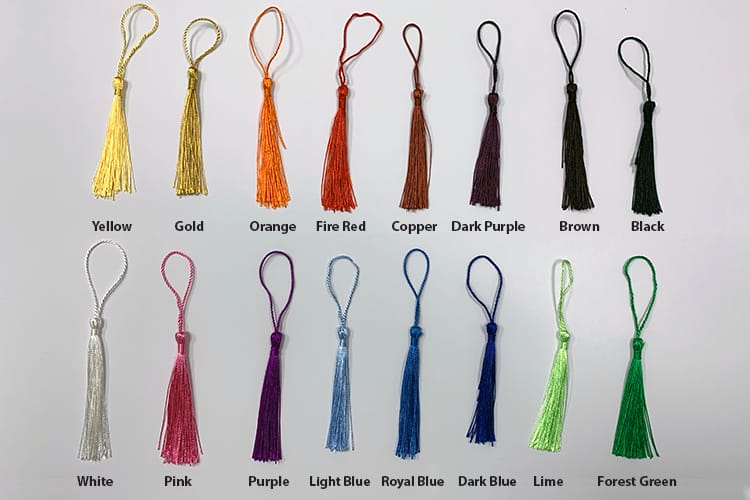
Tassels and ribbons aren't part of the print process, but they're easy to add yourself after delivery. A simple tassel through a hole punch turns a printed bookmark into a gift-ready product. Similar creative touches apply when you're figuring out How To Make Envelopes for packaging those bookmarks.
Step 6: Prepare Your Print File
File prep is where most bookmark projects go sideways. Here's your checklist:
- Final size plus 0.125" bleed on each side
- 300 DPI resolution
- CMYK color mode
- Fonts embedded or outlined
- No RGB images lurking in your layout
- Saved as press-ready PDF (PDF/X-1a or PDF/X-4)
If you're designing for double-sided printing, make sure front and back are properly aligned in your file. Most printers want them as separate pages in a single PDF. 4OVER4.COM's upload system walks you through this, but getting it right beforehand saves time.
The same file prep principles apply across print products. If you've ever set up files for How To Make Flyers, you already know the drill.
Step 7: Choose Your Printing Method
Two main options here. Digital printing works best for short runs (under 500 pieces). It's fast, affordable, and handles variable data if you want each bookmark to be slightly different.
Offset printing shines for larger runs (500+). The per-unit cost drops a lot at higher quantities, and color consistency is rock-solid across thousands of pieces.
4OVER4.COM handles both methods. For most bookmark orders, digital printing hits the sweet spot of speed and quality. If you're printing bookmarks alongside other materials - like Custom Booklets for a reading program - bundling your order can save on shipping.
Step 8: Review and Order
Before you hit "order," take one more look. Print a test copy on your home printer at actual size. Hold it. Does the text read clearly? Are the margins comfortable? Does the design work at bookmark scale?
Upload your final file, select your paper stock and finish, choose your quantity, and place the order. 4OVER4.COM's proofing system lets you review a digital proof before production starts, so you catch any issues early.
"I ordered 500 gloss laminated bookmarks for our indie bookstore's anniversary. The colors were saturated and vivid, and every single one came out identical. Our customers kept asking where we got them."
- Rachel K., ★★★★★
For more hands-on printing knowledge, including care tips for your tools, check out How To Clean Rubber Stamps.
Here's some real customer bookmark work and ready-to-use templates to jump-start your project:
Blank Templates
Bookmark Mistakes That Waste Your Money
Even experienced designers trip up when making bookmarks. Here are the most common errors to avoid:
Ignoring bleed. If your design runs to the edge but your file has no bleed, you'll get uneven white borders after trimming. Always add 0.125" bleed.
Using RGB instead of CMYK. That electric blue on your screen? It'll print as a muddy teal. Convert everything to CMYK before exporting.
Choosing paper that's too thin. Anything under 12pt will bend, curl, and look cheap within days. Stick to 14pt or thicker for bookmarks that last.
Overcrowding the design. A bookmark is narrow. You don't have room for a paragraph of text, three images, and a QR code. Pick one focal point per side.
Forgetting the safety zone. Text too close to the trim edge gets cut off. Keep all important content 0.125" inside the trim line. 4OVER4.COM's templates have these guides built in, which eliminates guesswork.
Best 4OVER4.COM Bookmark Products for Your Project
Once you know how to make bookmarks, picking the right product is the final step. 4OVER4.COM carries standard Bookmarks, Gloss Laminated Bookmarks, and 3D Lenticular Bookmarks - each suited to different needs and budgets.
Need them fast? 4OVER4.COM offers Same Day Printing on select products so tight deadlines don't derail your project.
Here are the available bookmark products, pricing, specs, and customer reviews:
Free Design Templates

Ink Color
Effect
Number of Flips
Effect Direction
Hole Drilling
Tassels
Rounded Corners
Proof Options
Common Questions About Making Bookmarks
What's the best paper thickness for custom bookmarks?
14pt to 16pt cardstock works best for most bookmarks. It's rigid enough to hold its shape between book pages without being so thick it damages the spine. For luxury or collectible bookmarks, 32pt ultra-thick stock adds a premium, hefty feel that stands out.
What size should I make my bookmarks?
The standard bookmark size is 2" x 6", which fits most paperback and hardcover books. A 2" x 7" option gives you extra space for designs or text. For children's books, 2" x 5" is a good fit. Always match the bookmark size to the type of book it'll be used with.
Can I print bookmarks on both sides?
Yes. Double-sided printing is standard for most bookmark orders. Use the front for your main design or artwork, and the back for contact information, a reading list, a quote, or secondary branding. Just make sure both sides are properly aligned in your PDF file.
What file format should I use for bookmark printing?
Submit a press-ready PDF at 300 DPI in CMYK color mode. Include 0.125" bleed on all sides and keep text within the safety zone. PDF/X-1a or PDF/X-4 formats work best. If you have questions about file setup, visit the Help Center for detailed guides.
What's the difference between gloss and matte laminated bookmarks?
Gloss lamination gives bookmarks a shiny, reflective surface that makes colors look vivid and saturated. Matte lamination creates a smooth, non-reflective finish with a softer, more understated look. Both add durability and protect against moisture and fingerprints.
How do 3D lenticular bookmarks work?
3D Lenticular Bookmarks use a special ribbed plastic overlay that shows different images depending on the viewing angle. You can create flip effects, animation sequences, or 3D depth illusions. They're popular for promotional giveaways, children's products, and collectible items because the motion effect grabs attention instantly.