Quick Guide: Laminated Business Cards That Last
Learning how to make laminated business cards starts with choosing the right card stock, finish, and lamination type. 4OVER4.COM has printed over 10 billion cards for more than 150,000+ businesses, so you're in good hands. Gloss lamination adds shine and color pop. Silk lamination gives a smooth, muted texture. Velvet lamination creates a soft, tactile feel. Each finish protects against water, scratches, and daily wear - keeping your card looking sharp for months.
Why Laminated Business Cards Beat Standard Prints
A standard business card bends, smudges, and fades. A laminated one doesn't. That's the short version. The longer version? Lamination seals your card between protective layers, making it resistant to moisture, fingerprints, and general abuse. It also adds a professional finish that people notice the second they touch it.
If you're figuring out how to make laminated business cards, you've got options. Gloss for vivid color. Silk for understated elegance. Die-cut for creative shapes. You can browse real customer work on the Showcase to see what's possible. Need inspiration beyond cards? Check out the guide on Custom Magnets Faq for another fun print project.
| Quantity | Price Per Unit |
|---|---|
| 500 | $0.35 |
| 1,000 | $0.22 |
| 3,000 | $0.15 |
| 5,000 | $0.13 |
Ink Color
Spot UV
Die Cutting
Proof Options
4OVER4.COM makes the process simple. Pick your lamination type, upload your artwork or start from scratch using Design Templates, and let professional presses handle the rest. Here's a look at the most popular laminated card styles available:
Ink Color
Spot UV
Rounded Corners
Total Sets
Proof Options
Step-by-Step: Designing and Ordering Laminated Business Cards
Step 1 - Pick Your Lamination Finish
This is the decision that shapes everything else. Your lamination finish determines how the card looks, feels, and holds up over time. Here's what to know about each option.
Gloss lamination is the go-to for bold, colorful designs. It amplifies saturation and adds a reflective sheen. Real estate agents, photographers, and restaurants love it because images and logos really pop. The surface is smooth and slightly slippery - think magazine cover.

Free Design Templates:
Silk lamination sits between matte and gloss. It's smooth to the touch with a subtle satin finish that doesn't reflect light. This works well for text-heavy designs or brands going for a modern, understated look. Consultants, architects, and tech startups tend to gravitate here.

Silk Laminated Business Cards
Starting from $74.53
Free Design Templates:
Velvet lamination is the premium pick. It feels soft - almost like suede. People don't just look at a velvet card. They rub it between their fingers. That tactile response creates a memorable moment, and that's exactly what you want from a business card. It's popular with luxury brands, spas, and high-end services.
Die-cut lamination takes things further by cutting the card into custom shapes. Rounded corners, leaf shapes, guitar outlines - whatever fits your brand. If you want to see what creative shapes look like in real life, check out 3D Lenticular Business Cards for another eye-catching format.
Free Design Templates:
Step 2 - Choose Your Card Stock and Size
Lamination goes on top of your card stock, so the base material matters. Thicker stock creates a more rigid, big card. A 14pt stock works for budget-friendly runs. A 16pt stock feels like a credit card. And 32pt? That's three times the thickness of a standard card - hefty, sturdy, and impossible to ignore.
Standard business card size is 3.5 x 2 inches. That's what fits in wallets and card holders. But you can go with square cards, slim cards, or oversized formats if your brand calls for it. Just keep in mind that non-standard sizes might not fit in a standard cardholder - which can be a feature or a drawback depending on your strategy.
When setting up your file, include a bleed area of 0.0625 inches on each side. This prevents white edges after trimming. Keep all important text and logos at least 0.125 inches from the trim line.
Step 3 - Design Your Card
You don't need to be a graphic designer. 4OVER4.COM offers free design templates that you can customize with your logo, contact info, and brand colors. Upload your own design if you've got one, or start from a blank canvas.
A few design tips specific to laminated cards:
- Use high-resolution images - 300 DPI minimum. Lamination magnifies imperfections, so blurry photos look worse under gloss.
- Go bold with color - gloss lamination makes colors richer. Take advantage of that with saturated hues and strong contrast.
- Keep text readable - silk and velvet finishes soften the look slightly. Use fonts at 8pt or larger for body text.
- Consider both sides - a laminated card feels premium, so make the back count. Add a tagline, QR code, or secondary branding element.
- Export as PDF - CMYK color mode, 300 DPI, with bleed marks. This is the safest format for print-ready files.
Blank Templates


If you're working on other print projects alongside your cards, the guide on How To Make Flyers walks through a similar design process. And for branded stationery, How To Make Envelopes covers matching your card design to envelope prints.
Step 4 - Upload and Proof Your Design
Once your file is ready, upload it through the 4OVER4.COM ordering system. You'll get a digital proof showing exactly how your laminated business card will look after printing and trimming. Check for typos, alignment, and color accuracy before approving.
This step catches mistakes before they become 250 printed mistakes. Take your time with it. Zoom in on phone numbers and email addresses - those are the most common error spots.
"I ordered silk laminated cards for my architecture firm and the proof caught a misaligned logo I'd missed in three rounds of editing. Saved me from a costly reprint."
Marcus L., ★★★★★
Step 5 - Select Quantity and Turnaround
Order what you need. Most professionals start with 250 or 500 cards. Larger runs drop the per-card price a lot. If you're testing a new design, a smaller batch lets you gauge reactions before committing to thousands.
Turnaround times vary by product and finish. Standard production takes a few business days. Need them faster? 4OVER4.COM maintains a 99.8% on-time delivery rate, and 82% of orders ship early. You can browse more resources and print guides at the Faq Hub if you want to plan your timeline.
DIY Lamination vs. Professional Printing
Can you laminate business cards at home? Technically, yes. You'd need a pouch laminator, laminating pouches, and pre-printed cards. Feed each card into a pouch, run it through the machine, and trim the excess.
Here's the honest truth though. Home lamination works for ID badges and quick labels. For business cards, the results rarely match professional output. Common issues include:
- Bubbles and wrinkles from uneven heat distribution
- Peeling edges that look unprofessional within weeks
- Inconsistent thickness because pouch lamination adds bulk unevenly
- Limited finish options - you won't get silk or velvet from a home laminator
Professional lamination bonds directly to the card stock during printing. There's no pouch, no trimming, and no bubbles. The finish is uniform edge to edge. If your cards represent your business, professional lamination is worth the investment.
For maintaining your other office supplies, the guide on How To Clean Rubber Stamps has practical tips. And if you're producing marketing materials alongside your cards, How To Fold A Brochure covers brochure production from start to finish.
When to Use Each Lamination Type
Matching your lamination to your industry and audience makes a difference. Here are practical scenarios:
Real estate agents hand out cards constantly - at open houses, in mailboxes, tucked into folders. Gloss lamination protects against moisture and handling while making property photos on the card look vivid and sharp.
Beauty salon owners benefit from velvet lamination. The soft texture mirrors the sensory experience of their services. Clients remember how the card felt, which reinforces the brand.
Startup founders networking at tech events often go with silk lamination. It's modern, clean, and doesn't scream "look at me" - it whispers "I'm worth your attention."
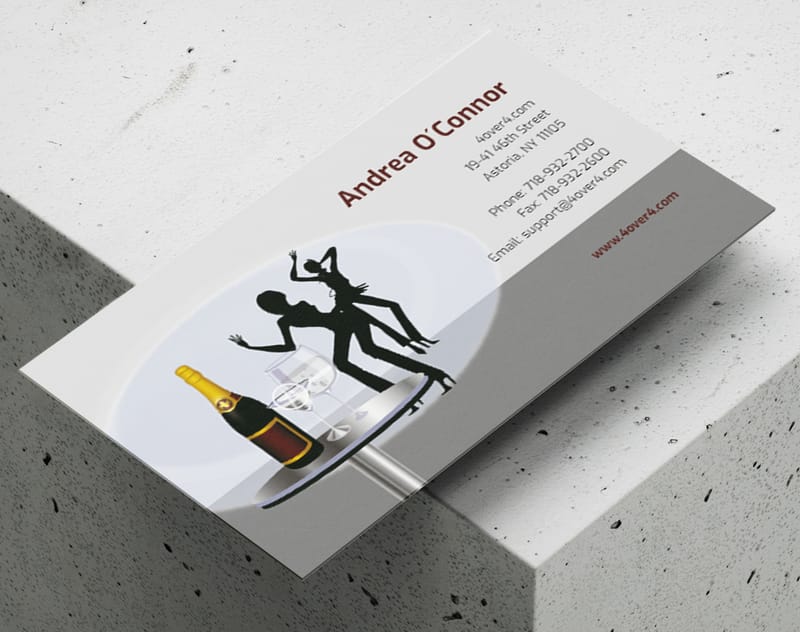
Event planners can use die-cut laminated cards shaped like tickets, champagne glasses, or stars. These double as conversation starters and rarely get thrown away.
Want to see real examples from 4OVER4.COM customers? The Showcase features laminated card designs across dozens of industries.
Here are some design templates to get you started with your laminated business cards:
Mistakes That Ruin Laminated Business Cards
Even a great design can fall flat if you skip the details. Here are the most common errors people make when creating laminated business cards - and how to avoid them.
- Skipping the bleed area. Without proper bleed, you'll get thin white lines along the edges after trimming. Always extend your background 0.0625 inches past the trim line.
- Using low-resolution images. Lamination sharpens everything - including flaws. Anything below 300 DPI will look pixelated under gloss.
- Choosing the wrong finish for the design. Dark, photo-heavy designs look best with gloss. Minimalist, text-forward designs work better with silk or velvet.
- Ignoring the back of the card. A laminated card feels premium on both sides. Leaving the back blank wastes half your real estate.
- Not ordering a proof. 4OVER4.COM provides digital proofs for a reason. Approve one before your full run prints. It takes two minutes and prevents expensive reprints.
These mistakes are easy to fix before you order. Take the extra five minutes during setup - your finished cards will show the difference.
Best Laminated Business Cards to Order at 4OVER4.COM
Ready to put this guide into action? 4OVER4.COM offers multiple laminated business card products, each designed for a specific look and feel. Whether you want the vivid shine of gloss, the refined texture of silk, or a custom die-cut shape, there's a match for your brand.
- Glossy Lamination
- Matte Lamination
- Soft-Touch Lamination
- Butterfly pouches allow for borderless lamination and are ideal for achieving polished edges.
- Self-sealing laminating pouches are great for quick jobs, as they don’t require a laminator. These are also acid-free, protecting your cards from fading and damage.
Need your cards fast? Same Day Printing is available on select products so you're never stuck waiting. Here's a breakdown of available options, specs, and pricing:
Free Design Templates


Your Laminated Business Card Questions, Answered
What's the difference between gloss and silk lamination on business cards?
Gloss lamination adds a shiny, reflective finish that makes colors look more vivid. Silk lamination creates a smooth, matte-like surface with a subtle sheen. Gloss works best for photo-heavy or colorful designs. Silk suits minimalist layouts and text-forward cards. Both protect against water, scratches, and daily handling.
Can I laminate business cards at home?
You can use a pouch laminator at home, but results won't match professional quality. Home lamination often creates bubbles, peeling edges, and uneven thickness. Professional lamination from 4OVER4.COM bonds directly to the card stock during production, giving you a uniform finish with no trimming needed.
How thick are laminated business cards?
Thickness depends on the base card stock. A 14pt stock is standard weight. A 16pt stock feels similar to a credit card. A 32pt stock is about three times the thickness of a standard card. Lamination adds a thin protective layer on top without a lot increasing overall thickness.
Will lamination affect the colors on my business card?
Yes, but in a good way. Gloss lamination intensifies colors and adds depth. Silk and velvet lamination slightly soften colors, creating a more muted, sophisticated look. Design your card with the finish in mind - bold colors for gloss, subtle tones for silk or velvet.
What file format should I use for laminated business cards?
Submit your design as a PDF in CMYK color mode at 300 DPI with bleed marks included. This format ensures accurate color reproduction and clean trimming. 4OVER4.COM also accepts AI, PSD, and EPS files if you're working in professional design software.
How many laminated business cards should I order?
Most professionals start with 250 to 500 cards. Larger quantities lower the per-card cost. If you're testing a new design or just launched your business, a smaller batch lets you gather feedback before committing to a bigger run.
Do laminated business cards work with spot UV or foil?
Yes. Spot UV adds a raised glossy accent on specific areas of a matte or silk laminated card - like your logo or name. Foil stamping in gold, silver, or other metallic colors pairs well with velvet lamination for a high-end look. These finishes layer on top of the lamination.