Quick Takeaways: Cricut Sticker Making
Learning how to make stickers with Cricut starts with the right sticker paper, a clean design file, and proper cut settings. You'll use Cricut Design Space to upload or create your artwork, then let the machine handle precise cuts. 4OVER4 has helped 150,000+ businesses turn designs into professional print products across 1,000+ product types. Whether you're crafting at home or scaling up, these steps get you there.
Your Starting Point for Cricut Sticker Projects
"Standard Stickers /5"
| Quantity | Price Per Unit |
|---|---|
| 25 | $0.96 |
| 600 | $0.13 |
| 5,000 | $0.07 |
| 25,000 | $0.05 |
Ink Color
Rounded Corners
Total Sets
Proof Options
Making stickers with a Cricut machine is one of the most satisfying DIY projects you can tackle. The machine does the hard part - cutting around your designs with precision that scissors can't match. You design it, print it on sticker paper, and let the Cricut kiss-cut or die-cut each piece.
"Roll Stickers /5"
Corner Specs
Lamination
Applied By
Applied To
Core Diameter
Unwind Position
Proof Options
This guide walks you through every step of how to make stickers with Cricut, from choosing materials to troubleshooting common issues. If you're into other hands-on print projects, check out our guides on Custom Magnets Faq and How To Make Envelopes for more inspiration. 4OVER4 has printed over 10 billion+ cards and products, so we know a thing or two about getting print right.
"Sticker Sheets /5"
Diecut Options (Stickers/Labels Only)
Ink Color
Finish
Die Cutting
Total Sets
Proof Options
Before diving in, here's a look at the professional sticker options available when you're ready to scale beyond your Cricut.
Step-by-Step: Making Stickers With Your Cricut Machine
Making stickers with a Cricut isn't complicated once you understand the workflow. It's a print-then-cut process. You design or upload artwork, print it on your home printer, then load the printed sheet into your Cricut for precision cutting. Let's break down every stage.
What You Need Before You Start
Gather your supplies first. You'll need a Cricut machine (Explore Air 2, Explore 3, Maker, or Maker 3 all work), printable sticker paper (glossy or matte), an inkjet printer, a Cricut cutting mat (light grip works best), and a weeding tool. That's the core kit.
For sticker paper, you've got two main options. Glossy sticker paper gives your designs a shiny, bright look - great for colorful illustrations and photo-based stickers. Matte sticker paper has a softer finish that's easier to write on and doesn't show fingerprints. Both come in white and clear varieties.
If you want waterproof stickers, look for vinyl sticker paper rated for inkjet printers. Standard paper stickers work fine for planners, journals, and indoor use. Outdoor stickers for water bottles and laptops need that vinyl upgrade. For a broader look at creative print projects, visit our Faq Hub for dozens of how-to guides.
Designing Your Stickers in Cricut Design Space
Open Cricut Design Space and start a new project. You can design directly in the software, upload your own images, or use Cricut's built-in image library. For uploaded designs, PNG files with transparent backgrounds work best.
Here's the key step most people miss: flatten your design. When you flatten layers in Design Space, you're telling the Cricut "print this as one image, then cut around it." Without flattening, the machine tries to cut each layer separately. That's a mess you don't want.
To flatten, select all elements of your sticker design, then click "Flatten" at the bottom of the Layers panel. Your design should now appear as a single "Print Then Cut" layer. The software automatically adds registration marks that your Cricut reads to align cuts perfectly.
Size matters here. Cricut's Print Then Cut feature has a maximum printable area of 9.25 x 6.75 inches for most machines. The Cricut Maker 3 and Explore 3 with updated firmware can handle slightly larger areas. Plan your sticker sheet layout within these boundaries.
Want to add a bleed area? Offset your cut line slightly outside the design edge. This prevents tiny white borders caused by minor alignment shifts. In Design Space, you can add an offset by selecting your image, clicking "Offset," and choosing a small positive value. If you enjoy creative layout work, you might also like our guide on How To Fold A Brochure.
Printing Your Sticker Sheet
Click "Make It" in Design Space. The software prompts you to send the design to your printer first. Use your inkjet printer's best quality setting. Cheap print quality means fuzzy stickers.
Load your sticker paper into the printer with the printable side facing the correct direction (check your printer manual - it varies). Print a test page on regular paper first. Hold it up against the sticker paper to confirm alignment before committing your good stock.
Let the ink dry completely. This takes 5-10 minutes depending on your printer and paper type. Glossy paper takes longer. If you load a wet sheet into your Cricut, the ink smears and your mat gets ruined. Patience pays off here.
For extra durability, apply a thin layer of clear laminate over your printed sheet before cutting. This adds water resistance and prevents ink from scratching off. You can use self-adhesive laminate sheets or a spray sealant. Not required, but it makes a noticeable difference for stickers that get handled a lot.
Cutting Settings and Loading the Mat
Place your printed sticker sheet on the Cricut cutting mat with the printed side facing up. Smooth it down gently to avoid air bubbles. The registration marks (those black lines the printer added around your design) need to be fully visible and not covered by the mat's edge.
In Design Space, select your material. For most sticker papers, choose "Sticker Paper" or "Printable Vinyl" from the materials list. If your specific paper isn't listed, "Washi Paper" or "Light Cardstock" often works as a starting point. The goal is a kiss cut - the blade cuts through the sticker layer but not the backing paper.
Load the mat into your Cricut and press the flashing button. The machine scans the registration marks with its sensor, aligns itself, then cuts. Don't bump the machine during this process. Even small vibrations can throw off alignment.
After cutting, unload the mat. Carefully peel away the excess sticker material around your designs (this is called weeding). A weeding tool - basically a sharp hook - makes this much easier than using your fingers. Your stickers are now ready to peel and stick.
Blank Templates

Kiss Cut vs. Die Cut: Which Should You Choose?
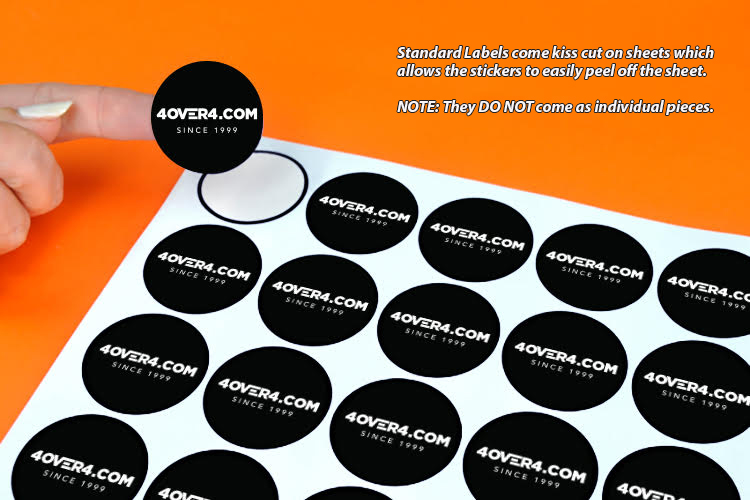
Kiss cuts slice through the top sticker layer only, leaving the backing sheet intact. This is the standard approach for sticker sheets where multiple stickers sit on one page. Peel them off individually when you're ready to use them.
Die cuts go all the way through both layers, giving you individual stickers with no backing sheet border. These are better for single stickers you plan to hand out or package individually. On a Cricut, you achieve die cuts by increasing the pressure setting or using a deeper blade.
For professional-grade Custom Die Cut Stickers at scale, 4OVER4 handles the heavy lifting with commercial-grade equipment. But for small batches and personal projects, your Cricut handles both cut types well.
Tips for Better Sticker Quality
Your stickers are only as good as your design file. Use 300 DPI resolution minimum for crisp prints. Anything lower looks pixelated up close. Vector files (SVG format) scale perfectly at any size, so use those when possible.
Color calibration between your screen and printer matters more than you'd think. What looks vivid on your monitor might print dull or shifted. Print a color test sheet first. Adjust your printer's color settings or tweak your design's saturation until the output matches your vision.
Clean your Cricut mat regularly. Dust, paper fibers, and sticker residue build up over time and reduce stickiness. A lint roller works wonders. When the mat loses grip entirely, replace it. A sticker that shifts mid-cut means a ruined sheet. Speaking of keeping tools clean, our guide on How To Clean Rubber Stamps covers similar maintenance principles.
Replace your blade when cuts start looking ragged or the machine tears instead of slicing cleanly. A fresh blade makes a dramatic difference. Most Cricut blades last through several hundred cuts, but sticker paper dulls them faster than regular cardstock.
Scaling Up: When to Go Beyond Your Cricut
A Cricut is perfect for small batches - 10, 50, maybe 100 stickers at a time. But if you're selling stickers online, packaging products, or running a business, you'll hit a wall. Cutting one sheet at a time gets old fast.
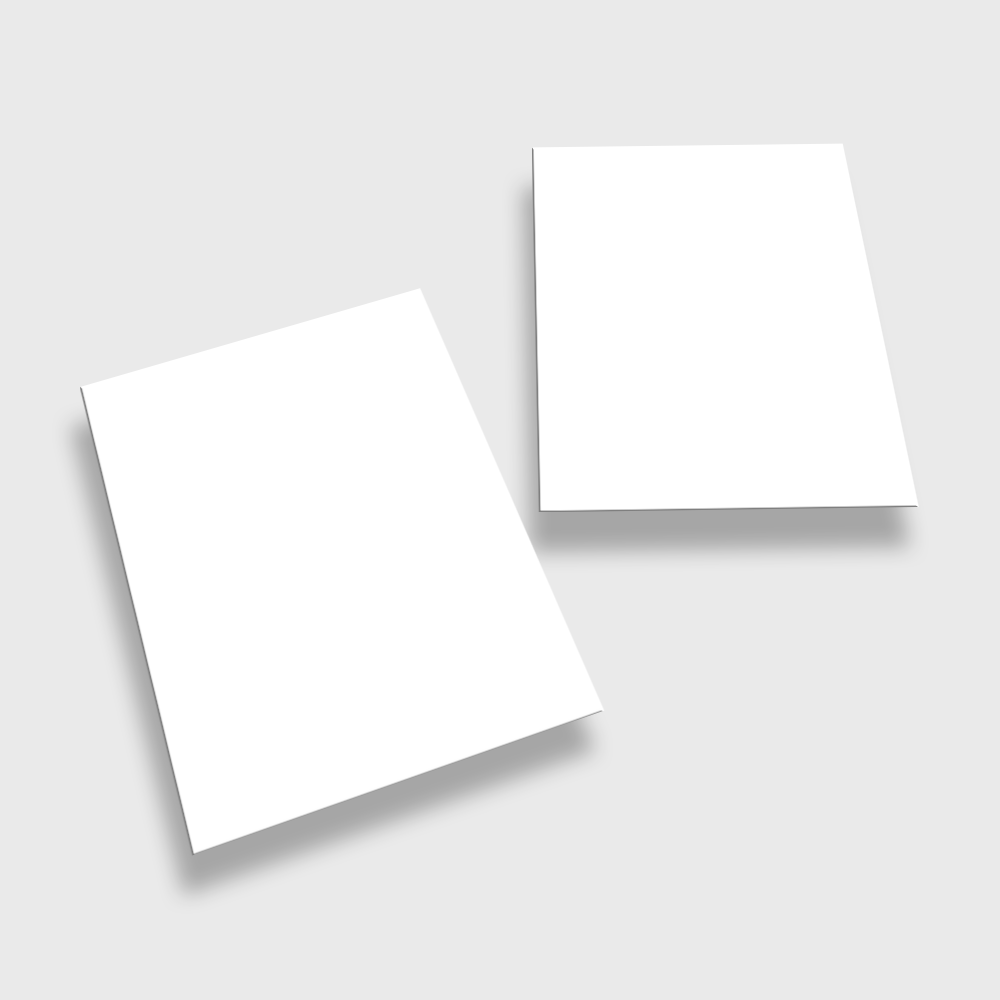
That's where professional printing comes in. 4OVER4 offers stickers on premium materials with commercial-grade adhesives that hold up outdoors, in dishwashers, and through years of use. You can order Free Samples to compare the quality difference yourself. For design prep, grab our Blank Templates to make sure your files are print-ready.
Many sticker makers start with a Cricut for prototyping, then move to professional printing for production runs. It's a smart workflow. Test your designs at home, refine them based on real feedback, then order in bulk when you know what sells. If you're also creating promotional materials, our guide on How To Make Flyers covers another popular print project.
"I started making stickers on my Cricut Maker for my Etsy shop. Once orders picked up, I switched to 4OVER4 for production runs and kept the Cricut for testing new designs. Best of both worlds."
- Megan L., Etsy shop owner
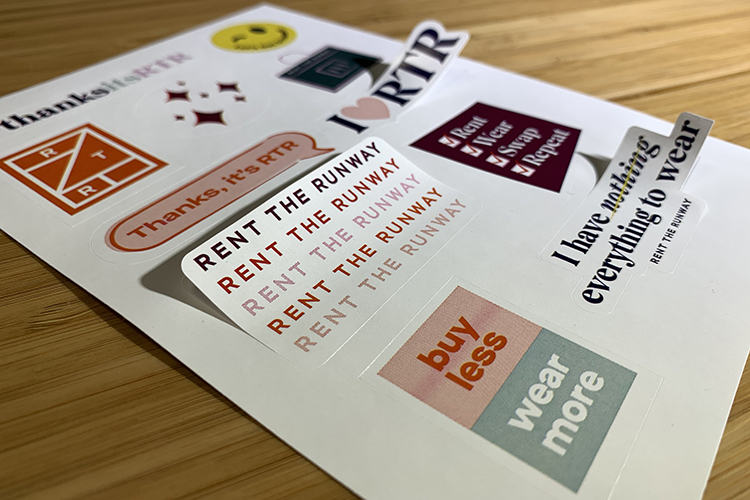
Here are some industry insights and creative examples to inspire your next sticker project.
Mistakes That Ruin Cricut Sticker Projects
Forgetting to flatten layers. This is the number one mistake. If you don't flatten your design in Cricut Design Space, the machine tries to cut each element separately instead of treating it as one print-then-cut image. Always flatten before clicking "Make It."
Loading wet prints onto the mat. Inkjet ink on glossy sticker paper needs time to dry. Rush this step and you'll smear your design across the cutting mat. Give it a full 10 minutes.
Using the wrong material setting. Selecting "Vinyl" instead of "Sticker Paper" changes the blade pressure. Too much pressure cuts through the backing. Too little leaves stickers that won't peel cleanly. Test on a small area first.
Ignoring registration mark placement. If your printed sheet is crooked on the mat or the registration marks are partially hidden, the Cricut can't align its cuts. Place sheets straight and keep marks fully visible.
Skipping the test cut. 4OVER4 recommends always running a test cut on scrap material before committing a full sticker sheet. One wasted test piece saves an entire sheet of expensive sticker paper.
Professional Sticker Options When You're Ready to Scale
Once you've mastered how to make stickers with Cricut at home, scaling up with 4OVER4 is the natural next step. Professional printing gives you access to weatherproof vinyl, custom shapes, and bulk pricing that home machines can't match.
- Manual Sticker Makers: Ideal for transforming materials like die cuts, ribbon, and photos into stickers. These are accessible tools without requiring complex setups. Check our stickers section for diverse ideas.
- Cutting Machines for Stickers: Machines such as Cricut, Silhouette, and Brother can create intricate designs and cut both die-cut and kiss-cut stickers. Explore our standard stickers for straightforward solutions.
If you're exploring eco-conscious options, check out 4OVER4's Green Printing program. And if you're planning events alongside your sticker projects, grab Free Invitations to round out your print materials. You can also order Free Invitations as a promotional add-on to complement any sticker campaign.
"Ordered how to make stickers with cricut from 4OVER4 and the quality blew me away. Sharp colors, premium feel, arrived 2 days early."
"Been using 4OVER4 for how to make stickers with cricut for a year. Consistent quality every time. The online designer made it easy."
"Switched to 4OVER4 and saved 40% on how to make stickers with cricut. Better quality than my old printer. 60+ paper options."
"4OVER4's how to make stickers with cricut helped us look more professional. Clients notice the difference."
Here's a look at specifications, products, pricing, and what real customers say about 4OVER4 stickers.
Free Design Templates
Sticker Making With Cricut: Your Questions Answered
What type of sticker paper works best with a Cricut?
Printable vinyl sticker paper designed for inkjet printers gives the best results. Glossy versions produce vivid colors, while matte finishes reduce glare and fingerprints. For outdoor or waterproof stickers, use vinyl-based sheets rated for moisture resistance. Always confirm your paper is compatible with your printer type before buying in bulk.
Can I make waterproof stickers with a Cricut?
Yes. Use printable vinyl sticker paper and apply a clear laminate overlay after printing. The laminate seals the ink and adds a waterproof barrier. Without laminate, inkjet ink can smudge or fade when exposed to water. This combination works well for water bottle stickers, outdoor labels, and product packaging.
What's the maximum sticker size a Cricut can cut?
Cricut's Print Then Cut feature supports a maximum printable area of 9.25 x 6.75 inches on most machines. Updated firmware on the Maker 3 and Explore 3 may allow slightly larger areas. For stickers bigger than this, you'll need to cut manually or use a professional printing service like 4OVER4.
Why does my Cricut tear sticker paper instead of cutting it cleanly?
A dull blade is the most common cause. Replace your fine-point blade if cuts look ragged or the paper catches. Also check that you've selected the correct material setting in Design Space. Too much pressure tears the paper, while too little leaves incomplete cuts. A fresh blade and proper settings solve this almost every time.
How do I make kiss-cut sticker sheets with a Cricut?
Select "Sticker Paper" as your material in Cricut Design Space. This setting applies just enough blade pressure to cut through the top sticker layer without slicing the backing sheet. After cutting, weed away the excess material to reveal individual peel-and-stick stickers on one sheet. It's the same technique professional sticker sheets use.
Is it cheaper to make stickers at home or order them professionally?
For small batches under 50 stickers, home Cricut production is usually cheaper. Once you need hundreds or thousands, professional printing from 4OVER4 drops the per-sticker cost a lot and saves hours of manual cutting. Factor in your time, ink costs, and sticker paper expenses when comparing.