
How to Order Large Banner Printing That Prints Sharp at Full Size


Tobias is our voice for cutting, binding and large format, built from the knowledge of our production team, with over 20 years in printing.
Measure the mounting point, choose a material that suits the weather, respect the roll width that caps a single piece panel, and build the file for the distance people will actually stand at. Do those four things and a big banner is an easy order.
Large banner printing is wide format printing onto roll material such as scrim vinyl, mesh, or fabric, finished with hems, grommets, or pole pockets so it can hang. Order it in this sequence: measure the usable opening at the mounting point, pick the material for the environment and the lifespan, confirm whether the width fits one unbroken panel or needs a welded seam, then supply a CMYK file built at scale for the viewing distance.

Start here
Opening, material, roll width, file
A large banner is printed from a roll, not a sheet, and every rule follows from that. Length is generous because the roll keeps feeding, width is capped by the roll itself, so anything wider arrives welded from panels or hangs as matching sections. Material choice comes from the environment: scrim vinyl outdoors, mesh where wind is a factor, blockout for double sided, fabric indoors. Resolution comes from viewing distance, not habit. Finishing comes from the hardware already on site.
Material and sizes
Large format banner material and sizes
Three roll materials cover most large banners, and each comes in its own size range. Vinyl for outdoor signs, perforated mesh where wind hits a fence or scaffold, and polyester fabric for indoor backdrops. Each also takes an any size option, and all three ship with the grommets, hems and pole pockets you set on the order form.
| Banner | Material | Standard sizes | Starts at |
|---|---|---|---|
| Vinyl Banners | 13oz. Outdoor Vinyl or 15oz. BlackOut Vinyl | 2 x 4 ft to 8 x 20 ft | $79 for one, 3 business days |
| Mesh Banners | 8oz. Perforated Vinyl | 24 x 72 to 48 x 144 in | $75 for one, 3 business days |
| Fabric Banners | 5oz Economy or 9oz Premium Polyester | 24 x 72 to 48 x 144 in | $57.20 for one, 4 business days |
Why most large banner orders go wrong before the file reaches the press

The complaint is almost never about ink. It is a banner that arrived four inches too wide for the fence rail, grommets that landed where the bungee cords could not reach, or a logo that looked crisp on a laptop and turned into soft edges once it was ten feet across. None of those are printing errors. They are ordering errors, made before anyone clicked upload.
Large banner printing has its own physics. The press pulls from a roll, so width behaves differently from length. Enlargement multiplies every flaw in a placed image. Wind treats a solid sheet like a sail. Once you know those three rules, the rest of the order is straightforward, and a large format print can go from measurement to hung sign without a single reprint. This guide walks the order in the sequence the shop floor actually uses, and the infographic further down condenses it into one frame you can keep beside your tape measure.
What large banner printing actually covers
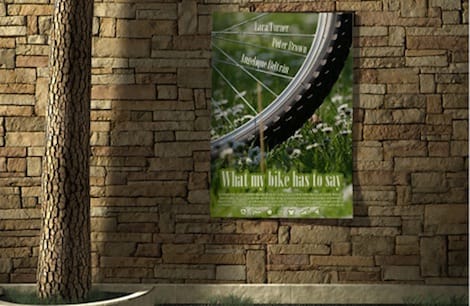
Large banner printing means wide format output onto flexible roll material rather than cut sheets. The printer feeds a continuous roll of scrim vinyl, mesh, or fabric past the print heads, then cuts, hems, and finishes the piece so it can hang. That single difference is why banners reach sizes no sheet press can touch, and why the roll width matters more than any other number in the order.
The category is broader than one product. It covers hanging vinyl banners on fences and building faces, step and repeat backdrops for press walls, mesh for windy sites, indoor fabric backdrops, and portable retractable stands that carry the same artwork into a trade show booth. They share a workflow: measure the space, choose a material for the environment, prepare art at scale, then pick finishing that matches the hardware. If you are weighing a step and repeat build specifically, the step and repeat banner comparison covers the layout rules that keep logos out of the crop.
Measure the mounting point before you touch the artwork

Take the tape to the actual spot. Measure the clear opening between posts, the height from the ground to the lowest obstruction, and the distance from the ceiling grid or truss to the floor. Write down the usable rectangle, not the wall. A twelve foot fence panel with a two inch rail on each side gives you a banner that is a bit narrower than twelve feet, and that difference is the whole job.
Then subtract for the attachment method. Bungee cords and zip ties need room to reach anchor points, so a banner sized flush to the frame leaves nothing to pull against. Most installers give up two to four inches of slack per side. Pole pocket banners lose height to the sleeve itself, usually three to four inches top and bottom depending on the pole diameter you plan to slide through.
Sanity check the number against sight lines. A banner mounted high needs taller type than one at eye level, and a sign hung above a doorway competes with everything else on that wall. If the space is awkward, an indoor banner stand at a fixed footprint often beats forcing a hanging banner into a place it was never meant to go.
Materials: scrim vinyl, mesh, blockout, and fabric

Thirteen ounce scrim vinyl is the standard. The scrim is a woven grid laminated between vinyl layers, and it is what keeps a grommet from tearing loose in the first storm. It prints bright, folds for shipping, and handles seasons outdoors. For long term installs or double sided work, heavier eighteen ounce and blockout grades add opacity so the printing on the back does not ghost through the front.
Mesh is scrim vinyl with holes. It gives up a little color density and gains a lot of survivability, because wind passes through instead of pushing against a solid sheet. Use it on chain link fences, scaffolding, rooftops, and anywhere a solid banner would act like a sail. Fabric, usually a smooth polyester, is the indoor choice: it does not glare under booth lighting, it packs into a bag without creasing badly, and it photographs cleanly behind people.
Match the material to lifespan, not to price. A one weekend event banner does not need blockout, and a year long storefront sign should not be built on the thinnest option available. If you are comparing shops on stock weights and finishing rather than on sticker price, the Printmoz comparison lays out what actually differs once the specs are side by side.
Real size limits, seams, and when a banner becomes panels

Here is the number most guides skip. A wide format press prints from a roll, so the roll width caps one dimension of any single piece banner. Common roll widths in the industry run around five feet and again around ten feet. Length is the generous direction, because the roll simply keeps feeding, which is why a three foot by forty foot street banner is routine while a fourteen foot tall single piece drop is not.
Cross that limit and there are two honest answers. The printer can heat weld two printed panels along a seam, producing one piece that reads as continuous from any normal viewing distance. Or the art is split into matching panels that hang side by side with a deliberate reveal between them. Welded banners look better up close. Panels ship smaller, store easier, and let you replace one section instead of the whole sign. Our guide on how to store and transport vinyl banners without damage covers rolling those panels between events.
Design for the seam rather than against it. Keep faces, logos, and headlines off the weld line, treat the gap between panels as part of the composition, and expect a small tolerance in finished dimensions on very large pieces since vinyl moves with temperature. Building a fence run or an event perimeter from several matched pieces is standard practice, and the outdoor event banner guide shows how those installs are usually staged.
Resolution at scale: the file math that keeps big art sharp

Three hundred pixels per inch is a sheet printing habit, and applying it to a banner produces a file no software wants to open. The honest rule is that required resolution falls as viewing distance grows, because the eye cannot resolve detail it is standing too far away to see. Set the number by where the audience stands, then build once and stop worrying.
Practical targets: art viewed within a few feet, such as a booth backdrop people walk up to, is comfortable near 150 pixels per inch at final size. Art read from ten to twenty feet, which covers most fence and storefront banners, holds up at roughly 100. A rooftop or highway piece nobody gets close to can go well below that without visible softness. Those are working targets, not laws, so lean higher when the art is photographic.
When the full size document gets unwieldy, build it at one tenth scale and multiply the resolution by ten: a ten foot banner becomes a twelve inch file at 1000 pixels per inch, which prints identically and opens in seconds. Keep logos, type, and rules in vector so they scale without pixels at all, convert color to CMYK before export, outline or embed fonts, and add bleed so the hem does not eat your border. Raster photos are the only elements that truly need the resolution math. For a standard banner size, start the file from a blank banner template at that size instead of drawing the document from scratch.
Finishing and hardware: hems, grommets, and pole pockets

Finishing is what turns a printed sheet into something you can hang. A welded hem folds and heat seals the edge so the banner does not fray and the grommets have doubled material to bite into. Skip the hem on an outdoor piece and the first strong wind starts a tear at the nearest corner. Reinforced corner patches are cheap insurance on anything larger than a few feet.
Grommets are usually set on a regular interval, commonly every two to three feet along the hem plus one in each corner. Tell the printer the spacing you need if your existing frame has fixed anchor points, because a grommet that lands two inches off a hook is the same as no grommet at all. For pole pockets, state the finished pocket depth so the sleeve clears the pole and the hardware you already own actually slides through.
Then plan the tension. Bungee cords and zip ties allow the banner to move slightly in gusts, while rope pulled bar tight transfers every load straight into the grommets. On a windy site, mesh plus generous grommet spacing beats a solid banner cinched down hard. Every one of these choices costs nothing extra at order time and everything later if it is wrong.
Indoor banners and stands when there is nothing to hang from

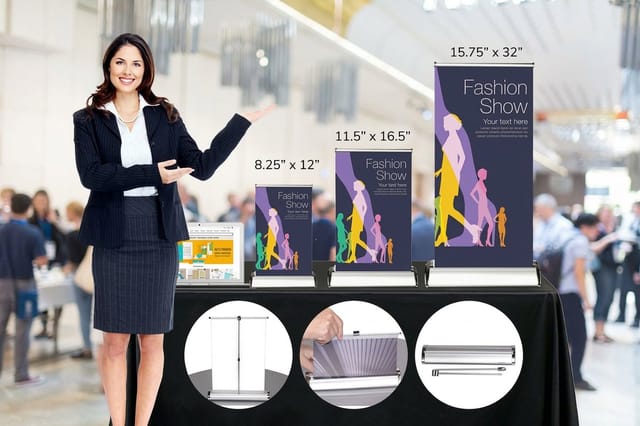
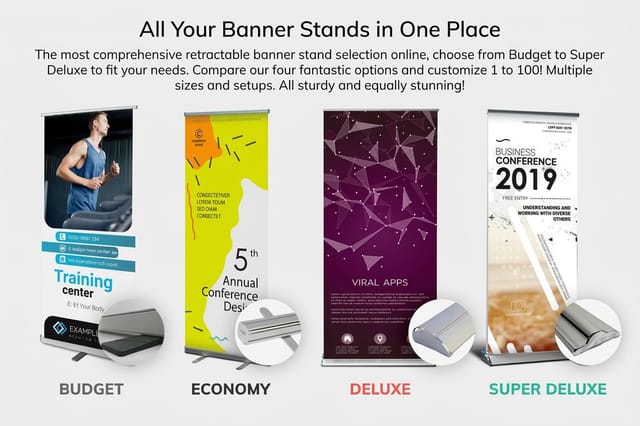
Half the banner requests that reach a print shop are not really hanging banners. They are a booth, a lobby, a conference table, or a pop up shop where nobody is allowed to drill into the wall. A retractable stand solves that: the printed panel lives inside a weighted cassette, pulls up against a support pole in under a minute, and rolls back down into its own travel case at the end of the day.
Full size Retractable Banner Stands start at $139 and carry a floor standing panel meant to be read from across a room, which makes them the default for trade shows, conference registration, and storefront entries. Mini Retractable Banner Stands start at $49.41 and sit on a counter or table, which is the right scale for menus, product callouts, and a sales desk where a full height sign would be absurd.
Design them differently from a hanging banner. The bottom several inches sit near knee height behind a table, so keep essential information in the upper two thirds. Use one message per stand rather than a poster full of copy. And check the stand comparison in the retractable banner alternative breakdown before you buy hardware you will be carrying to events for years.
The file prep checklist that survives a ten foot enlargement

Run this list before you upload and the preflight desk will have nothing to send back. Build the document at final size or at a clean scale fraction. Convert everything to CMYK, because a screen bright RGB blue has no ink equivalent and will shift on its own if you leave the conversion to someone else. Embed or outline every font. Flatten transparency effects that depend on a specific rendering engine.
Add bleed on all four sides so the hem fold has material to consume, and pull critical content into a safe margin well inside the trim. On grommeted banners, keep type and logos at least a couple of inches away from the edge, since a grommet punched through a letter is a permanent mistake. Export a single flattened PDF rather than a packed layout folder, and name the file with the finished dimensions so nobody has to guess.
Then set the finishing fields the order form asks for. On Vinyl Banners you choose 13oz. Outdoor Vinyl or 15oz. BlackOut Vinyl, grommets at the corners only or every 2 feet, hems on the top and bottom or all 4 sides, and 2 or 4 inch pole pockets top and bottom or left and right, then a free online proof or straight to production. Standard sizes run from 2 x 4 feet to 8 x 20 feet, one banner starts at $79, and standard production is 3 business days.
Last, look at the art at actual scale before approving. Print a small section at full size on a desktop printer, tape it to the wall, and step back to the real viewing distance. That thirty second test catches soft photos, timid type, and low contrast color combinations far more reliably than zooming around on a monitor does.
How to order, what it costs, and how the schedule works

Ordering runs in the same sequence every time: confirm the measured size, pick the material for the environment, choose finishing that matches your hardware, upload a print ready file, then check the live turnaround before you commit. Doing it in that order means no step contradicts an earlier one, which is exactly how reprints get avoided.
Cost tracks square footage first. Because area is width times height, a modest bump in both dimensions moves the price more than people expect, so a size chosen with a tape measure is also a size chosen with a budget. Large Format Posters start at $25, which makes them the low commitment way to test artwork at scale before you commit to a full outdoor build, and quantity is the other big lever: the same file repeated across locations drops the unit price, which is what bulk discounts are for. On schedule, remember that production days start when the file passes preflight, not when you place the order, so a clean upload is the fastest shipping upgrade available. If you are cross shopping vinyl specifically, the vinyl banner comparison puts the specs next to the price.
Wally explains big banners
Measure the frame, then design the banner
Wally starts every banner job at the wall, not at the keyboard. He tapes the usable opening, subtracts a few inches for the bungee cords, checks whether the width still fits one seamless panel, and only then opens the file. Material comes from the weather, resolution comes from how far back people stand, and grommet spacing comes from the hooks already bolted to the fence.
Configure large format printing →
Infographic
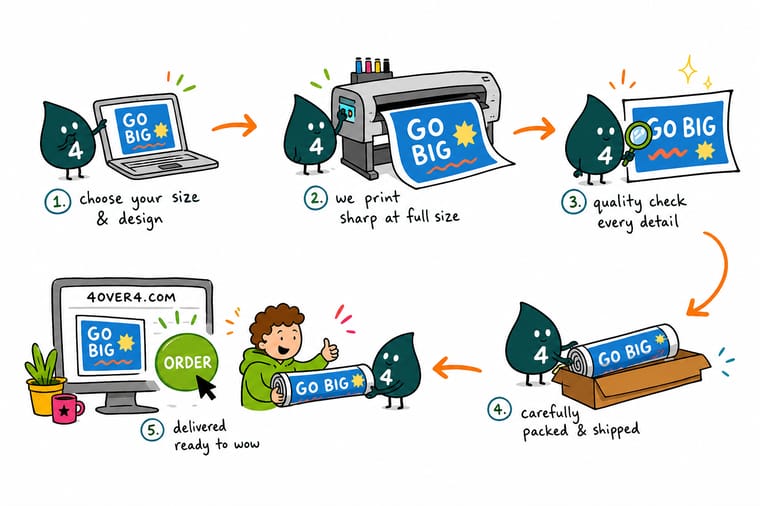
The 7 steps of a large banner order at a glance
Seven steps in the order a print shop works through them: measure the usable opening, pick 13oz vinyl, mesh or fabric, check the width against one unbroken panel, set about 150 pixels per inch for close viewing or 100 for ten to twenty feet, choose hems, grommets every 2 feet or pole pockets, export a CMYK PDF with bleed, then proof and ship. Send it to whoever is holding the tape measure.
The steps are sequential for a reason. Every answer narrows the next one, and the two that people reverse most often, size and material, are the two that force a reprint when they are guessed.
Specs and pricing
Large format specs and live pricing
When the measurements and the material are settled, the numbers below are the ones that decide the invoice. Check the size options against your measured opening before you configure the order.

| Quantity | Price Per Unit | Total |
|---|---|---|
| 1 | $25.00 | $25.00 |
Print it
Large format and banner display products at 4OVER4
See it in use
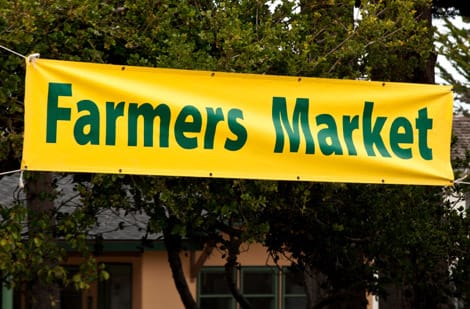
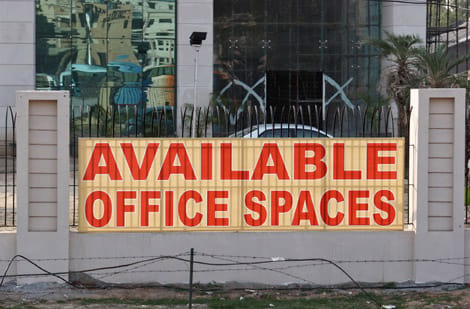
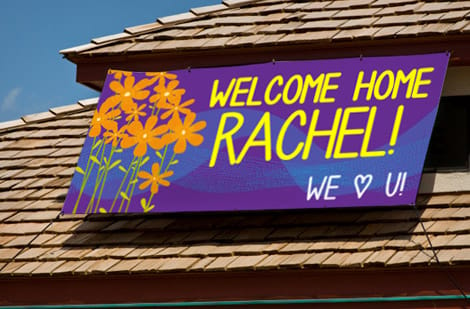
Large format banners printed from customer files




Explore more
Where to go next

By the numbers
Paper and media types behind a full size banner
Common Questions
Common questions about large banner printing
What is large banner printing?
Large banner printing is wide format printing onto flexible roll goods such as scrim vinyl, mesh, or fabric, at sizes a sheet press cannot reach. The press prints from a continuous roll rather than cut sheets, which is why length is generous and width is capped by the roll. The finished piece is hemmed, grommeted, or sewn with a pole pocket so it can hang from a wall, fence, truss, or stand.
Where does it hang, and for how long?
Start with three answers: where it hangs, how long it stays up, and how close people stand. An indoor trade show sign that travels every month belongs on a retractable stand. A fence banner for a weekend event belongs on standard scrim vinyl with grommets. A rooftop or open fence run in wind belongs on mesh. Once the location and lifespan are set, the material, the finishing, and the file resolution all follow from them.
What does large banner printing cost and how are prices set?
Price is driven by square footage first, then by material weight, finishing, and quantity. Doubling the width and the height quadruples the area, so a modest size change moves the number more than most people expect. Hardware is priced separately from print, which is why Retractable Banner Stands start at $139 while Mini Retractable Banner Stands start at $49.41. Larger runs of the same file drop the unit cost sharply.
What sizes, stocks, and finishes are available for large banner printing?
Common outdoor stock is 13 ounce scrim vinyl, with 18 ounce and blockout grades for heavier duty or double sided work, mesh for windy sites, and smooth polyester fabric for indoor backdrops that should not glare under lights. Finishing options usually include a welded hem on all four sides, grommets on a regular spacing, reinforced corners, and sewn pole pockets top and bottom. Sizes run from small rail signs up to full building drops built in panels.
How long does large banner printing take to print and ship?
Turnaround has two halves: production and transit. Production is quoted in business days after your file passes preflight, and a file that needs a fix restarts that clock, so upload print ready art the first time. Transit depends on the ship method and the distance, and oversized rolled tubes travel as freight-friendly parcels rather than flats. Order by the live turnaround shown on the product page rather than by the calendar in your head.
Can a banner be printed wider than the press roll?
Yes, in two ways. The printer can weld two printed panels along a seam so the banner reads as one piece, or the art can be split into matching panels that hang side by side with a deliberate gap. Welded seams are stronger and nearly invisible from a distance, while separate panels are easier to ship, store, and replace one at a time.
What resolution should a large banner file be?
Work backward from viewing distance rather than from a fixed number. Art read from a few feet away wants roughly 150 pixels per inch at final size, art read from ten to twenty feet is comfortable near 100, and a highway or rooftop piece is fine much lower. When the full size file becomes unmanageable, build it at one tenth scale with the effective resolution multiplied by ten and keep every logo, rule, and type block in vector.
Get Started
Measure the opening, then set the material and the finishing
Bring your measurements and your artwork to 4OVER4.COM. Configure the size, pick the material for where it hangs, and let our preflight team check the file before it goes to press.
Legal Disclaimer
Gold Standard guarantees apply to all standard orders placed through 4over4.com. Price match requires verifiable proof of a competitor's published price for an equivalent product with matching specifications and turnaround time. Satisfaction guarantee covers manufacturing defects and print quality issues. Contact support with order number and documentation.
