What You Need to Know About DPI and Image Resolution
Image resolution DPI explained in simple terms: DPI (dots per inch) measures how many ink dots a printer places in one inch of paper. Higher DPI means sharper, more detailed prints. For professional print projects, 300 DPI is the standard. Screen images typically use 72 PPI. 4OVER4.COM has printed over 10 billion+ cards across 1,000+ products, and every one of those projects starts with the right resolution.
Why DPI Matters for Every Print Project You'll Ever Run
DPI is the single biggest factor between a print that looks professional and one that looks like a blurry mess. It doesn't matter how great your design is. If the resolution is wrong, the final product suffers. That's true for business cards, postcards, banners, and everything in between.
This guide covers what DPI actually means, how it differs from PPI, and which settings you need for different print formats. You'll also learn how to check and adjust your image resolution before uploading files. Browse the Showcase to see what properly resolved images look like on finished products. If you're working with other print materials, check out our guide on How To Clean Rubber Stamps for more hands-on tips. And when you're ready to design, 4OVER4.COM's Online Designer makes it easy to build files at the correct resolution from the start.
DPI vs. PPI - What's the Actual Difference?
People use DPI and PPI interchangeably. They shouldn't. PPI (pixels per inch) describes how many pixels exist in one inch of a digital image on screen. DPI (dots per inch) describes how many ink dots a printer lays down per inch on paper. One is about screens. The other is about physical prints.
When you design on your computer, you're working in PPI. When that file goes to a printer, DPI takes over. A file set to 72 PPI looks fine on your monitor but prints blurry. A file set to 300 PPI gives the printer enough data to produce a crisp, sharp result.
Think of it this way: PPI is the language your screen speaks. DPI is the language your printer speaks. You need to speak both if you want your prints to look right. For more design guidance across different formats, the Faq Hub has dozens of walkthroughs.
How Pixel Dimensions and DPI Work Together
Resolution isn't just about DPI. It's about pixel dimensions too. An image that's 3000 x 2400 pixels at 300 DPI will print at 10 x 8 inches. Take that same image and print it at 150 DPI, and it covers 20 x 16 inches - but it's half as sharp.
Here's the formula: Print size = Pixel dimension ÷ DPI. So a 1500-pixel-wide image at 300 DPI prints at 5 inches wide. At 72 DPI? That same image prints at almost 21 inches wide, but it'll look terrible up close.
Before sending any file to print, check both the pixel dimensions and the DPI setting. They're a team. One without the other tells you nothing useful.
The 300 DPI Standard for Print - and When You Can Go Lower
300 DPI is the industry standard for professional printing. Business cards, postcards, brochures, flyers - all of them need 300 DPI files for clean output. At this resolution, the human eye can't distinguish individual dots at normal viewing distance.
But not everything needs 300 DPI. Large-format prints like banners and posters are viewed from several feet away. For those, 150 DPI is often enough. Billboards? Some print at just 30-50 DPI because nobody looks at them from two feet away.
The rule is simple: the closer someone views your print, the higher DPI you need. A business card sits in someone's hand. That's close. A banner hangs across a booth. That's farther. Match your DPI to the viewing distance, and you'll save file size without losing quality. If you're designing brochures, our guide on How To Fold A Brochure covers the layout side of things.
DPI Settings for Common Print Products
Different products have different sweet spots. Here's what works:
- Business cards: 300 DPI minimum. These are held at arm's length. Every detail matters.
- Postcards and flyers: 300 DPI. People read these up close. Learn more in our guide on How To Make Flyers.
- Brochures and booklets: 300 DPI for images, vector for text and logos.
- Posters (up to 24x36 inches): 200-300 DPI depending on viewing distance.
- Banners and signage: 150 DPI for medium-distance viewing. 100 DPI for large banners.
- Magnets and specialty items: 300 DPI. Check out Custom Magnets Faq for specifics.
When in doubt, go with 300 DPI. You can always scale down. You can't scale up without losing quality.
What Happens When DPI Is Too Low
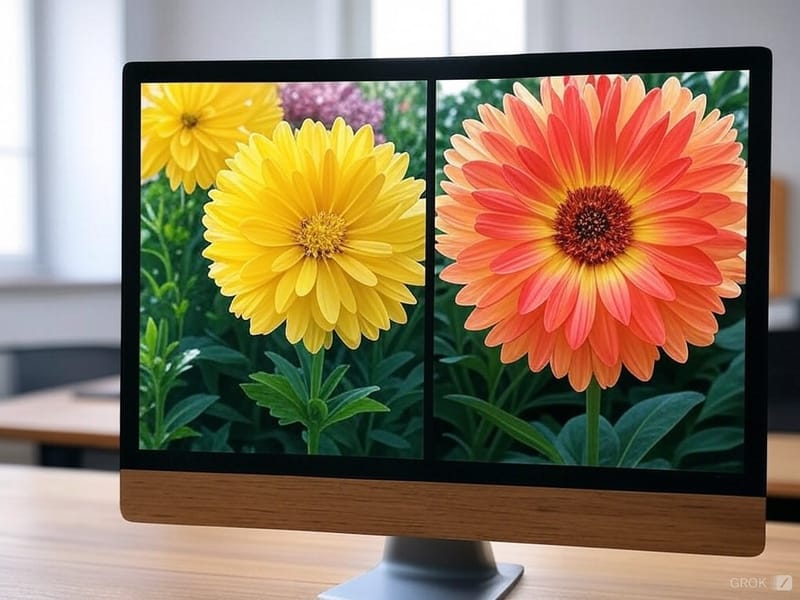
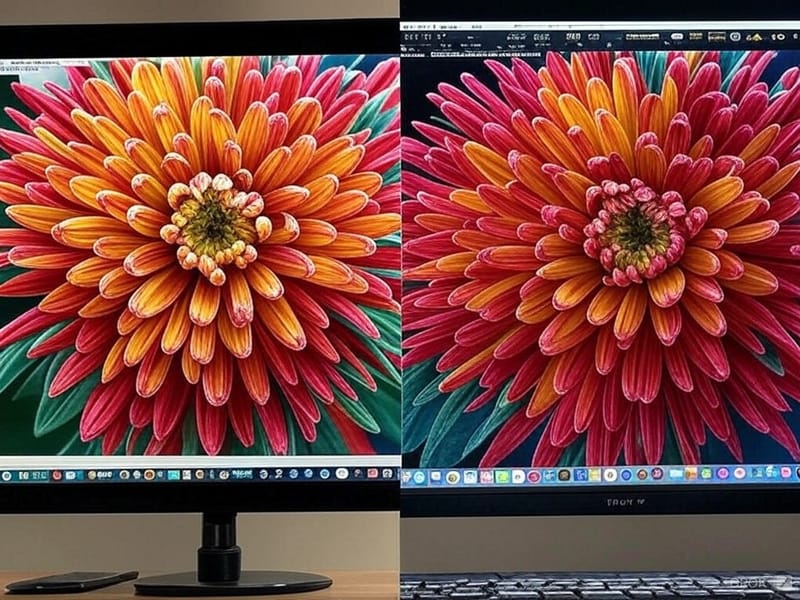
Low-resolution images pixelate. That means you can see the individual squares that make up the image. Text looks fuzzy. Edges look jagged. Colors bleed into each other. It looks unprofessional, and it's the number one reason print jobs disappoint people.
A common mistake: pulling images from your website and using them for print. Web images are typically 72 PPI. That's fine for screens but disastrous for print. A logo that looks great on your homepage will look like it was printed on a potato if you drop it into a business card file at 72 PPI.
Another issue: resizing small images by stretching them in design software. Making a 500-pixel image fill a 3000-pixel space doesn't add detail. It just makes the existing pixels bigger and blurrier. Always start with the largest source file you have.
"I sent a 72 DPI logo to print once and the business cards came back looking fuzzy. Now I always export at 300 DPI. The difference is night and day."
- Marcus L., graphic designer
How to Check and Change Your Image's DPI
Checking DPI is straightforward in most programs:
In Adobe Photoshop: Go to Image > Image Size. You'll see the resolution field listed in pixels/inch. Change it to 300 if it's lower. Make sure "Resample" is unchecked if you want to see the true print size without adding fake pixels.
In Canva: Export your design as a PDF Print file. Canva automatically exports at 300 DPI when you choose this option.
In GIMP (free): Go to Image > Print Size. Adjust the resolution to 300 pixels/inch.
On a Mac: Open the image in Preview, go to Tools > Adjust Size, and check the resolution field.
On Windows: Right-click the image, select Properties > Details, and look for the horizontal and vertical resolution.
If your image is below 300 DPI and you can't get a higher-resolution source, you have two options. Reduce the print size so the existing pixels cover a smaller area at higher density. Or use AI upscaling tools - they're getting better but still can't replace a properly shot high-resolution photo.
Vector vs. Raster - Why Format Matters for Resolution
Raster images (JPEG, PNG, TIFF) are made of pixels. They have a fixed resolution. Enlarge them too much and they fall apart.
Vector images (AI, EPS, SVG, PDF) are made of mathematical paths. They scale infinitely without losing quality. That's why logos, icons, and text should always be vector when possible.
For print projects, the ideal setup is vector for logos and text, raster at 300 DPI for photographs. This combination gives you the sharpest possible output. 4OVER4.COM accepts PDF, AI, PSD, and other common formats. If you're designing envelopes, our guide on How To Make Envelopes walks through the file setup process.
Color Mode and DPI - The Connection People Miss
DPI isn't the only setting that affects print quality. Color mode matters too. Screens use RGB (red, green, blue). Printers use CMYK (cyan, magenta, yellow, black). If you send an RGB file to a printer, the colors shift. Bright blues turn dull. Vivid reds look muddy.
Set your file to CMYK and 300 DPI before you start designing. Changing color mode after you've picked your colors means those colors will shift. It's a small step that saves big headaches. Products like 3D Postcards are especially sensitive to color accuracy because of their layered printing process.
File Size and DPI - Finding the Balance
Higher DPI means bigger files. A 300 DPI image is roughly 17 times larger than the same image at 72 DPI. That matters when you're uploading files, emailing proofs, or storing design assets.
For print, don't compress your files to save space. JPEG compression removes data permanently. Use TIFF or PDF for print files when possible. These formats preserve quality.
For web use, compress away. A 72 PPI JPEG loads fast and looks great on screen. Just keep the original high-resolution file saved somewhere so you always have it for print. Check out the Showcase to see how high-resolution files translate to finished products. And if you want to feel the difference quality resolution makes on paper, order Free Samples from 4OVER4.COM.
Quick DPI Reference by Use Case
- Social media posts: 72 PPI, RGB
- Website images: 72 PPI, RGB, compressed JPEG or WebP
- Email graphics: 72-96 PPI, RGB
- Business cards and stationery: 300 DPI, CMYK
- Flyers and postcards: 300 DPI, CMYK
- Posters: 200-300 DPI, CMYK
- Large banners: 100-150 DPI, CMYK
- Billboards: 30-50 DPI, CMYK
Costly DPI Mistakes That Ruin Print Jobs
Now that image resolution DPI explained in detail makes sense, here are the mistakes people make most often - and how to avoid them.
Using web images for print. That 72 PPI photo from your website won't cut it. Always source the original high-resolution file. If you don't have one, reshoot or purchase a stock image at 300 DPI.
Upscaling low-resolution images. Stretching a small image in Photoshop doesn't add real detail. It just makes blurry pixels bigger. Start with the right size from the beginning.
Ignoring bleed and trim areas. Even with perfect DPI, your image needs to extend past the trim line. Add 0.125 inches of bleed on all sides so nothing gets cut off awkwardly.
Designing in RGB instead of CMYK. Your screen colors won't match your print colors. 4OVER4.COM prints in CMYK, so convert your files before uploading.
Forgetting to check DPI after resizing. Cropping or resizing in design software can change your effective DPI. Always verify resolution as the last step before export.
Print Products Where DPI Makes the Biggest Difference
Getting your DPI right pays off most on products people hold in their hands. Business cards, postcards, and brochures all demand 300 DPI because they're viewed at close range. 4OVER4.COM offers 1,000+ products across paper types and finishes - and every single one benefits from properly resolved images.
If sustainability matters to your brand, check out Green Printing options that pair high-quality output with responsible materials. Below, you'll find detailed specs and customer feedback on how resolution impacts real print results.
| Application Type | Recommended DPI |
|---|---|
| High-quality prints (e.g., flyers, brochures) | 300 DPI |
| Standard prints (e.g., magazines) | 150-300 DPI |
| Digital viewing (e.g., websites, emails) | 72 DPI |
| Factor | Impact on Image Resolution |
|---|---|
| Device Capabilities | Higher megapixel cameras yield sharper images. |
| File Formats | PNG and TIFF formats retain more details. |
| Compression Techniques | Higher compression results in quality loss. |
| Resampling Techniques | Proper methods preserve image clarity. |
- Resolution Management: Aim for 300 DPI for print and 72 PPI for web.
- File Formats: Use TIFF or PNG for print, JPEG for web.
- Color Consistency: Apply color management for accurate displays.
- Resampling Techniques: Use appropriate methods to maintain quality.
Your DPI and Image Resolution Questions Answered
What DPI should I use for printing business cards?
Use 300 DPI for business cards. Since people hold cards just inches from their face, anything lower produces visible pixelation. Set your file to 300 DPI and CMYK color mode before you start designing. 4OVER4.COM's file upload system flags low-resolution files so you can fix them before printing.
Can I convert a 72 DPI image to 300 DPI for print?
Technically yes, but it won't improve quality. Changing the DPI setting without adding real pixel data just makes the print size smaller. A 1000-pixel-wide image at 72 DPI becomes a 3.3-inch-wide image at 300 DPI. You can't create detail that wasn't captured in the original photo.
What's the difference between DPI and PPI?
PPI (pixels per inch) measures digital screen resolution. DPI (dots per inch) measures printed output density. When image resolution DPI explained simply: PPI is for your monitor, DPI is for your paper. For print files, set your resolution to 300 PPI in your design software, and the printer translates that to the appropriate DPI.
Does DPI matter for web images?
Not really. Web browsers display images based on pixel dimensions, not DPI. A 1200 x 800 pixel image looks the same on screen whether it's tagged as 72 DPI or 300 DPI. For websites, focus on pixel dimensions and file compression. Save the high DPI settings for print projects.
Why do my prints look blurry even though the image looks sharp on screen?
Screens display at 72-96 PPI. Printers need 300 DPI. An image that looks perfect on your monitor may only have enough data for a small, low-quality print. Always check the actual pixel dimensions and DPI before sending files to print. Right-click the file, check properties, and verify the resolution.
What file format preserves the best resolution for printing?
TIFF and PDF preserve full image quality without compression. JPEG uses lossy compression that degrades quality each time you save. PNG is lossless but creates larger files. For best results with 4OVER4.COM, submit print-ready PDFs at 300 DPI with CMYK color and 0.125-inch bleed on all sides.