
How to Print a Photo on a T-Shirt with Professional and DIY Methods


Two routes get a photo onto a shirt: DIY transfers at home, or professional print-on-demand. A photo needs 300 DPI at the printed size, which most phone shots clear and most web downloads do not.
To put a photo on a shirt, print it with transfer paper and a press at home, or upload it for professional direct-to-garment printing. DIY suits a single quick shirt, while DTG and print-on-demand bond the photo into the fabric for soft feel and lasting detail. Start from a sharp file at 300 DPI, work in CMYK, and add a white underbase on dark shirts.
Start here
Home transfer or commercial press
You can put a photo on a shirt at home with transfer paper and a press, or professionally with direct-to-garment printing. DIY is cheap and immediate but the print sits on top and can crack, while DTG and sublimation bond the image into the fabric for soft feel and durability. Whichever you choose, start from a sharp 300 DPI file in CMYK, and add a white underbase on dark shirts. The map below compares every method.
Photograph on a t-shirt
What a printed photograph on a t-shirt takes
A photograph on a t-shirt needs a sharp file, a method that holds tone, and a shirt color planned with the ink. Send the photo at about 300 DPI at print size, which is 2550 by 3300 pixels for our 8.5 by 11 inch print area. We print full color on the front, the back or both, on a white or black shirt in sizes S to XXL, with a white underbase on the black shirt. One shirt starts at $21.96, orders run to 250, and production is 5 business days.
Getting a photo onto a shirt the right way
An iron-on transfer puts a photo on a shirt tonight; a direct-to-garment print from a 300 DPI file is what stays sharp, feels soft, and survives dozens of washes. The same photo can look crisp for years or crack after three washes depending entirely on how it was applied.
There are two broad routes. The DIY route uses transfer paper, cutting vinyl, or a home heat press, and it suits a single gift or a one-off you want tonight. The professional route uses direct-to-garment or sublimation, either through your own equipment or, far more simply, through a print-on-demand service where you upload the photo and a printed shirt arrives.
This guide compares both by quality, durability, and cost, then shows exactly how to prep your photo so it prints well whichever way you go. If you already know you want it done right and shipped, our premium custom t-shirts take a photo and a shirt choice and handle the rest.
Yes, a photo prints on a t-shirt with the right method
Yes, you can print a photograph on a t-shirt, and the method decides whether it looks like a photo or like a sticker. Direct-to-garment and DTF hold continuous photo tone; dye sublimation does too on light polyester. Heat-transfer vinyl does not, because it cuts flat shapes, and iron-on paper holds the image but cracks over repeated washes.
To get a photo printed onto a shirt, send a file at about 300 DPI at the size it will print, pick the shirt and quantity, and let the press add the white underbase on a dark garment. Our photo tees start at $21.96 for a single shirt and ship in 5 business days.
Things to consider before you print a photo on a shirt
Before you pick a method, five choices shape the outcome. Fabric comes first: cotton takes direct-to-garment ink beautifully, while polyester is built for dye sublimation. Method follows from that, since transfer, vinyl, DTG, and sublimation each behave differently on the same shirt.
Shirt color is the one beginners miss. On a dark garment a photo needs a white underbase printed first, or the colors go dull and muddy. Photo resolution is next: aim for roughly 300 DPI at the size it will print, because an image that looks fine on a phone can turn soft once it is stretched across a chest. Finally, file type matters, since a high-quality PNG or a print-ready CMYK file reproduces far more faithfully than a small compressed JPEG.
Nail those five and any method improves. If juggling fabric, underbase, and file setup sounds like a lot, that is exactly what professional printing removes. Our custom t-shirt printing handles the underbase and color automatically, and our online design tool helps you size and place the photo correctly before it ever prints.
The DIY methods, and where each one fits

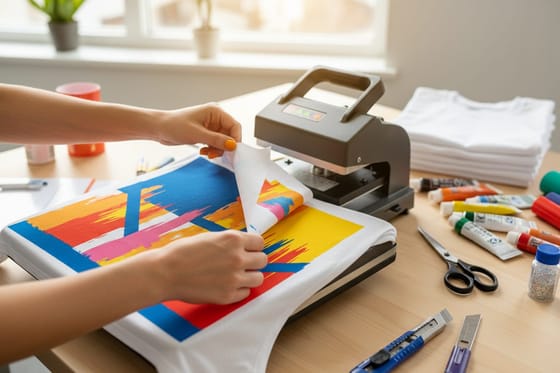
Iron-on transfer paper is the classic starting point. You print the photo onto special paper, then press it into the shirt with a household iron. It costs almost nothing and works tonight, but the print sits on top of the fabric, feels a little plasticky, and tends to crack or peel over repeated washes. It is best for a single quick shirt on light cotton.
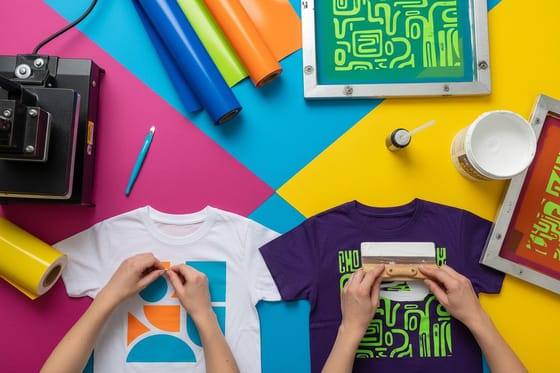
Heat-transfer vinyl is cut on a machine and pressed on, which produces bold, durable flat color and crisp text. The catch is that it is poorly suited to a real continuous-tone photograph, so it shines for logos and lettering more than portraits. Inkjet transfer paired with a proper home heat press is the strongest DIY option for a full photo, giving better durability than an iron and true photographic detail, provided you own the press.
DIY is genuinely great for one-offs and experiments. Its limits show up in durability, consistency, and anything you plan to sell or produce in numbers, which is where the professional methods pull ahead.
The professional methods that hold true photo detail
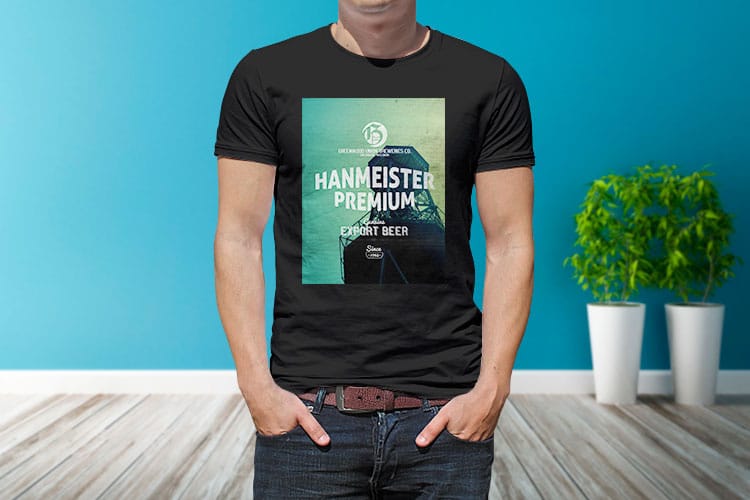
Direct-to-garment printing, or DTG, is the standard for photo tees. It sprays the ink directly into the cotton fibers, so the photo becomes part of the fabric rather than a layer on top. That means soft feel, full continuous-tone detail, no minimum order, and durability that easily outlasts any home transfer. On dark shirts the printer lays a white underbase first so colors stay accurate.
Dye sublimation takes a different path, turning ink into gas that permanently dyes light polyester. It never cracks or peels because there is no separate layer at all, and it is the method of choice for vivid, all-over prints. Its trade-off is that it needs a light-colored poly fabric to work.
The simplest way to use either is print-on-demand, where you skip the equipment entirely. You upload the photo, choose the shirt and size, and a professionally printed tee is produced and shipped. Our premium t-shirts and vinyl-print t-shirts cover the range, and for a full product line our kitting and fulfillment can pack and ship on your behalf.
Have us print the photo tee for you. Pick the garment, upload the photo at about 300 DPI at print size, set the quantity, and the price per shirt and the production turnaround both appear on the product page before you pay, so there is no quote to wait for. Cotton goes to DTG with the white underbase added automatically on dark shirts; light polyester goes to sublimation for an all-over print. There is no minimum, so one keepsake shirt is a real order, and the per-shirt price keeps improving as the run grows. Start on premium t-shirts for soft, continuous-tone photo prints, or on vinyl-print t-shirts when the artwork is bold lettering and flat shapes rather than a photograph. Ordering for a whole roster or a product line? Kitting and fulfillment packs and ships them for you.
DIY versus professional: quality and cost compared
On cost, DIY looks cheaper up front, since a pack of transfer paper and a blank shirt is a small outlay. That math changes once you count wasted attempts, the shorter life of the print, and the value of your time. Professional printing has a clear per-shirt price that only gets more efficient as the quantity grows.
On quality and durability, the gap is real. A home iron-on can look good on day one and rough by month two, while a DTG or sublimation print stays soft and sharp through dozens of washes. If the shirt is a keepsake, a uniform, or something you sell, that longevity is the whole point.
Read the table across, not down. At one shirt the DIY rows win on cash out of pocket and lose on everything else; by ten the labor has quietly overtaken the materials; by fifty only the professional rows are still sane, and the fabric decides between them: cotton to DTG, cotton and blends to DTF, light polyester to sublimation.
| Method | Cost per shirt at 1 | At 10 shirts | At 50 shirts | Expected wash durability |
|---|---|---|---|---|
| Iron-on transfer paper, DIY | The cheapest single shirt on the list: one blank plus one sheet of transfer paper | Flat per shirt, since you buy ten sheets and press ten times by hand | The worst value here once you count reject shirts and a lost evening | Looks good on day one, commonly cracked or rough by month two |
| Heat transfer vinyl, DIY | Blank plus a vinyl sheet, and you need a cutter before you can start at all | Still flat per shirt, and weeding every letter multiplies the labor | Time, not materials, is what stops most people at this quantity | Tough on bold shapes and lettering, but it cannot carry photo tone |
| Direct-to-garment, professional | One clear per-shirt price with no minimum order | Same file, same white underbase, and the per-shirt price steps down | The most efficient per-shirt price of the true photo methods | Stays soft and sharp through dozens of washes because the ink sits in the fibers |
| DTF transfer, professional | Close to DTG for a single shirt, and it prints on cotton and blends alike | Transfers gang up on one sheet, so the per-shirt price drops with the sheet | Strong at volume, especially across mixed fabrics and dark colors | A thin film on the surface: far tougher than an iron-on, a shade less soft than DTG |
| Dye sublimation, professional | Fine for a one-off, but light polyester only | Efficient, and the natural pick once the print runs edge to edge | The cheapest per shirt for vivid, full-coverage work | Permanent: the ink dyes the fabric, so there is no separate layer to crack or peel |
Prepping your photo so it prints well

Whichever method you choose, the file does half the work. Start from the highest-resolution original you have and check it at 100 percent zoom, aiming for about 300 DPI at the print size. If it looks soft on screen, it will look soft on fabric, and no setting adds detail that was never captured.
Next, work in CMYK so your screen preview reflects the ink instead of glowing screen light, and watch bright blues and greens that can shift in conversion. Crop tight and, if the photo should float alone on the shirt, remove the background cleanly so there is no faint box around the image. On dark garments, remember the print needs a white underbase, which professional services add automatically.
PNG or JPEG for a photo shirt. Use a PNG when the photo needs a transparent background, so a cut-out subject floats on the shirt with no box around it. Use a high quality JPEG for a full rectangle photo, saved at the highest quality setting. Either way the file needs about 300 DPI at print size: for the full 8.5 by 11 inch print area that is 2550 by 3300 pixels. Check the pixel size in your photo app before you upload, remove the background first if you want the subject alone, and convert to CMYK so the screen preview matches the ink.
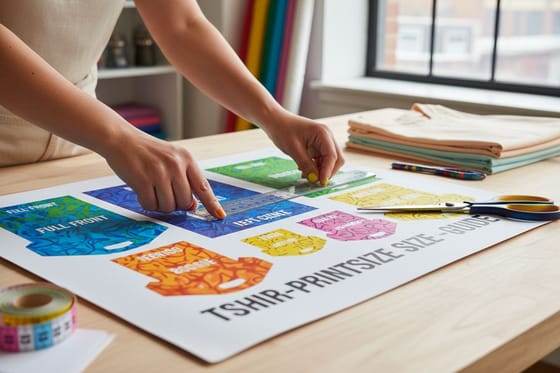
Finally, size the artwork to the shirt real print area rather than the whole shirt, and keep important faces and detail away from the seams. Our t-shirt print size guide covers the exact dimensions for each placement, and the online designer keeps your photo inside the safe print zone as you position it.
With the file cropped, converted to CMYK and sized to the print area, the last step is choosing who prints it. Hand it to photo t shirt printing and the white underbase, the curing and the color check are handled for you, or go straight to photo t shirt printing on premium tees to pick the garment, set the quantity and see the price and turnaround before you order.
How to choose and order your photo tee
Bring it together with three questions. How many shirts do you need, how long must the print last, and what fabric are you printing on? At 4OVER4 a photo tee starts at $21.96 for one shirt, runs up to 250 per order in white or black and sizes S to XXL, and ships in 5 business days. One quick shirt on light cotton can be a home transfer. A durable, professional-looking photo tee, or any quantity, points straight to professional printing.
Once you decide, cost is easy to reason about. Pick the shirt, the size, and the options, and the price updates live as you go, dropping per unit as the quantity climbs. Choose premium t-shirts for a soft heavyweight blank, kids t-shirts for smaller sizes, or browse the full t-shirt range to match the fit and color you want.
From there it is just upload and order. Send your prepped photo, confirm the placement, and let the press handle the underbase, color, and cure. Order free samples first if you want to feel the fabric, then use the live specs and pricing below to lock in your run.
Wally prints the photo, not a sticker
Soft detail that survives the wash
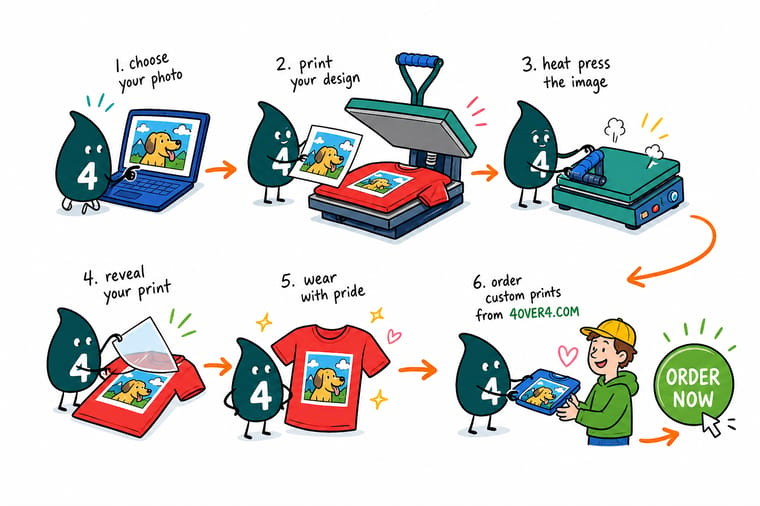
Wally treats a photo tee like a print job, not a craft project. A home transfer sits on top of the fabric and cracks, while direct-to-garment sprays the image into the fibers so it stays soft and sharp. Send a sharp 300 DPI photo, pick your shirt, and 4OVER4 handles the white underbase, color, and cure so it looks right and lasts.
Print your photo t-shirt →Quick reference
Photo-on-a-shirt methods at a glance
Every method puts a photo on fabric a different way: iron-on paper on light cotton, vinyl for flat graphics, a home press for a one-off photo, direct-to-garment on cotton of any color, and sublimation on light polyester. Match it to your fabric, quantity, and how long the print must last.
| Method | Best for | What to know |
|---|---|---|
| Iron-on transfer paper | Home iron, light cotton | The cheapest way to test a photo, but the print sits on top of the fabric and cracks or fades over repeated washes. |
| Heat-transfer vinyl | Cutter plus heat press | Great for bold flat graphics and text, but poorly suited to a full continuous-tone photograph. |
| Inkjet transfer plus press | Home heat press | Reproduces a full photo at home if you own a proper press, with better durability than a household iron. |
| Direct-to-garment (DTG) | Cotton, any shirt color | Prints the photo straight into the fibers for soft feel and true detail, the professional standard for photo tees. |
| Dye sublimation | Light polyester | Dyes the fabric permanently so it never cracks, ideal for all-over and vivid prints on poly blends. |
| Print-on-demand | Upload and ship | No equipment at all: you send the photo, the shirt is printed professionally and shipped to you or your customer. |
Step by step
Print a photo on a t-shirt in 6 steps
- Start from a high-resolution photoUse the sharpest original you have, ideally 300 DPI at the size it will print. Never enlarge a tiny image to fill the chest, since scaling only stretches the pixels you already have.
- Clean up the image and backgroundCrop tight, fix exposure, and remove or knock out the background if the photo should sit alone on the fabric. A clean edge is what separates a pro-looking tee from a homemade one.
- Match the method to the fabric and colorChoose DTG for cotton and dark shirts, sublimation for light polyester, and a home transfer only for a quick one-off. On dark garments, plan for a white underbase so colors stay true.
- Convert and set up the fileWork in CMYK so screen color matches ink, keep the file at full resolution, and size the artwork to the real print area of the shirt.
- Print a test before a batchFor any run beyond a single shirt, print one first and wash it. What looks right on screen can shift on fabric, and a test catches it before you commit.
- Order the professional route for durabilityWhen you want it clean, soft, and long-lasting, upload the photo to a professional print-on-demand shirt and let the press handle the underbase, color, and cure.
Specs and pricing
Custom t-shirt specs and live pricing
Once your photo is ready, fabric, size and quantity are what is left. Premium t-shirts run $21.96 and ship in 5 business days.

| Quantity | Price Per Unit | Total |
|---|---|---|
| 1 | $21.96 | $21.96 |
| 2 | $16.47 | $32.93 |
| 3 | $16.46 | $49.39 |
| 4 | $15.93 | $63.71 |
| 5 | $15.93 | $79.63 |
| 6 | $15.93 | $95.56 |
| 7 | $15.85 | $110.94 |
| 8 | $15.38 | $123.02 |
Print it
Print your photo tee at 4OVER4
Premium, vinyl and kids t-shirts all start at $21.96 for one shirt, in white or black, with full color on the front, the back or both.
See it in use
Photo tees printed for customers
Explore more
Where to go next
By the numbers
Custom apparel and print across 60+ stocks
Common Questions
Common questions about printing a photo on a shirt
What is the best way to put a picture on a shirt?
Photo t shirt printing puts a full-color photograph onto fabric, and the best method for a true photograph that lasts is professional direct-to-garment (DTG) printing or print-on-demand, where the image is printed straight into the fabric with a white underbase on dark shirts so colors stay accurate. It gives soft feel, full detail, and durability that survives repeated washing, with no minimum order, so a single keepsake shirt and a fifty-shirt run go through the same process. On light polyester, dye sublimation is the alternative, since it turns the ink into gas that dyes the fabric permanently and never cracks or peels. Home methods like iron-on transfer paper work for a quick one-off, but the print sits on top of the fabric and tends to crack or fade over time, often within a couple of months of regular washing. The right choice comes down to how many shirts you need, what the fabric is, and how long the print has to last.
What should I consider before printing a photo on a T-shirt?
Five things decide the result. Fabric: cotton takes DTG well while polyester suits sublimation. Method: transfer, vinyl, DTG, or sublimation each behave differently. Shirt color: a dark garment needs a white underbase so the photo does not go dull. Photo resolution: aim for about 300 DPI at print size so it stays sharp on fabric. And file type: a high-quality PNG or a print-ready file in CMYK reproduces more faithfully than a small compressed JPEG. Get those right before you print and the photo lands the way you pictured it.
How do I print a photo on a T-shirt at home versus print-on-demand?
At home you print the photo onto transfer paper, then press it into the shirt with an iron or a heat press, which is cheap and immediate but limited in durability and best for one or two shirts. Print-on-demand skips all of that: you upload the photo, choose the shirt and size, and a commercial printer produces it with direct-to-garment or sublimation and ships it to you. Home methods win on speed and cost for a single gift, while print-on-demand wins on quality, consistency, and durability, especially for multiples or anything you sell.
One shirt tonight, or fifty next week?
Match the method to three things: how many shirts, how durable it must be, and the fabric. For a single quick shirt on light cotton, a home inkjet transfer and press is fine. For a photo that has to stay sharp through many washes, choose professional DTG. For vivid, all-over, or permanent prints on light polyester, choose sublimation. If you would rather not own any equipment or manage the underbase and curing, print-on-demand handles the whole thing and is the simplest path to a clean, professional result.
What does printing a photo on a shirt cost and how are prices set?
At home the cost is the transfer paper plus a blank shirt, but you also carry the risk of wasted attempts and shorter print life. Professionally, price is set by the shirt itself, the print method, and the quantity, with the per-shirt price dropping as the order grows. On the product page you pick the shirt, size, and options and the total updates live, so you can see exactly what a larger run or a premium garment does to the number before you order.
How do I keep a printed photo from cracking or fading?
Durability starts with the method. Prints that sit on the surface, like household iron-on transfers, crack first, while direct-to-garment and sublimation bond into the fibers and last far longer. Beyond method, wash the shirt inside out in cold water, skip the harsh detergents and bleach, and tumble dry low or hang it. Starting from a proper white underbase on dark shirts and a fully cured professional print is the single biggest factor in how long a photo tee keeps looking new.
Get Started
Order a kids t-shirt at $21.96
Upload your photo to 4OVER4.COM, pick the shirt and size, and get a soft, durable custom tee printed and shipped. Watch your price update live as you set the run.
Legal Disclaimer
Gold Standard guarantees apply to all standard orders placed through 4over4.com. Price match requires verifiable proof of a competitor's published price for an equivalent product with matching specifications and turnaround time. Satisfaction guarantee covers manufacturing defects and print quality issues. Contact support with order number and documentation. On-time delivery rate based on tracked orders 1999 to 2026. Individual results may vary based on shipping carrier performance.
