What You Need to Know About Standoff Signage
Standoff signage uses metal or acrylic hardware to mount signs away from a wall, creating a floating, three-dimensional look. These fasteners - called standoffs - hold panels like acrylic, metal, or printed substrates at a fixed distance from the mounting surface. The result is a polished, professional display that catches attention in lobbies, offices, retail spaces, and wayfinding systems. 4OVER4.COM offers 1,000+ products for businesses looking to build standout branded environments, and standoff-mounted signs remain one of the most requested options.
Why Standoff Signage Deserves Your Attention
Standoff signage explained in simple terms: it's a mounting method that uses cylindrical hardware to hold a sign panel away from a wall. That gap between panel and surface creates depth, shadow, and visual impact you can't get from a flat-mounted sign. Walk into any modern office, dental practice, or boutique hotel and you'll likely spot standoff-mounted signage behind the reception desk.
With 25+ years in the printing industry, 4OVER4.COM has helped 150,000+ businesses create branded materials that look sharp in person. Whether you're designing lobby signage or directional panels, understanding how standoffs work gives you more control over the final result. Check out our Showcase for real-world examples, or browse Daily Deals to save on your next sign project.
How Standoff Hardware Actually Works
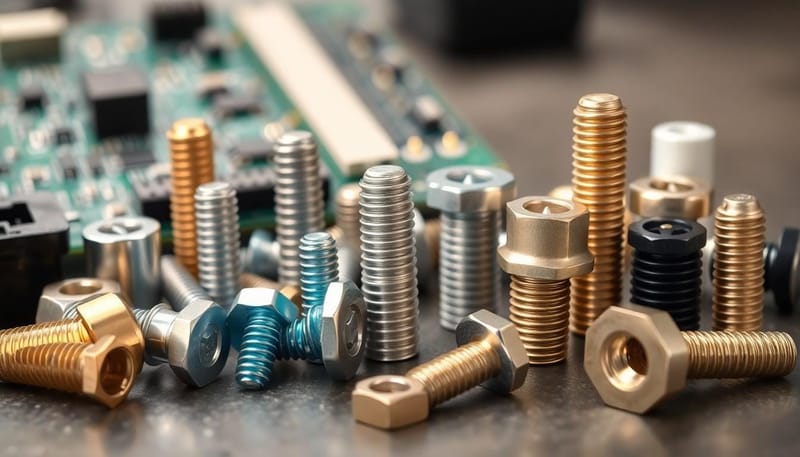
A standoff is a cylindrical fastener with three parts: a wall anchor (or screw), a barrel (the spacer), and a decorative cap. The barrel is the star of the show. It determines how far your sign panel floats from the wall. Barrels typically range from 1/2 inch to 2 inches in length, though custom lengths exist for specialty installations.
Here's the basic process. You drill holes through your sign panel and into the wall. The wall anchor goes into the wall first. Then the barrel threads onto the anchor, holding the panel at a fixed distance. Finally, the cap screws onto the front of the barrel, sandwiching the panel in place. No adhesive. No framing. Just clean hardware and a floating sign.
The beauty of this system is its simplicity. You don't need specialized tools beyond a drill and a level. And because the hardware is visible, it becomes part of the design - not something you hide.
Materials Used for Standoff Hardware
Standoff barrels and caps come in several materials, each suited to different environments and budgets.
- Stainless steel - the most popular choice for commercial signage. Resists corrosion, looks sleek, and holds up in high-traffic areas.
- Brushed aluminum - lightweight and modern. Works well in contemporary office spaces and retail environments.
- Brass - offers a warmer, more traditional look. Good thermal conductivity and rust resistance make it reliable for long-term installations.
- Nylon or plastic - budget-friendly and electrically non-conductive. Common in electronics mounting but occasionally used for lightweight indoor signs.
- Chrome-plated steel - mirror-like finish that adds a high-end feel to reception areas and showrooms.
Your material choice affects both the look and the longevity of the installation. For outdoor standoff signage, stainless steel is the safest bet. For indoor lobby signs, brushed aluminum or chrome gives you that polished, architectural vibe.
Panel Materials That Work With Standoffs
The sign panel itself matters just as much as the hardware. Standoffs grip the panel through pre-drilled holes, so the material needs to be rigid enough to hold its shape without sagging between mounting points.
Acrylic (Plexiglass) is the go-to panel material for standoff signage. It's available in clear, frosted, and colored options. Clear acrylic with vinyl lettering or direct printing creates that modern floating-text effect you see in corporate lobbies. Frosted acrylic diffuses light and adds a softer look.
Dibond (aluminum composite) panels are rigid, lightweight, and weather-resistant. They're a strong pick for outdoor standoff signs or large-format indoor displays. If you're printing full-color graphics, Dibond holds UV-printed images with sharp detail.
PVC and foam board work for temporary or budget-conscious indoor installations. They're lighter than acrylic or Dibond but won't hold up as well over time. For event signage or short-term displays, they get the job done.
For tips on creating other print-based projects, check out our guide on How To Make Flyers or learn How To Fold A Brochure for complementary marketing materials.
Where Standoff Signage Makes the Biggest Impact
Standoff-mounted signs aren't just functional - they're a design statement. Here are the settings where they work best.
Corporate Lobbies and Reception Areas
This is where standoff signage really shines. A company logo mounted on clear acrylic with brushed stainless standoffs instantly communicates professionalism. The floating effect adds depth that flat wall decals can't match. Many businesses pair their lobby sign with directional standoff panels throughout the office for a cohesive branded environment.
"We installed a 36x24 acrylic panel with our logo using chrome standoffs in our reception area. Clients comment on it every single visit. It completely changed the feel of our office."
- Rachel K., ★★★★★
Retail Stores and Restaurants
Menu boards, promotional signs, and wayfinding panels all benefit from standoff mounting. In retail, the dimensional look draws the eye more than a flat poster in a frame. Restaurants use frosted acrylic standoff signs for menus, specials boards, and restroom signage. The hardware is easy to clean - important in food service environments.
Medical and Dental Offices
Healthcare facilities use standoff signage for room identification, directional signs, and branded displays. The clean, modern look fits the sterile aesthetic of medical spaces. Acrylic panels are easy to wipe down, and the mounting hardware resists the cleaning chemicals common in healthcare settings.
Trade Shows and Events
Portable standoff sign systems exist for trade show booths and temporary installations. These use freestanding bases instead of wall anchors, letting you display branded panels without drilling into venue walls. For more event-ready print products, visit our Showcase to see what other businesses have created.
Designing Your Panel for Standoff Mounting
Designing a panel for standoff installation requires a few specific considerations that differ from standard print design.
Hole Placement and Spacing
Your panel needs pre-drilled holes that match the standoff barrel diameter. Standard standoff barrels are 3/4 inch or 1 inch in diameter, so your holes should be slightly larger - typically 1/16 inch wider than the barrel. Place holes at least 1 inch from any edge to prevent cracking, especially with acrylic panels.
For rectangular signs, four corner-mounted standoffs are the standard configuration. Larger panels (over 36 inches in any dimension) may need additional standoffs along the edges or center to prevent bowing. A good rule: one standoff every 18-24 inches along the longest edge.
Design File Setup
When setting up your design file, mark the standoff hole locations clearly. Most print shops need these indicated on a separate layer. Keep important text and graphics at least 2 inches from any hole location - the cap will cover about 1/2 inch of the panel surface around each hole.
4OVER4.COM provides Blank Templates for various print products to help you set up files correctly. If you're working on related projects, our Faq Hub covers design basics across multiple product types.
Color and Finish Considerations
Standoff signs benefit from bold, high-contrast designs. The floating effect naturally draws attention, so your graphics should be clean and readable from a distance. For acrylic panels, consider second-surface printing - where the ink goes on the back of a clear panel, so the acrylic protects the print from scratches and UV damage.
Matte finishes reduce glare under office lighting. Gloss finishes pop in retail environments with controlled lighting. If your sign faces a window, UV-resistant inks and coatings will prevent fading over time.
Installation Tips for a Clean, Professional Result
Even the best-designed standoff sign can look amateur if the installation is sloppy. Here's how to get it right.
Use a level. Always. Nothing ruins a standoff sign faster than mounting it slightly crooked. The floating effect amplifies any misalignment because there's no frame to hide behind.
Choose the right wall anchors. Drywall anchors work for lightweight acrylic panels under 10 pounds. For heavier Dibond panels or larger signs, drill into studs or use toggle bolts. Concrete and brick walls need masonry anchors and a hammer drill.
Measure twice, drill once. Mark all hole positions on the wall using the panel as a template. Double-check spacing with a tape measure before you pick up the drill. Fixing misaligned holes in drywall means patching, repainting, and starting over.
Clean the hardware before final assembly. Fingerprints on chrome or stainless standoffs are visible from across a room. Wear cotton gloves during final tightening, or wipe each piece with a microfiber cloth after installation.
For maintaining other branded materials, our guide on How To Clean Rubber Stamps covers care tips for print tools. You might also find our guides on Custom Magnets Faq and How To Make Envelopes helpful for rounding out your branded material collection.
Indoor vs. Outdoor Installation Differences
Indoor installations are straightforward. Controlled environments mean you don't need to worry about weather, and most interior walls accept standard anchors.
Outdoor standoff signage requires more planning. Use stainless steel hardware rated for exterior use. Seal the wall anchor holes with silicone to prevent water intrusion. If the sign is in direct sunlight, factor in thermal expansion - acrylic panels can warp slightly in extreme heat, so leave a tiny gap between the panel and the standoff cap rather than over-tightening.
Wind load matters for outdoor signs too. A 24x36 panel mounted on 2-inch standoffs acts like a small sail. In windy locations, use shorter standoffs (1/2 inch or 3/4 inch) to reduce the lever arm and add extra mounting points.
Mistakes That Ruin Standoff Sign Installations
With standoff signage explained in detail above, let's talk about what goes wrong. These are the errors 4OVER4.COM sees most often from customers who've tried DIY installations before coming to us for help.
- Drilling holes too close to panel edges. Acrylic cracks easily when holes are less than 1 inch from the edge. This is the number one cause of ruined panels.
- Using mismatched hardware finishes. Mixing brushed and polished standoffs on the same sign looks unfinished. Buy all hardware from the same batch.
- Ignoring wall material. Drywall anchors in plaster walls will fail. Know your wall type before selecting anchors.
- Over-tightening the caps. Cranking down on acrylic panels causes stress fractures that spread over time. Hand-tight plus a quarter turn is enough.
- Skipping the level. Even 1/8 inch of tilt is noticeable on a floating sign. Use a laser level for panels wider than 24 inches.
Avoid these pitfalls and your standoff signage will look professional for years. With 150,000+ businesses served, 4OVER4.COM knows what separates a polished installation from a sloppy one.
Print Products That Complement Standoff Signage
Standoff signage explained above covers the mounting system itself, but the printed panel is where your brand comes to life. 4OVER4.COM offers a range of rigid and flexible print products that pair well with standoff hardware. For large-format outdoor displays, 2 Sided Blockout Banners give you double-sided visibility without light bleed.
Below you'll find detailed specs on sign and display products available through 4OVER4.COM, along with reviews from businesses that have used them for standoff and mounted signage projects.
- Brass: Brass standoffs feature excellent thermal conductivity and corrosion resistance. Their non-magnetic nature makes them ideal for electronic applications, ensuring reliable performance without interference. Brass is also relatively soft, allowing for easy machining.
- Aluminum: Aluminum standoffs boast lightweight characteristics, providing strength without adding significant weight. Their resistance to oxidation and ability to dissipate heat make them popular in electronic assemblies. Aluminum is often chosen for its aesthetic appeal, offering a polished finish.
- Nylon: Nylon standoffs hold advantageous properties as well. They resist moisture, chemicals, and high temperatures, making them suitable for various environments. Their lightweight nature contributes to overall weight reduction in assemblies, while their non-conductive characteristics enhance safety in sensitive applications.
- Stainless Steel: Stainless steel standoffs provide high strength and superior corrosion resistance. They're ideal for harsh conditions where durability is critical. Their robust structure makes them suitable for heavy-duty applications in industries such as automotive and aerospace.
- Printed Circuit Board (PCB) Mounting: Standoffs secure PCBs by positioning them away from metal surfaces. This prevents short circuits and allows for airflow, promoting thermal management.
- Signage Display: In signage, standoffs create a three-dimensional effect that enhances brand visibility. They serve to mount rigid signs effectively, adding sophistication to displays. Explore options for rigid signs and reflective aluminum signs to uplift branding efforts.
- Industrial Equipment Assembly: In machinery and equipment, standoff screws manage component spacing for improved functionality and maintenance access.
- Male-Female Standoffs: These fasteners consist of a male end that screws into a wall and a female end that holds the sign. They offer stability and a clean look, making them popular for sign displays.
- Male-Male Standoffs: In this configuration, both ends are male, allowing for connection between two components. They are ideal for projects that require components to be attached together without a wall interface.
- Female-Female Standoffs: These feature threaded holes at both ends. They are less common but useful for connecting two pieces in a controlled environment, ensuring secure placement.
- Edge-Grip and Through-Grip Standoffs: Edge-grip standoffs attach to the sign's sides, avoiding the need for drilled holes through the signage. Through-grip standoffs pass entirely through the sign, providing a sturdy mounting solution for thicker materials.
- Brass: Known for durability and attractive aesthetics, brass standoffs are common in high-end sign displays and enhance brand presence.
- Aluminum: Lightweight yet strong, aluminum provides resistance to corrosion and is ideal for both indoor and outdoor signage.
- Acrylic: Acrylic standoffs, often used in combination with acrylic prints, facilitate modern designs. They blend quality and style, perfect for contemporary visual presentations.
- Nylon: As a non-conductive option, nylon standoffs are valuable in electronic signage applications, ensuring safety while maintaining structural integrity.
- Gather Materials: Ensure all required tools and materials are available, including standoff screws, a screwdriver, and, if necessary, a spanner.
- Prepare the Surface: Clean the area where standoffs will be mounted. A clean surface guarantees optimal adhesion and alignment.
- Mark Drill Points: Use a pencil to mark the locations for drilling. Maintain a consistent spacing to ensure even placement of all standoffs.
- Drill Holes: Carefully drill holes at the marked points. Choose drill bits that match the size of the standoff screws.
- Insert Standoffs: Place the standoff screws into the drilled holes. For male/female configurations, ensure the threaded end aligns properly with the surface.
- Secure Standoffs: Tighten the standoffs using your screwdriver or spanner. Properly securing them enhances stability and maintains the necessary distance.
- Mount Components: Position the components, such as printed circuit boards or signs, onto the installed standoffs.
- Final Tightening: Ensure all connections are tight and secure. This step prevents any movement and maximizes the effectiveness of the standoff configuration.
- Drywall: Excellent for interior applications, drywall provides a solid backing. Use wall screws for a stronghold.
- Masonry: Ideal for outdoor signage, masonry surfaces require appropriate anchors to ensure durability against weather elements.
- Metal: Standoff signs on metal surfaces deliver a sleek, modern look. Ensure proper drilling techniques for best results.
- Wood: Versatile for a variety of settings, wood requires pre-drilled holes for standoff screws to maintain integrity and alignment.
- Improved Visibility: Standoffs create a visually appealing three-dimensional effect. This effect elevates signage, making it more striking and attention-grabbing. Displays using standoff screws stand out, contributing to brand presence and communication.
- Enhanced Durability: Standoff systems secure components firmly while preventing stress and damage that may occur due to inadequate mounts. With multiple screws used for heavier signs or structures, the stability increases, ensuring that installations remain intact.
- Material Variety: Standoffs come in various materials, such as brass, aluminum, and acrylic, accommodating different aesthetic needs and structural requirements. Each material lends distinct operational properties and durability values, enhancing functionality and brand image.
- Easy Maintenance: Standoff signage allows for quick and easy updates or replacements. This feature is particularly beneficial in dynamic environments where signage needs frequent changes.
- Professional Appearance: Standoff mounting communicates sophistication and credibility. This professional finish is vital for creating a positive first impression on clients and visitors.
- Select durable materials like brass, aluminum, and acrylic to ensure longevity and a polished look. Each material adds unique aesthetic value, helping to communicate professionalism.
- Incorporate reflective materials to increase visibility, especially in low-light conditions. Utilizing reflective aluminum signs enhances brand recognition at all times.
- Consider proportions that match the space. Large signs can attract attention, while smaller signs might fit better in more subtle settings.
- Select standoffs based on the sign's weight and mounting surface. Use through-grip standoffs for secure attachment, or edge-grip types for a clean look.
- Use multiple screws for sturdy support, particularly with larger or heavier signs. Placing screws at corners and center points reinforces structural integrity.
- Ensure proper pilot holes are drilled in advance to avoid damaging the sign during installation. Following these steps guarantees a secure mount.
- Create contrast between the sign and the background. A well-contrasted sign captures attention while remaining easy to read.
- Implement a three-dimensional effect using standoff kits that maintain a gap between the sign and the wall, producing a modern aesthetic. This effect visually separates the sign from the surface, making it more engaging.
- Incorporate branding elements such as logos and taglines in the signage design. Tailor your visuals to align with your company's mission and values.
- Explore custom printing options at 4OVER4.COM to elevate the quality of signage materials, ensuring a cohesive look across your marketing strategies.
- Identify appropriate mounting surfaces such as metal, drywall, or wood. Each surface type might require specific screws and anchors for effective installation.
- Evaluate foot traffic flow in your space. Position signage in high-visibility areas to maximize impact and engagement with your audience.
Your Standoff Signage Questions Answered
What exactly is standoff signage?
Standoff signage is a mounting method that uses cylindrical metal or acrylic hardware to hold a sign panel away from a wall. The gap between the panel and the wall creates a floating, three-dimensional effect. It's commonly used for lobby signs, directional panels, and branded displays in offices, retail stores, and healthcare facilities.
What panel thickness works best with standoffs?
Most standoff hardware accommodates panels between 1/8 inch and 1/2 inch thick. For acrylic signs, 3/16 inch or 1/4 inch thickness provides a good balance of rigidity and weight. Dibond panels are typically 3mm (about 1/8 inch) and work with standard standoff hardware without modification.
Can I install standoff signs on glass walls?
Yes. Special glass-mount standoffs use adhesive pads or clamp-style hardware instead of drilled anchors. These work on glass partitions, storefronts, and interior glass walls. They're slightly less secure than wall-anchored versions, so they're best for lighter panels under 5 pounds.
How far from the wall should standoff signs be mounted?
Standard standoff barrels create a gap between 1/2 inch and 2 inches. For indoor lobby signs, 3/4 inch to 1 inch is the most common choice - enough depth for a visible shadow effect without looking like the sign is jutting out awkwardly. Outdoor signs often use shorter 1/2-inch standoffs to reduce wind resistance.
Do standoff-mounted signs damage the wall?
Standoff installation requires drilling holes into the wall, similar to hanging a heavy picture frame. Each standoff needs one anchor hole. A typical four-corner sign means four small holes. If you remove the sign later, patching those holes is straightforward with spackle and paint.
How do I clean standoff signage after installation?
Wipe acrylic panels with a soft microfiber cloth and a mild soap solution. Avoid ammonia-based cleaners on acrylic - they cause clouding over time. For the metal hardware, a damp cloth followed by a dry buff keeps chrome and stainless standoffs looking sharp. Clean every 2-4 weeks in high-traffic areas.